
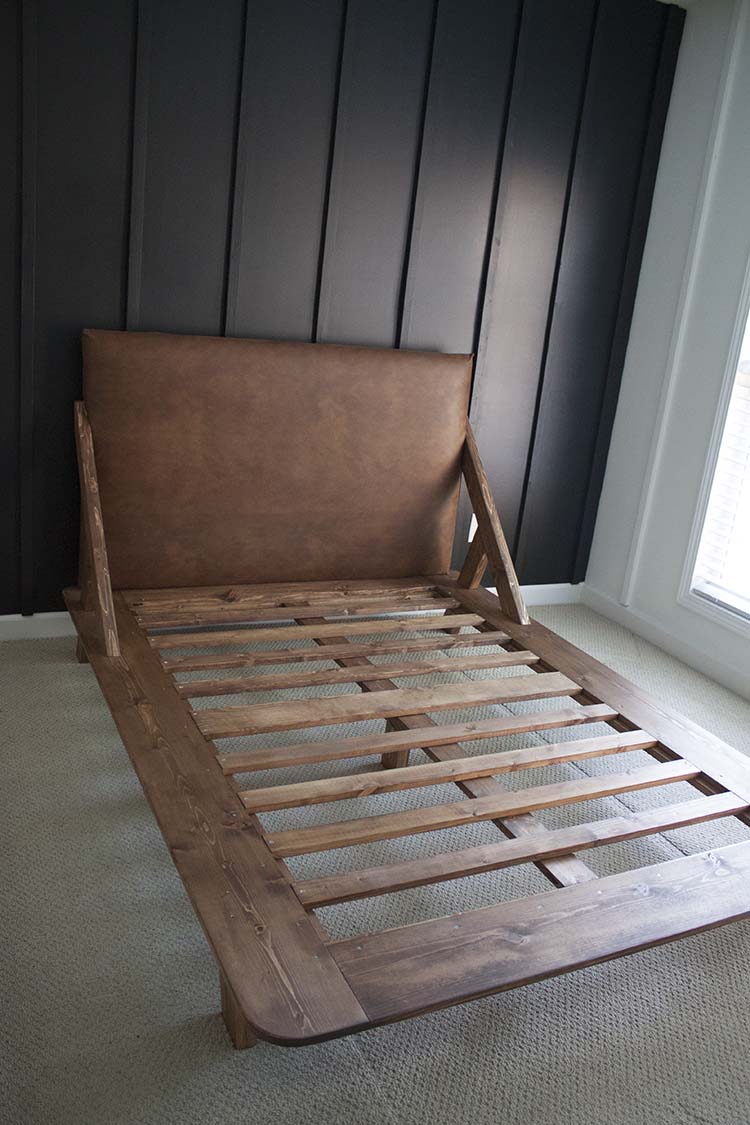
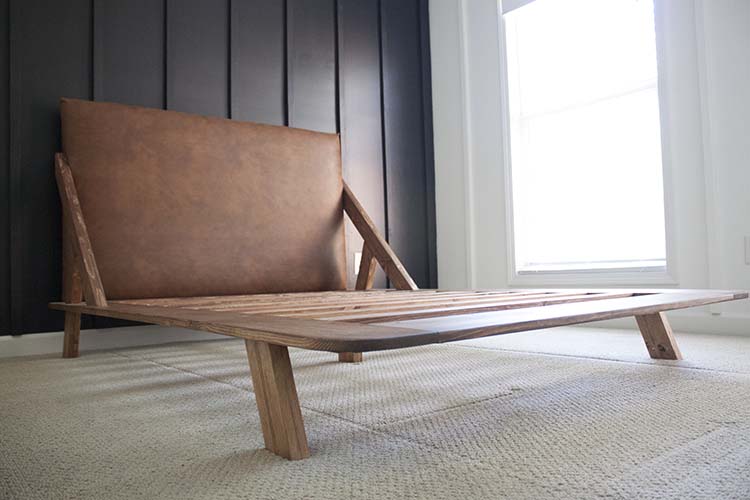
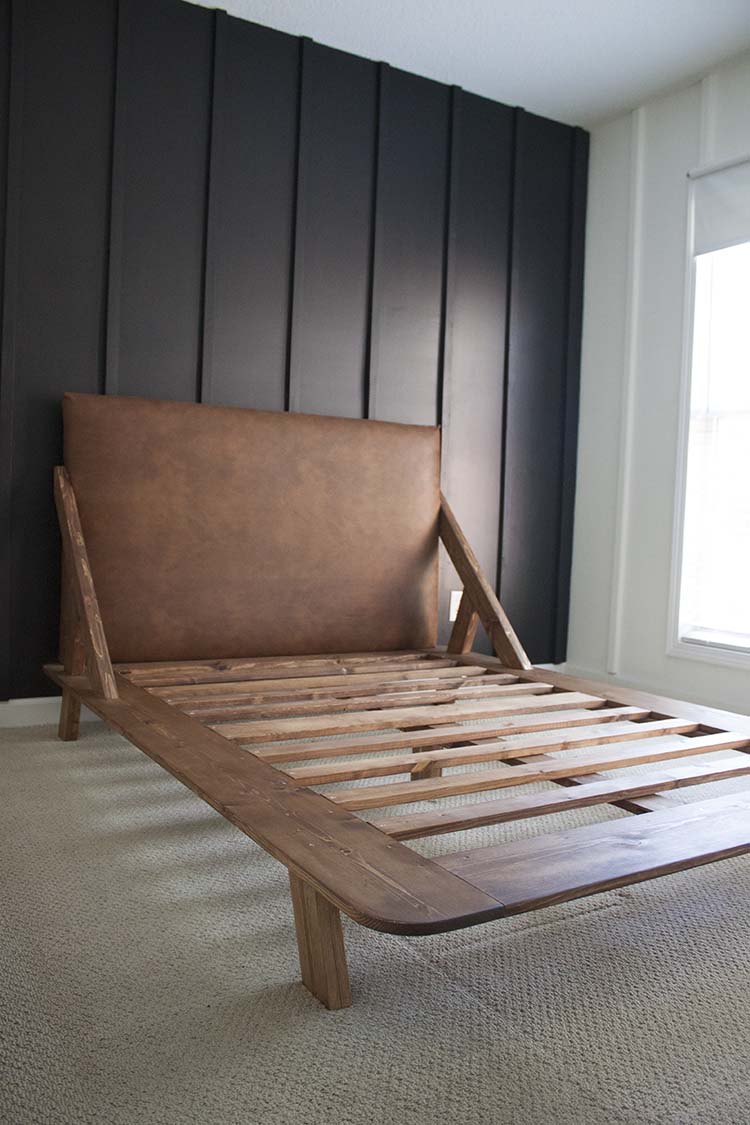
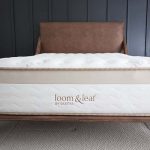
I can’t believe we’re already four weeks into the six-week One Room Challenge but it means I get to share our DIY platform bed with you! You might’ve already seen it when I wrote about the mattress we chose but I finally get to share the details of this amazing mid-century modern DIY platform bed. To recap, here’s week #1 – The Plan, week #2 – DIY Board & Batten Walls and week #3 – Modern DIY Dresser.
The thing about letting your teenager help choose the designs for his room is that you’re taking the chance that he’s got taste like yours. And I think they refer to that as caviar taste on a beer budget. So when he picked out this gorgeous bed from CB2, the Drommen Acacia Bed with Leather Headboard I knew, more than ever, that he needed a really good job when he grows up! But for now, I knew we needed another DIY.
Last week I shared our DIY dresser and it was an easy enough build but I’ve learned over the years that for most anything you want to make there’s almost always a blogger who’s already tried it and will help make your life a million times easier. I was not disappointed. Ashley, from Bigger Than the Three of Us, tackled this years ago and, while we did things differently, her tutorial saved me a ton of time. She’s the real MVP!
DIY Platform Bed
Instructions and material for a full-size bed. Can be easily adjusted for any size.
Supplies for bed frame
- 2 – 1 x 4 x 8
- 2 – 1 x 4 x 12
- 1 – 1 x 6 x 10
- 5 – 1 x 8 x 8
- 2 – 1 x 8 x 6
- 9- 1 x 3 x 6 (slats)
- 3/4″ plywood
- 2 – 1 3/4 x 5″ metal ties
- 4 – 2.75″ framing angle
- 3″ wood screws
- 1 1/4″ wood screws
- 5/8″ wood screws
- 2 1/2″ pocket hole screws
- wood glue
- stain/conditioner
- wax or sealer
- foam
- fabric
Tools
- measuring tape
- Kreg Jig
- miter saw
- drill
- jigsaw
- sander
- planer
- clamps
- table saw or skil saw
- staple gun
Making the Frame…
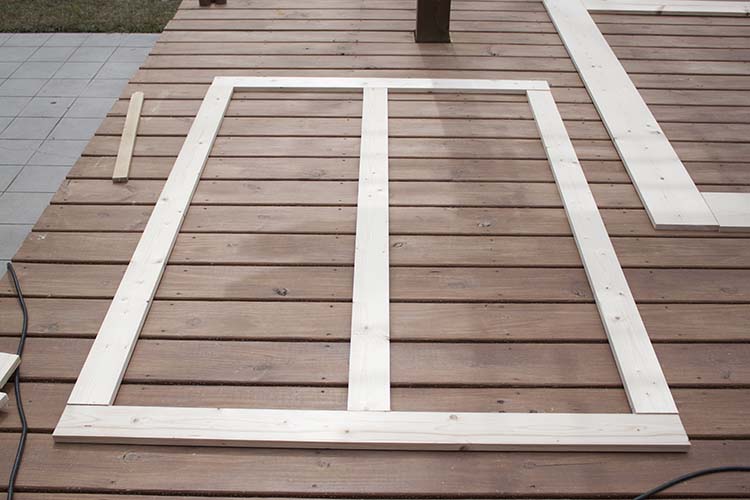
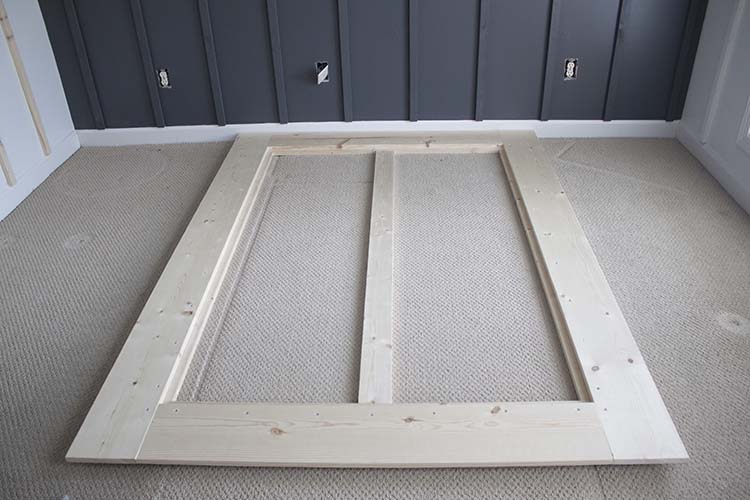
We started by creating the underframe or bottom frame, the one you don’t see once the bed is finished. The top and bottom pieces (2) of this frame are 1 x 6 x 50.5″, the sides (2) are 1x 6 x 64.5″ and the center brace (1) is 1 x 4 64.5″. We cut these with a miter saw.
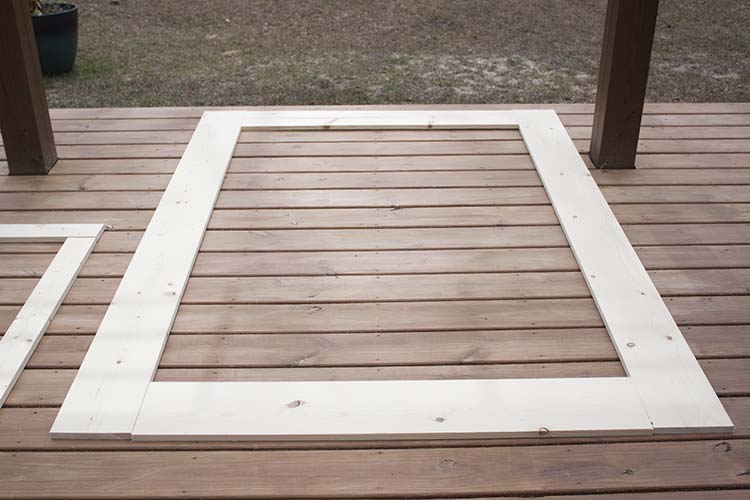
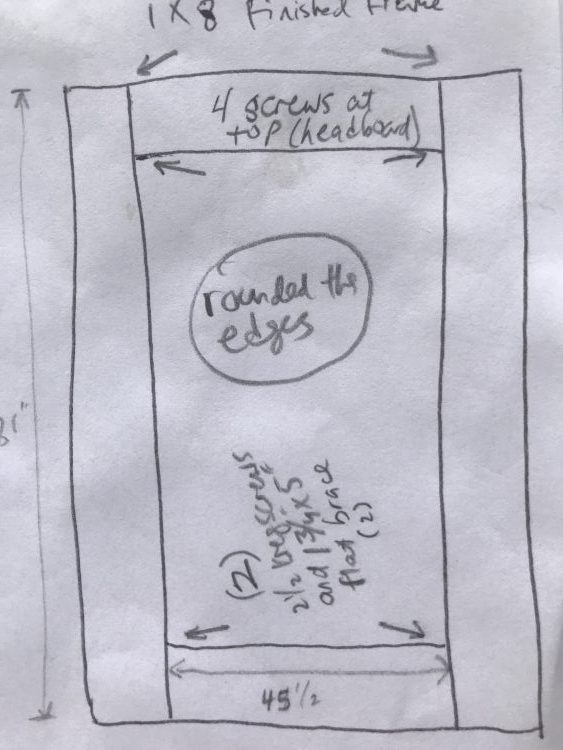
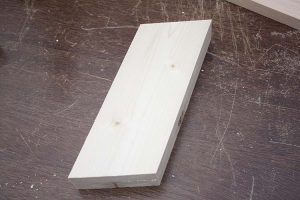
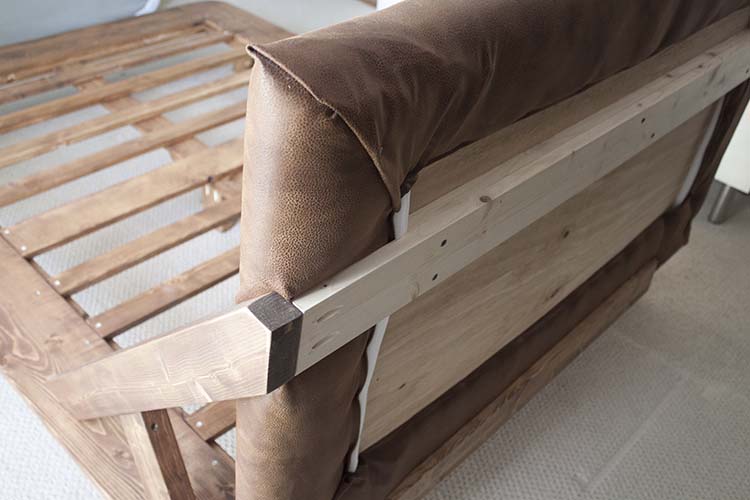
Next, we worked on the top frame, the one you will see once the bed is finished. The top and bottom parts (2) of this frame are 1x8x45.5″ and the side pieces (2) are 1 x 8 x 81″.
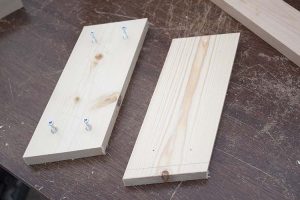
We assembled the bottom frame using our Kreg Jig and drilling pocket holes on in the inside and outside of both ends of the side pieces and both ends, inside and out, of the middle brace piece and screwed those into the top and bottom piece. We used 2 1/2″ pocket hole screws.
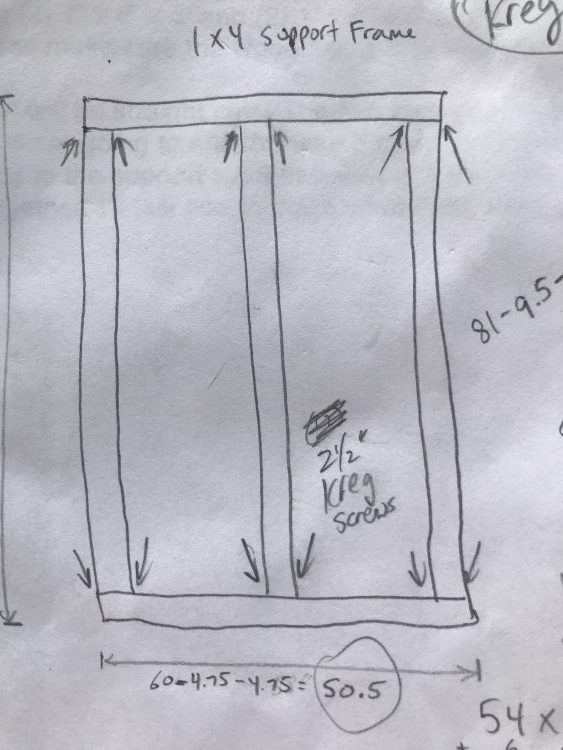
See the arrows for reference on our very professional illustration.
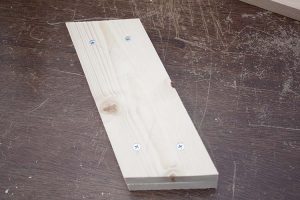
For the top frame, we used the Kreg jig on the inside and outside of both ends of the top piece, the headboard end, and inside only inside of the bottom piece. This way the pocket hole doesn’t show from the outside on the bottom end.
We then added the top from onto the bottom frame and attached with wood glue and 1 1/4″ screws.
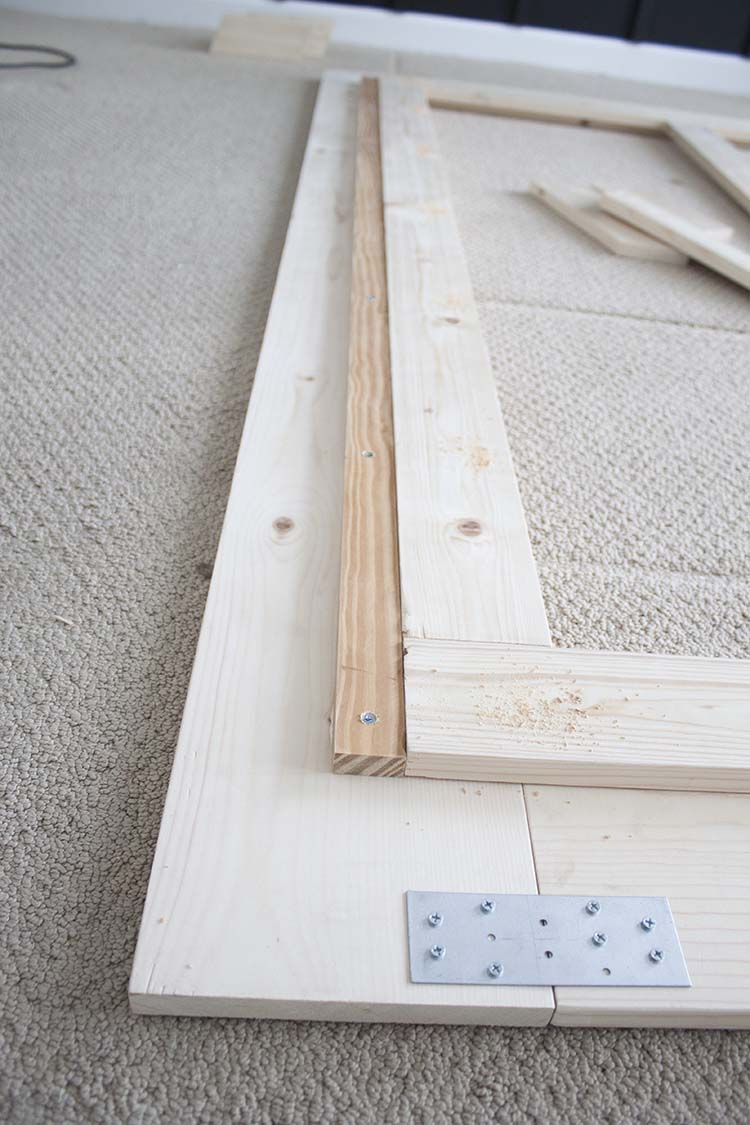
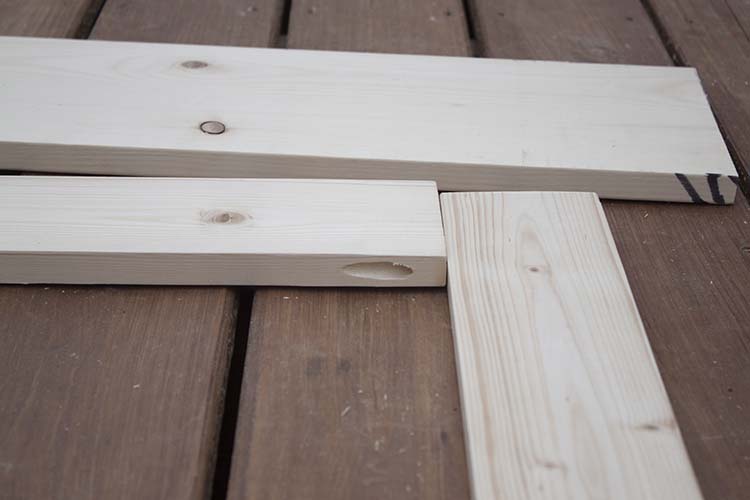
Since we didn’t use pocket holes on the outside of the bottom piece, we added these metal ties from the underside for added security.
I feel like I should pause here and address the fact that you might notice in the pic above we’ve added an extra 1 x 2 that I do not address in the supply list. That’s because we realized, too late, that we should have used a 1 x 6 here instead of a 1 x 4. This way the legs will line up with the brace later. So just do as I say, not as I do.
Also, see yet another very professional illustration of the pocket holes for the top frame.
Making the Legs…
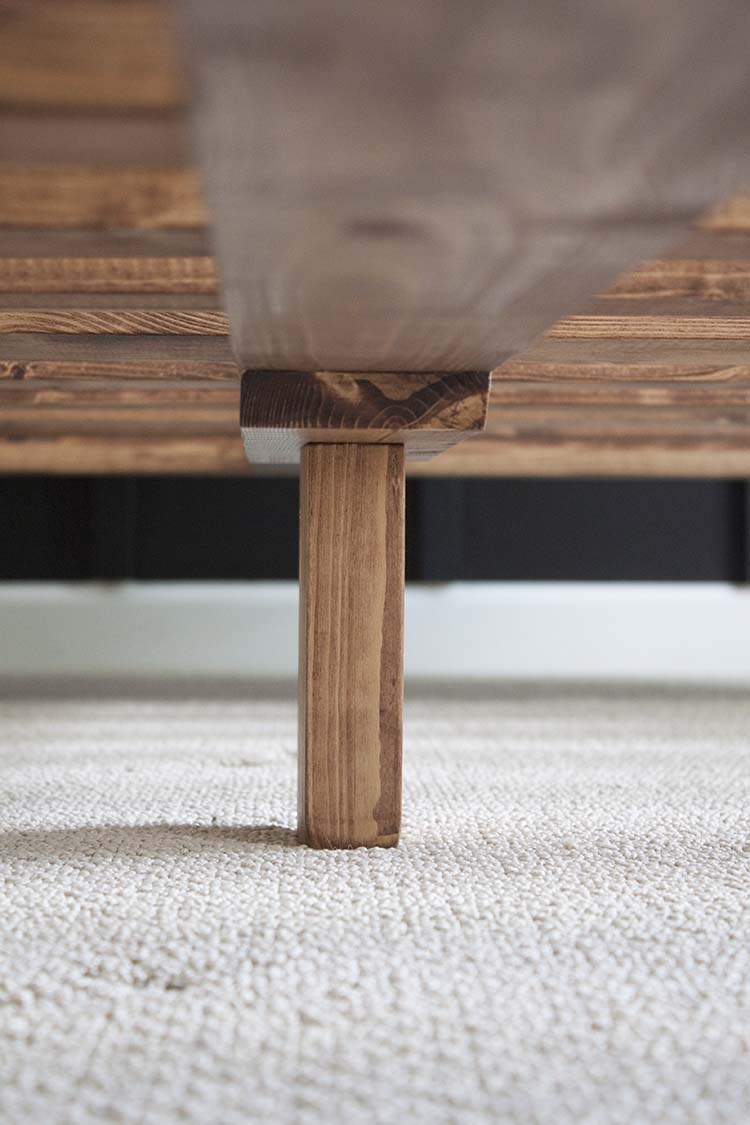
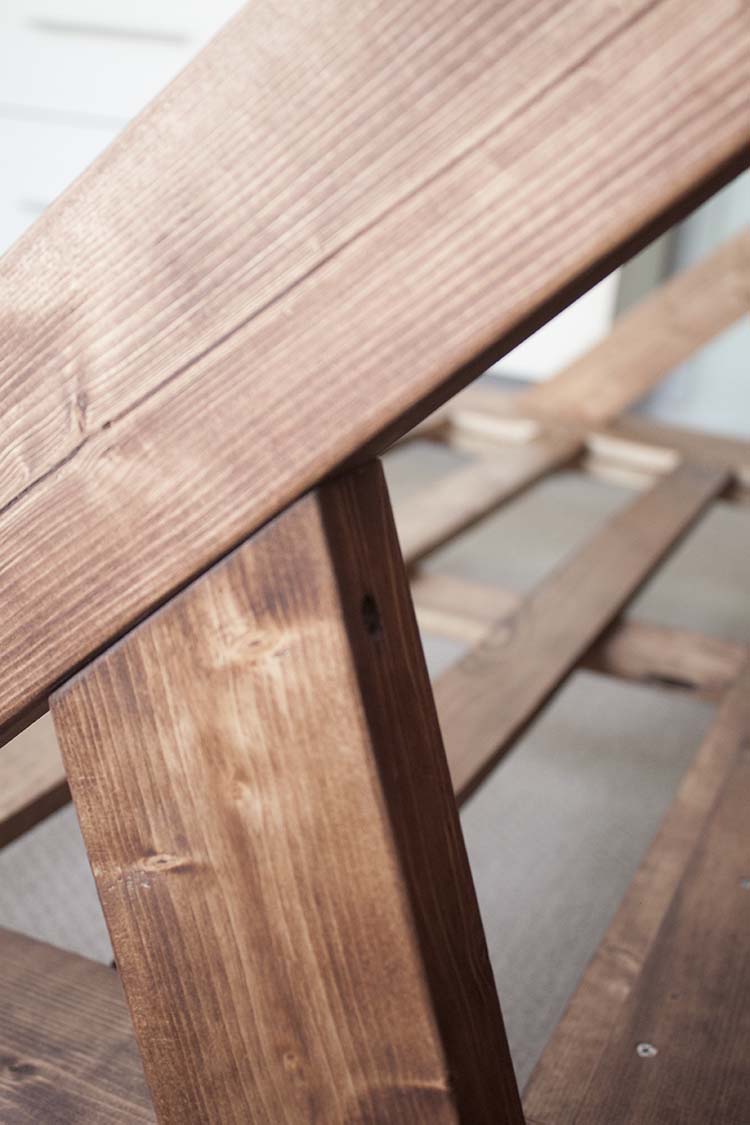
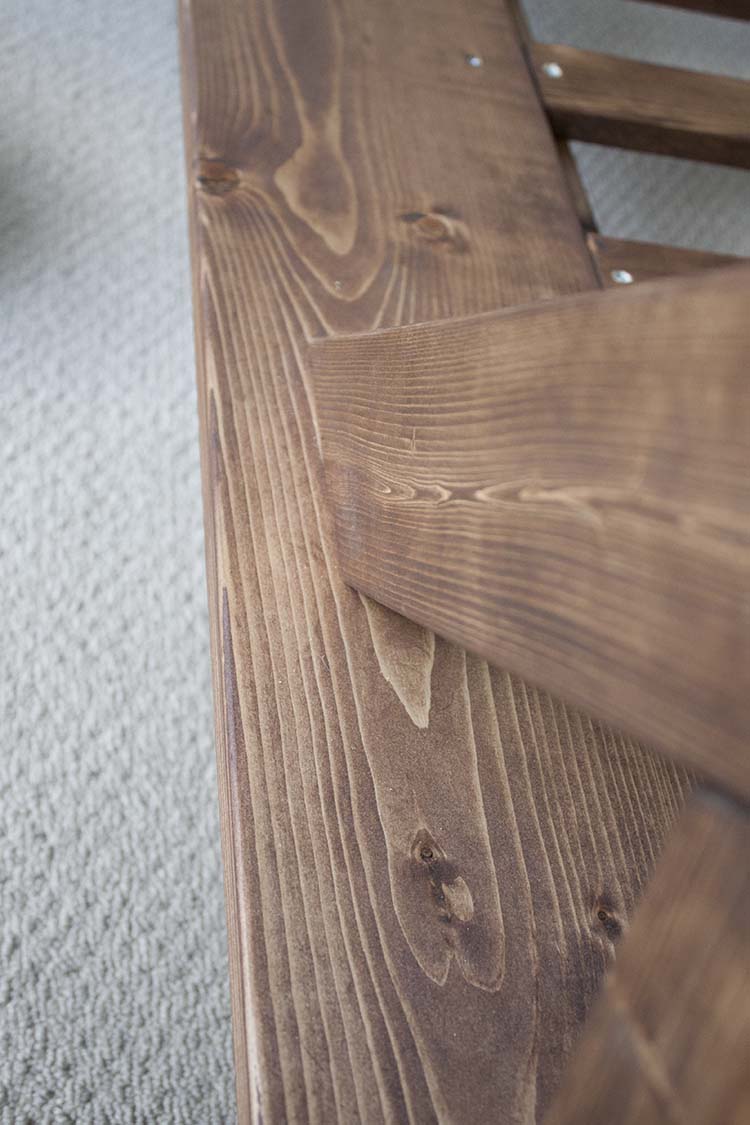
For the legs and headboard braces, we’ve used sandwiched 1x4s. To put together the legs we’ve used 1 1/4″ screws and wood glue to join them. Obviously, you’ll want the screws to be on the insides of the legs so that they won’t be seen from the outside. Our legs are 7 1/2″ tall with a 21-degree angle.
We planed and sanded these sandwiched pieces to give them a more finished look. You can’t tell they were sandwiched together at all.
There are four legs with one brace in the center.
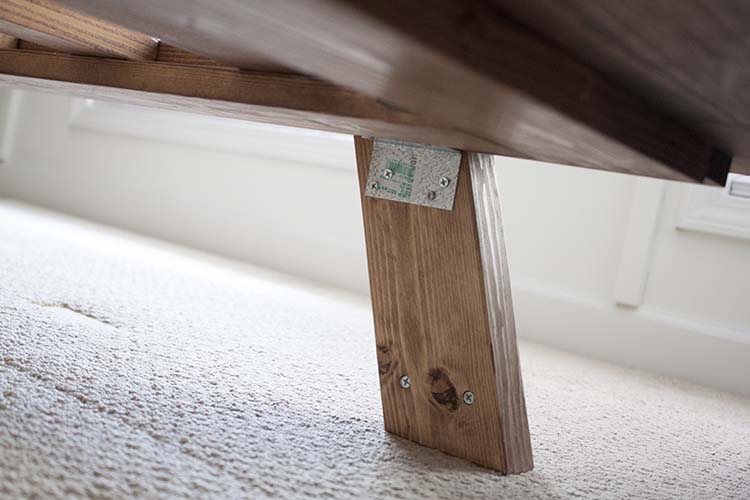
In addition to being screwed in from the top of the frame, using 3″ screws – one angled, one straight down, we also added a framing angle to each leg for added support.
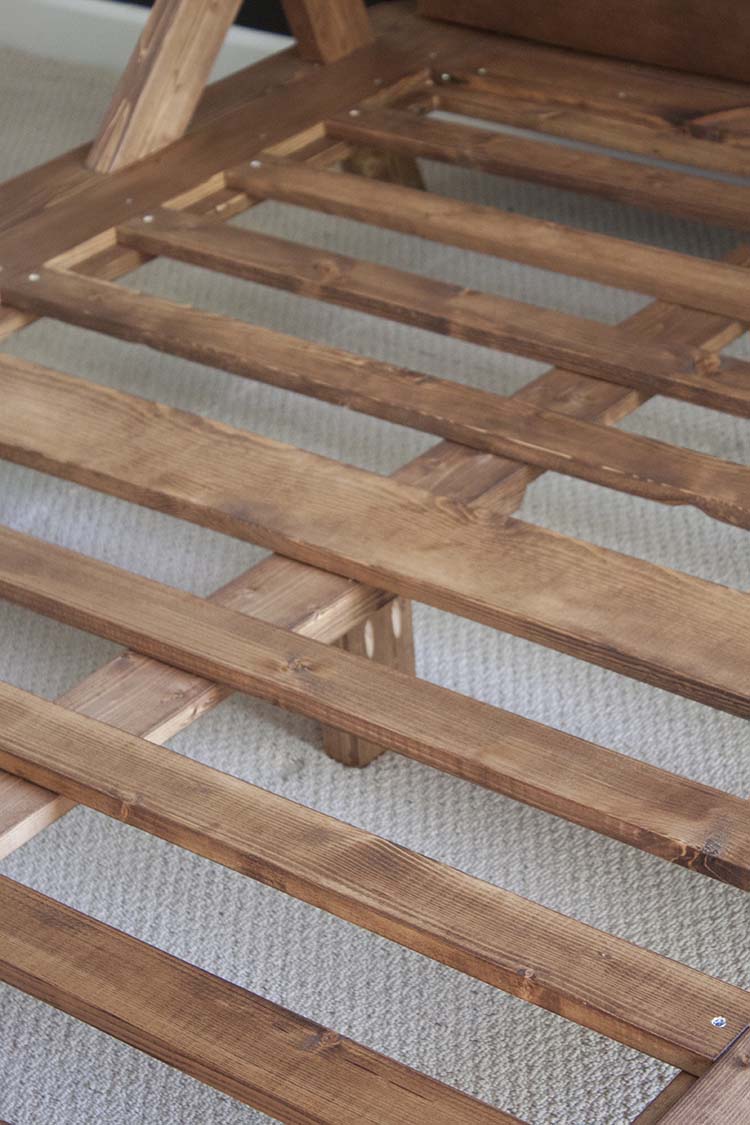
And because we felt like we needed to at that last minute, we also cut an extra length of wood (approx. 12″), attached a middle leg to it (no need to angle this leg) and added that to the already existing middle brace.
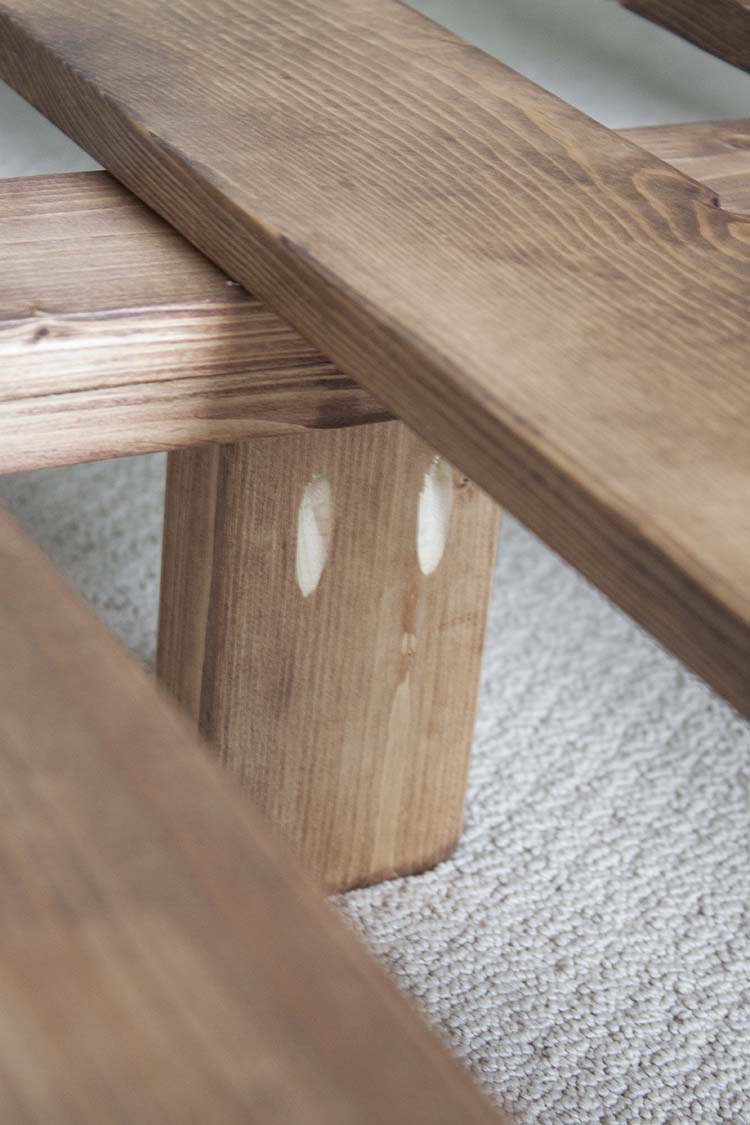
For this leg, we just drilled pockets holes and attached it to the brace using pocket hole screws.
A little closeup for reference.
There are nine slats made from 1 x 3 x 45 3/8″ spaced 4″ apart. They’re attached with wood glue and 1 1/4″ screws. The fit just inside the top frame and screw into the exposed section of the bottom frame.
You might also notice that we rounded the edges of the top frame. We just used a paint can to draw off the rounded edge and then we used a jigsaw to cut it.
Making the Headboard…
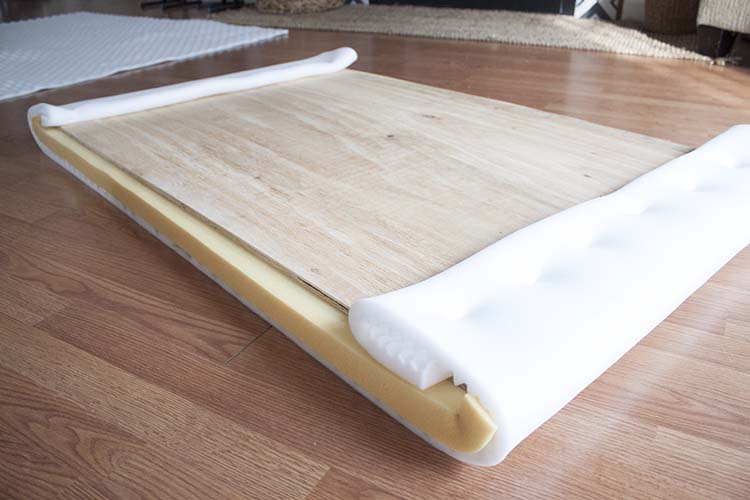
For the headboard, you’ll use a skil saw or table saw to cut a length of plywood for the headboard. Ours is 54″ x 31″.
Foam is expensive. So instead of spending about $100 on the upholstery kind, I just used the memory foam topper I had taken off my son’s old bed. It is a twin size so it already fit the plywood perfectly. Then I wrapped that in a cheap twin size 1 1/2″ egg crate mattress topper that I got from Walmart.
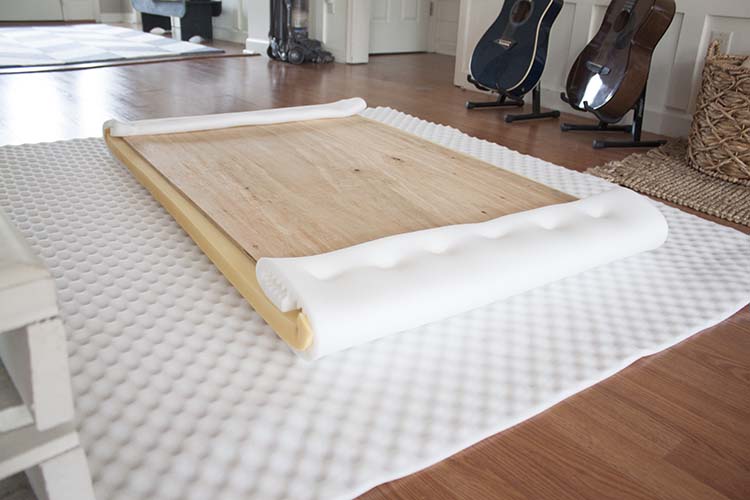
And THEN, I wrapped all of that in a queen size 1/4″ mattress topper, also from Walmart. This helped to smooth out any hard edges and will prevent a bulky appearance.
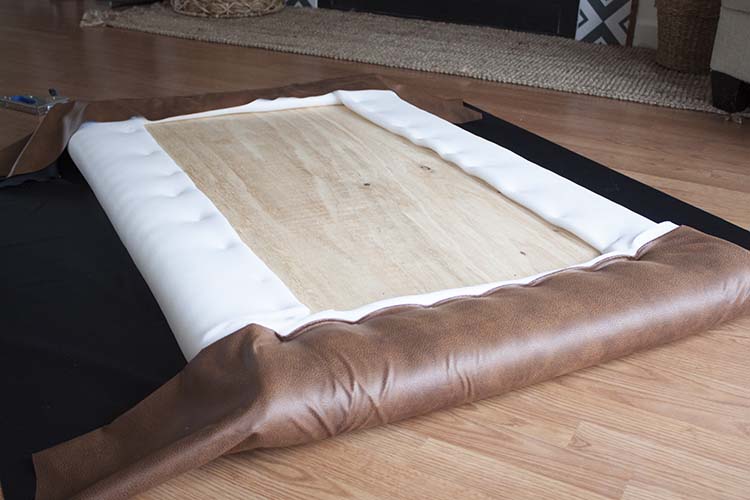
I found this faux leather fabric (2 yards) at JoAnn. I used my coupon so it cost me less than $15! I attached all of these layers with my handheld staple gun.
Making the Headboard Braces…
We attached the completed headboard to a 1 x 4…

and added another 1 x 4 on top of that. We attached them to one another using screws. The doubled boards accommodated the bulk from the foam. Prior to attaching the final board, we drilled pocket holes in either end in order to attach the headboard to the headboard braces.

We also added a scrap board at the bottom of the back of the headboard for added support.
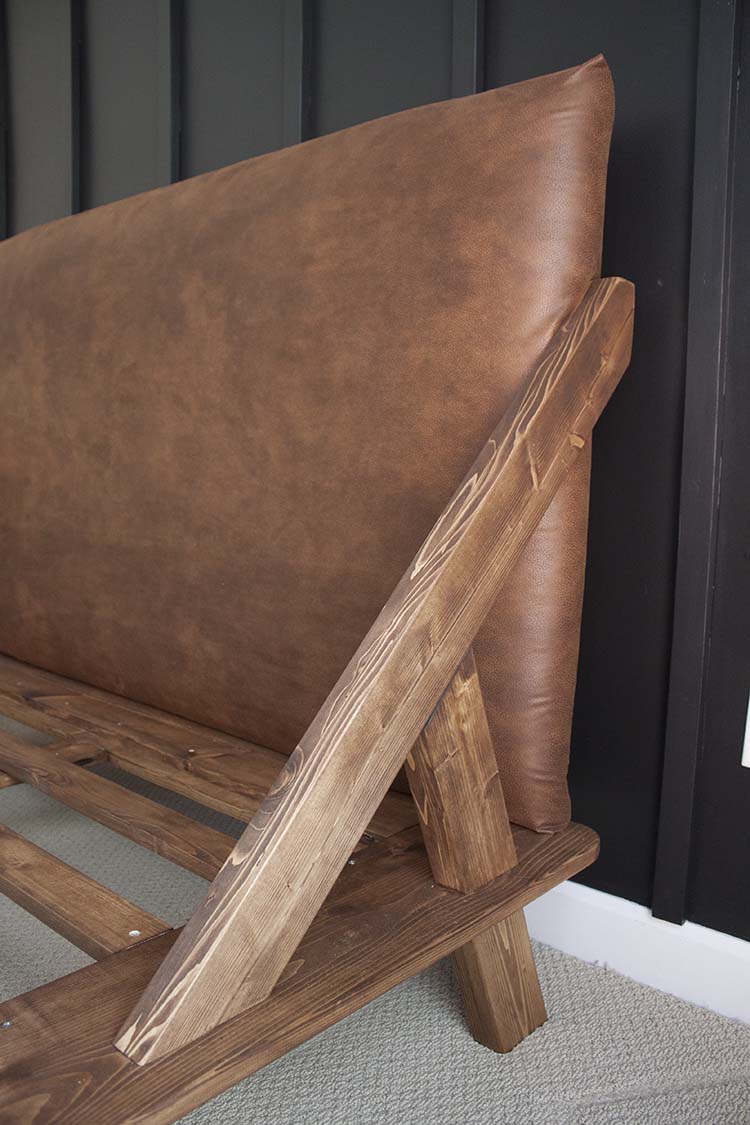
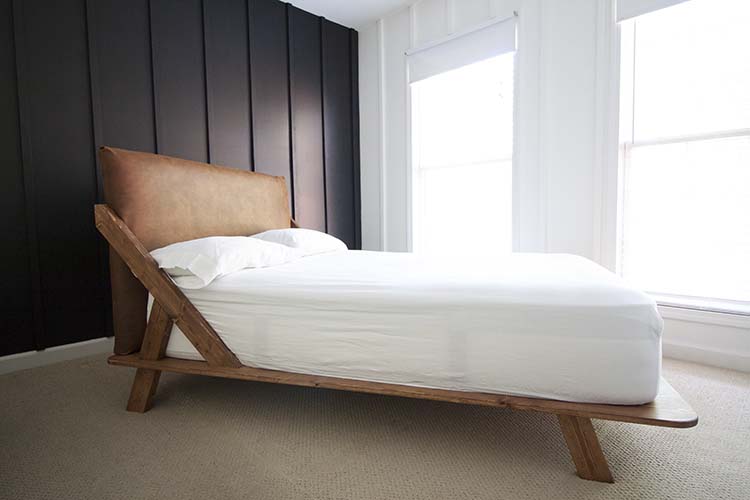
For the headboard braces, we just kind of played around with it until it looked right to us but there’s some wiggle room here if you want to change things up. The main thing for me is that these braces lined with the legs underneath so that it looks like the braces go through the bed and become the legs. These braces are also made with sandwiched 1x4s. They’re attached using wood glue. We clamped them and allowed them to dry before working with the them.
The long brace is 36″ l with a 45-degree angle and the shorter brace is 10 3/8″ with a 21-degree angle. Both measured from long end to long end.
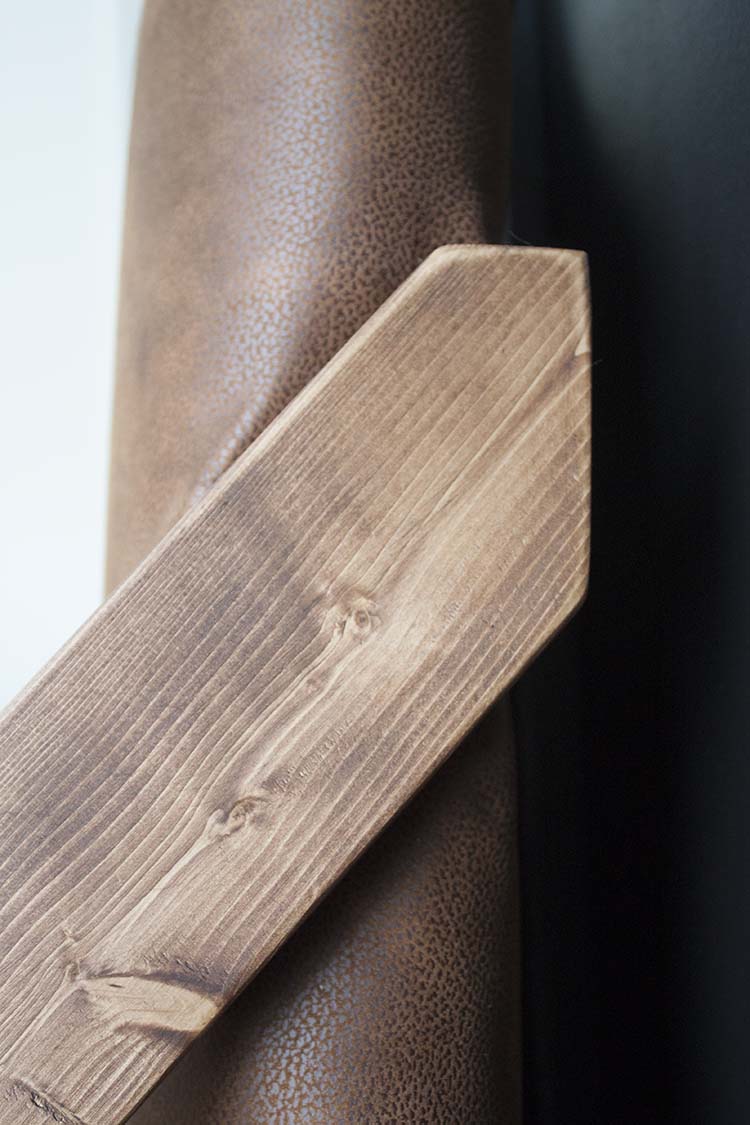
The top of the brace is clipped, in keeping with the design, and is attached from the back with the pocket holes from the back of the headboard.
The smaller brace is about 9″ long with a 21-degree angle and is attached to the long brace with a 3″ screw (as seen here).
And the long brace attaches to the bed frame from underneath using screws.
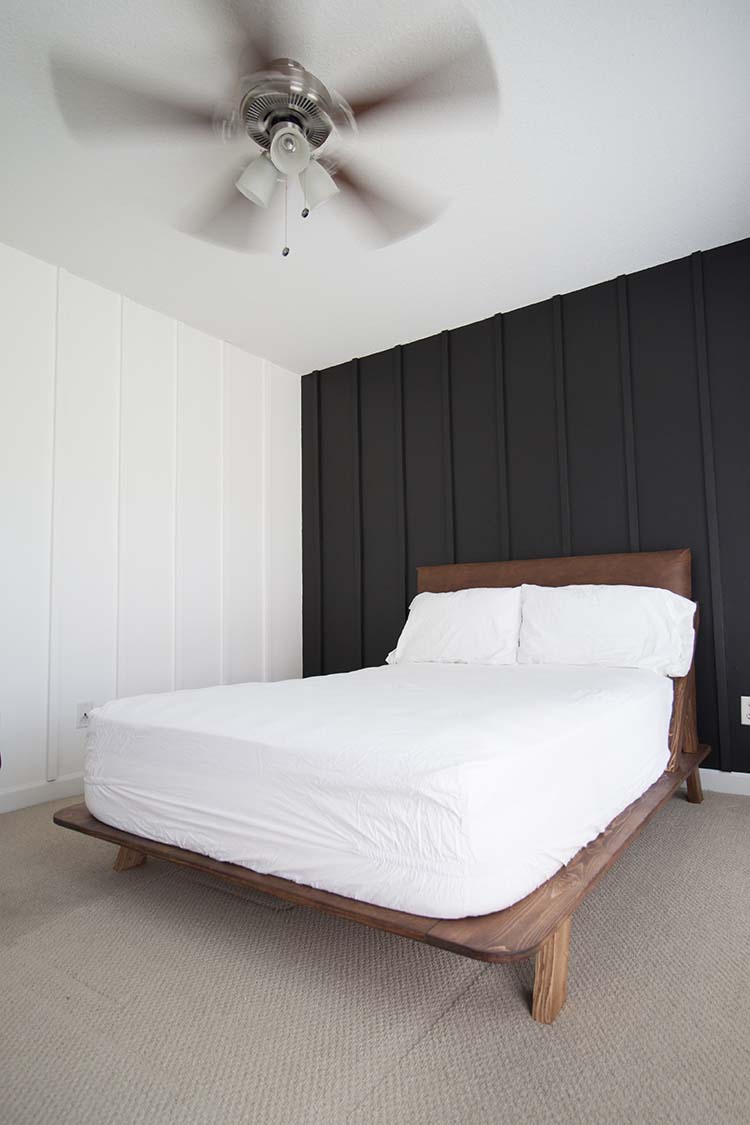
To finish the bed, I used wood conditioner and Minwax stain in Honey. Once that dried I waxed it to give it some sheen but not too much. I like that it makes the wood look more natural.
And, OMG, can you believe it?? I can hardly believe it! I mean it’s not Acacia wood but I don’t know if I’ve ever seen pine look so good. Or maybe I just feel accomplished! There was lots of sanding to keep things smooth and I definitely think that helps the wood to appear premium.
Now I get to move on to decorating and, possibly the most exciting part, ripping out this old carpet! See you in week 5, friends. We’re almost there!


Wow Jamie that looks sooooooooo awesome! I admire your skill! Your son is very lucky (and has excellent taste indeed). I can’t wait to see the finished room. I am seriously considering painting my own bedroom wall dark (I live in a rental apartment but it’s paint so I guess I could always paint them again?!). It makes for such a cool, modern look!
I have wanted that bed for so long and your version is beautiful. Well done!
It’s such a good bed, right?! Thank you so much!
This is my dream bed but yikes the price! Even though we’re handy I never thought to DIY it!! Thank you so much (it looks awesome and I will be using your tutorial!!)
Yay! Thanks so much. Let me know how it goes!
Absolutely loved this! I am obsessed with the Scandinavian bedroom style, but I’m a college student living on minimum wage checks in California, and relying on student loans to stay afloat. I’m curious about the time and cost to make this? My other bed frame idea is wooden crates for bed support. What’s your opinion?
Hi Ricky,
I love the idea of crates or pallet bedframes. Those are easy, budget-friendly, and perfect for a temporary space. You can also make them work for a rustic or modern style. The bed we built here cost just over $300 and it would have been a bit more had I not had some of the materials on hand. I would also say that it isn’t exactly a beginner project so it would depend on how much building experience you have. Another suggestion is building a simple box-style frame, like a platform bed, but without legs. It’s an easier build and it might give you the look you’re going for while allowing you some more design control. Best of luck!
This is awesome! Do you have the measurements for turning this into a king bed?
Thank you, Joanne! I haven’t done the measurements for a King but our full bed frame is just 4″ wider on each side than our mattress. So depending on the size of your mattress, you can build your bed frame 4″ wider than your mattress on the sides. Hope that helps!
How did you do your pocket hole. What jig??
Hi Kayla,
It’s called the mini jig kit and it’s the Kreg brand. I hope this answers your question!
Hi there. Absolutely amazing bed! What do you think the measurements might be for a king? And how much were your supplies ?
If you add the difference between a full mattress and a king size mattress to these plans, you will have exactly what you need! I hope that’s helpful. We might consider running these exact numbers in the future and developing plans for all bed sizes. Thanks!
I’m making this bed! Going through the cut list and step by step directions, I noticed that you call for the underframe to be made from 2–1×6 and 2 –1×8. The picture of the underframe looks as though the pieces are all the same size (except for the middle one).
Thanks for clarifying this!
Sarah
Hi Sarah,
Please see this section of the post for clarification:
“I feel like I should pause here and address the fact that you might notice in the pic above we’ve added an extra 1 x 2 that I do not address in the supply list. That’s because we realized, too late, that we should have used a 1 x 6 here instead of a 1 x 4. This way the legs will line up with the brace later. So just do as I say, not as I do.”
Let me know if you have any further questions! Thanks!
It is on my plans to do.
But I want to clarify something with the measures, Is the measures the final cut or did you make some adjustment counting with the difference between the common and actual size? Example: (Common: 1-in x 8-in x 8-ft; Actual: 0.75-in x 7.25-in x 8-ft) Pine Board
Hi Daniel,
Yes, we always have to make adjustments based on actual size but those are accounted for in the plans so that you don’t have to make those same adjustments, they’re already done for you. I hope this helps!
This is awesome! I’m planning on building this for a king sized bed. 1 Question, what kind of kreg jig can drill pocket holes in the think side of the 1×8? Don’t you need a jig with 8″ clearance? Did you use a pocket jig and a larger c clamp? Thanks!
Thanks for this! One question, how did you drill pocket holes into the 1×8? Most kreg jigs have a size limit, how did you get around that? What kreg jig did you use?
How did you make pocket holes in the thin side of the frame 1×6 and 1×8? I thought the Kreg jig only supports 1 1/2 depth?
Thanks so much for your email! I’ve included a picture of the jig we used. It’s separate from the main Kreg contraption and can be used on those boards that won’t fit in there. With this one, you can hold it, clamp it, or even screw it to the board you want pocket holes drilled into. The later is undoubtedly an unauthorized use of the jig but we did drill holes in ours and have used it that way as well. I think this came in a kit we purchased but we’ve had it so long neither of us can say for sure. I can’t find the kit that includes this anymore but I did find a link to the actual jig itself. It’s called the mini jig kit and it’s only $14 at Walmart! I’m sure you can find it elsewhere, this is just what popped up when I Googled.
I hope this helps! Again, I appreciate you reaching out. Take care!
Jamie