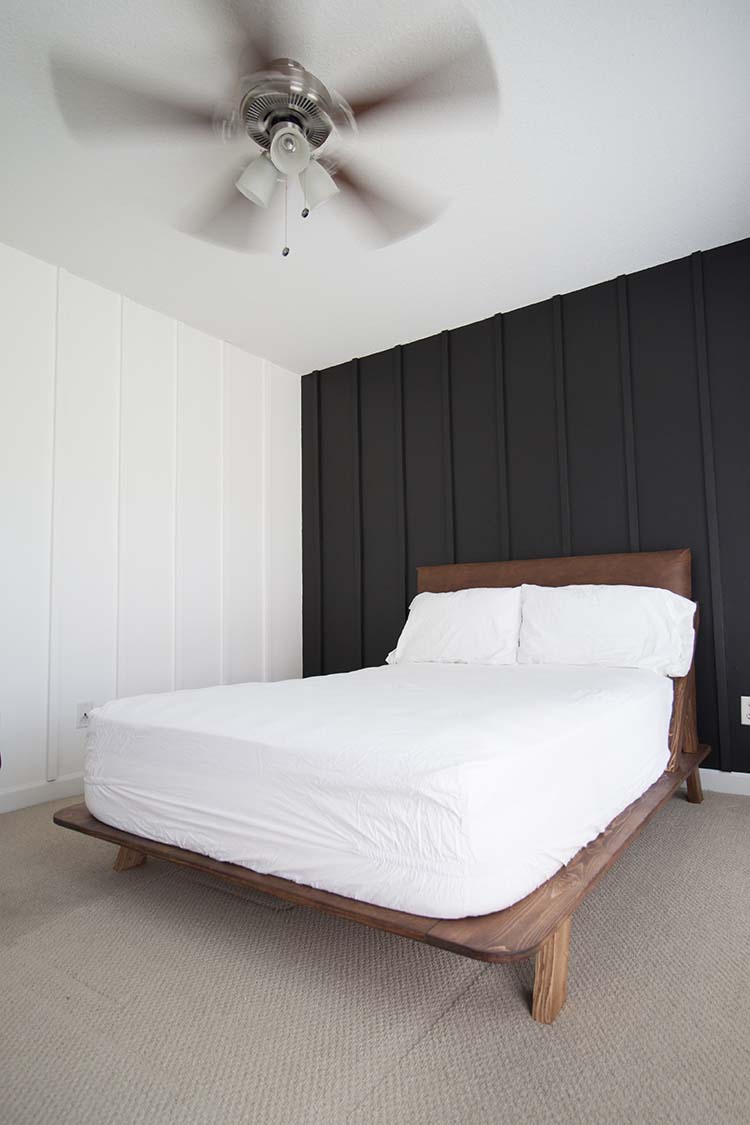
Last week was the first week of the One Room Challenge and I shared the plan for our modern bedroom makeover. This week I’m sharing the DIY board and batten wall treatment and, while I am pleased to say that I am actually ahead of schedule this time around. I’m a little bummed at the sneak peek you’re getting of his new bed. But sharing the news of our most favorite mattress of all time and the shot above, that really shows how well it’s coming along, is totally worth it.
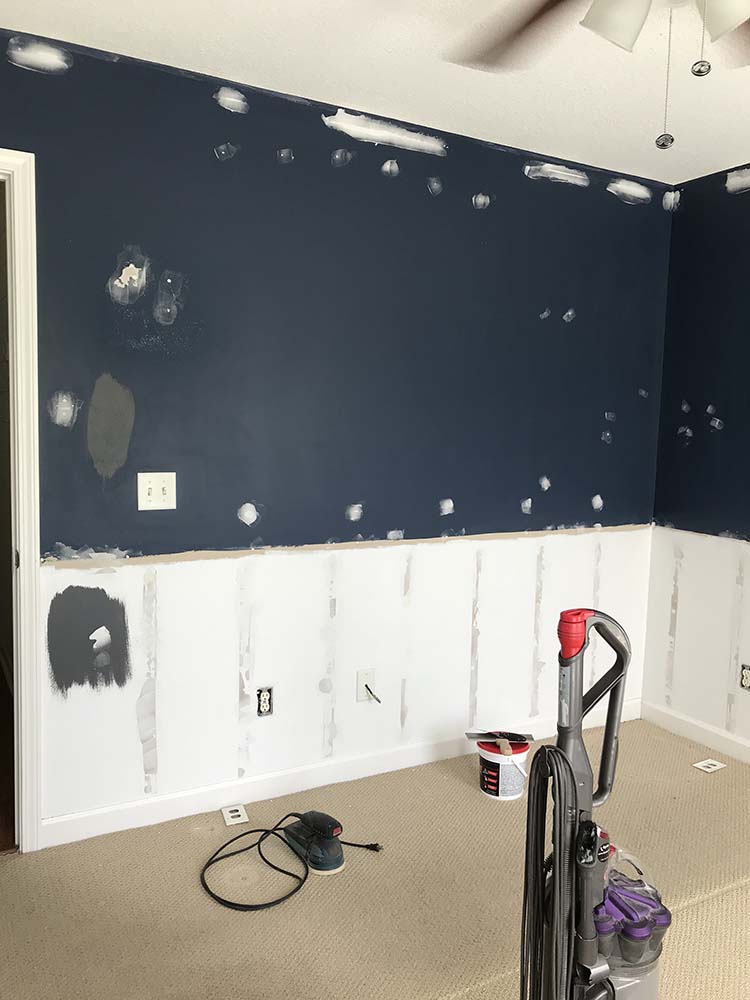
In case you need a refresher, his room used to be a Star Wars inspired kid’s room with a two-toned navy and white wall. It was very traditional with chair rail and crown molding which is funny because traditional is really not my style at all. So, while I will always love this navy wall, I wasn’t sad at all to see all of this go.
DIY Board and Batten Wall Treatment
Of course, all that molding and a bottom faux board and batten meant a lot of hole patching.
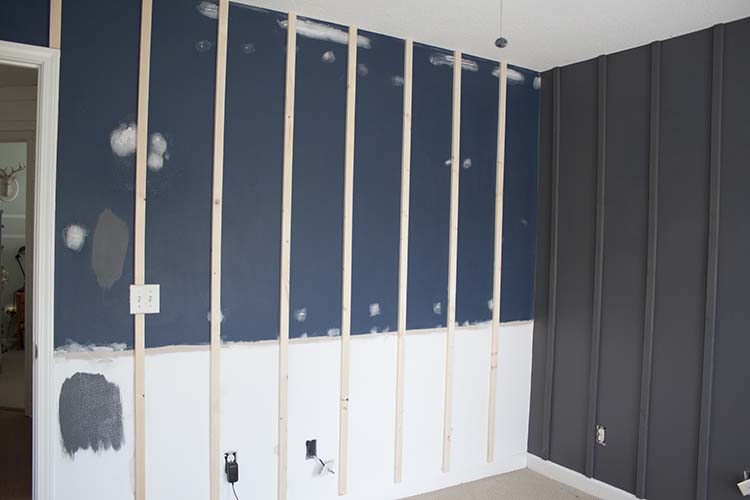
We decided to do more board and batten this time but something with a little more modern vibe. It’s literally just 1x2s attached to the wall with my brad nailer. That way if we ever change our minds again (spoiler alert: we will) it’ll be easy to remove without as much damage to the sheetrock.
Paint Colors…

Initially, we thought about going totally dramatic with a completely dark-walled room but we decided to do one wall in our initial paint choice, Sherwin William’s Peppercorn, and live with it for a day or so and then decide.
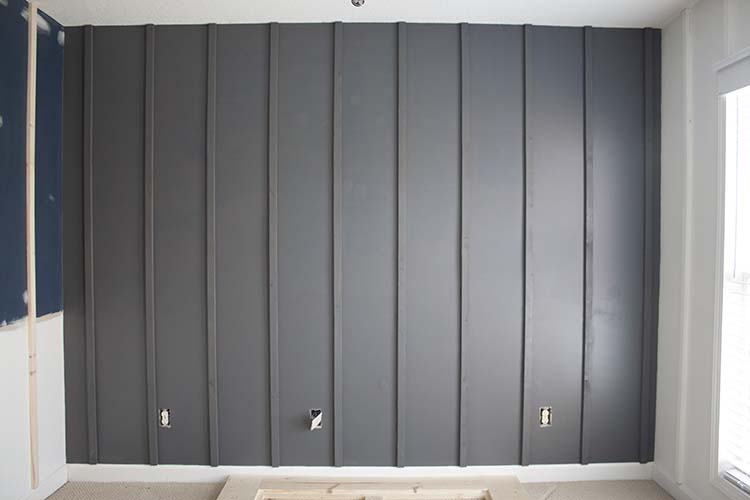
In the end, my son decided he wanted to go even darker, like black darker, and I have to admit, I got really excited about it.

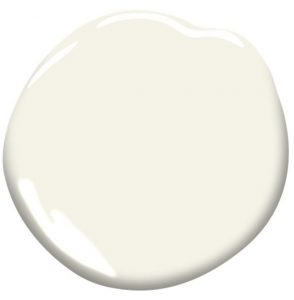
Since his room is really small though we decided, rather than paint all the walls black, we’d just do one black accent wall and the rest of the walls white instead. We used Benjamin Moore in Onyx and Simply White.
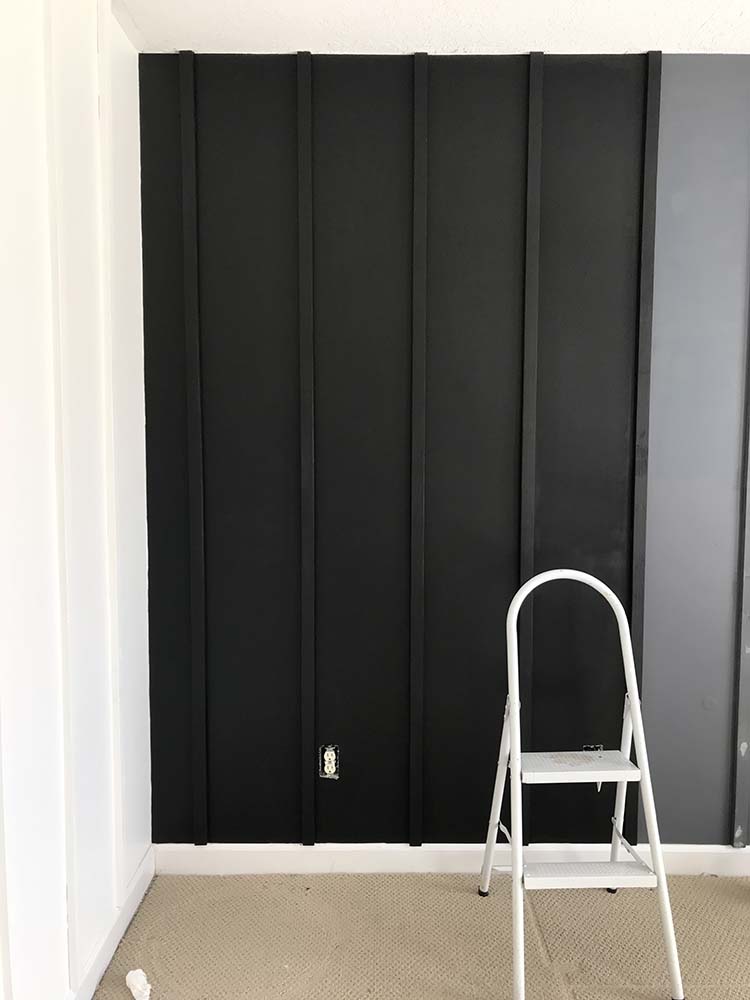
Since we’d already painted the wall a charcoal we didn’t need as much black paint to achieve full coverage.
So we painted
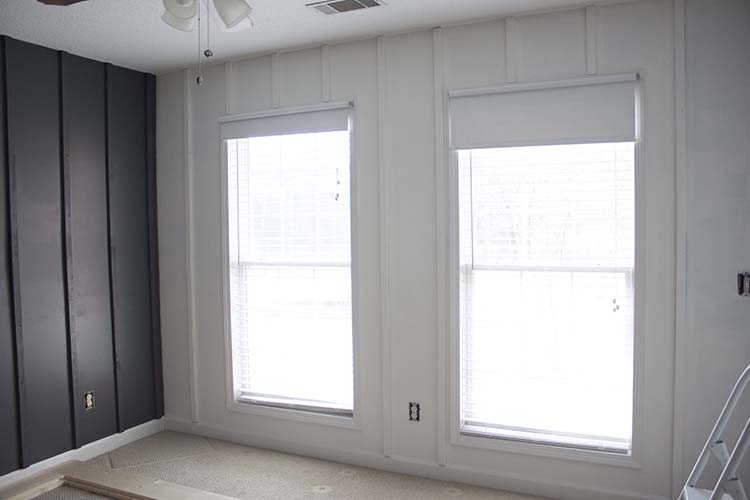
The white walls were a different story. I lost all sense of time but I’m pretty sure I painted about 4 coats of white on each wall to cover up those two-tone walls and get them a crisp clean white.
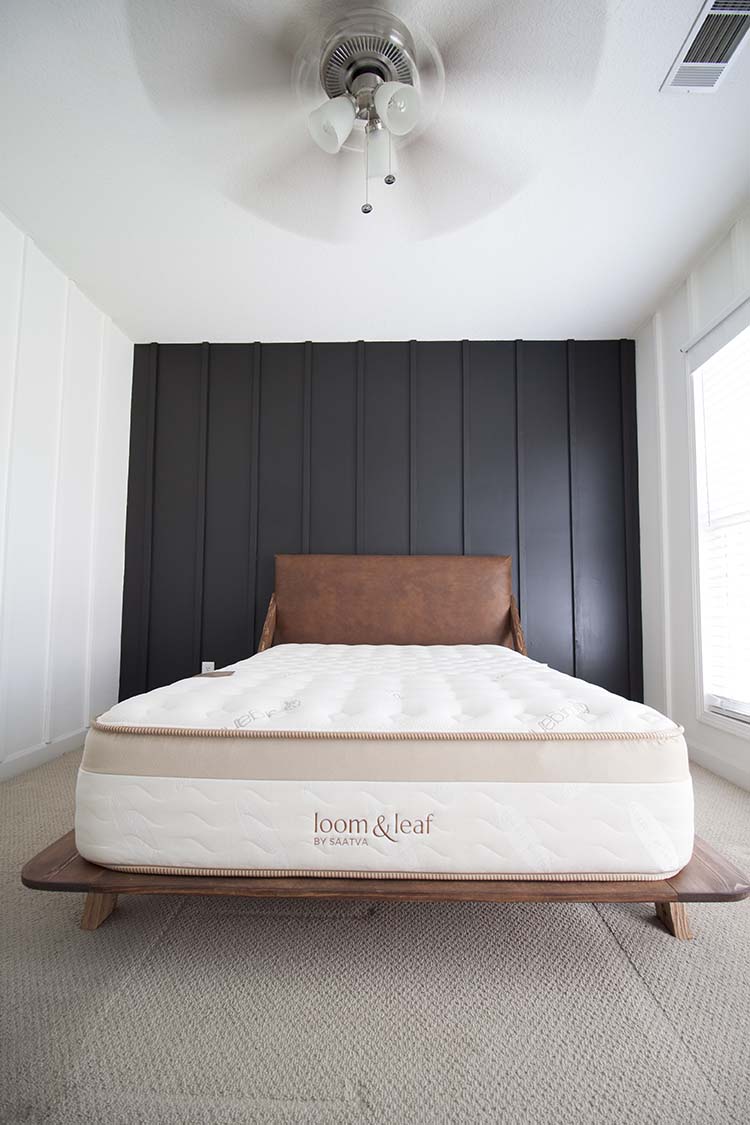
And you know, what? We love it SO much. I wanted to paint everything black now. Onyx is the perfect black. Not too cool, not too warm. All I can think about is where I can put it next.
Next week my ORC update are the details on his new platform bed. Knowing me you probably already know the answer but can you guess whether I DIYed or actually bought a piece of furniture this time?


I love the wall treatment and the black wall! It looks SO good! That bed is awesome! I can’t wait to see how this all comes together!
Hi Sam!
Thanks so much!
Oh my gosh! I LOVE the black! It looks awesome! And I am so glad to see this post because I was thinking of doing something similar in our living room on an accent wall and my husband gasped when I mentioned black as an option! 🙂
Black is always an option, amiright?! 😉
Jamie,
This room is STUNNING already! I am in love with the black/white/leather look. So sexy and sophisticated! Can’t wait to see more!!!
Meghan
Ahh thank you! I’m excited to see it come together.
how did you determine the number of 1 X 2 ‘s and also where did you start with them, the middle, ends, etc? if started L to R, did you keep going from one wall to next measuring the same amt. or treat each wall individually ? IE. if you ended with 7 ” left on wall A , did you start at 5″ on wall B if using a 12″ spacing pattern?
Hi Donna,
We treated each wall individually but we kept the spacing as close to the same as possible. For example, some might be 8″ apart while others are 7 3/4″ apart. Because we’d had battens on the lower wall before the makeover, we tried keeping the new ones in line with the old ones, mostly to cover up imperfections in the sheetrock where the previous ones had been. As far as where to start and determining spacing, it really depends on the room. For example, you know you’d want to avoid outlets, if at all possible (we weren’t able to avoid them entirely), and then you have doors and corners to consider. I’d suggestion measuring your walls, deciding the amount of spacing you think would look best, and then play around with mapping those out on the wall to see if it works out before installing. You can make a few minor adjustments here and there so in the end your battens may not be evenly spaced but won’t be noticeable to the eye. Hope this helps!
Absolutely love the makeover! Know I want to change my sons room thank for the inspiration.
Thank you so much!
Did you use semi gloss or eggshell paint? I love it!!
Hi Melissa,
Because I just used what I had on hand I can only tell you for sure that the white is satin. The black I can’t remember for sure but based on how it looks, it has more of a shine than the white and because of that, and the fact that it’s a dark color, the painting imperfections are harder to hide. And easier to make! 😉 Hope that helps! Thank you!