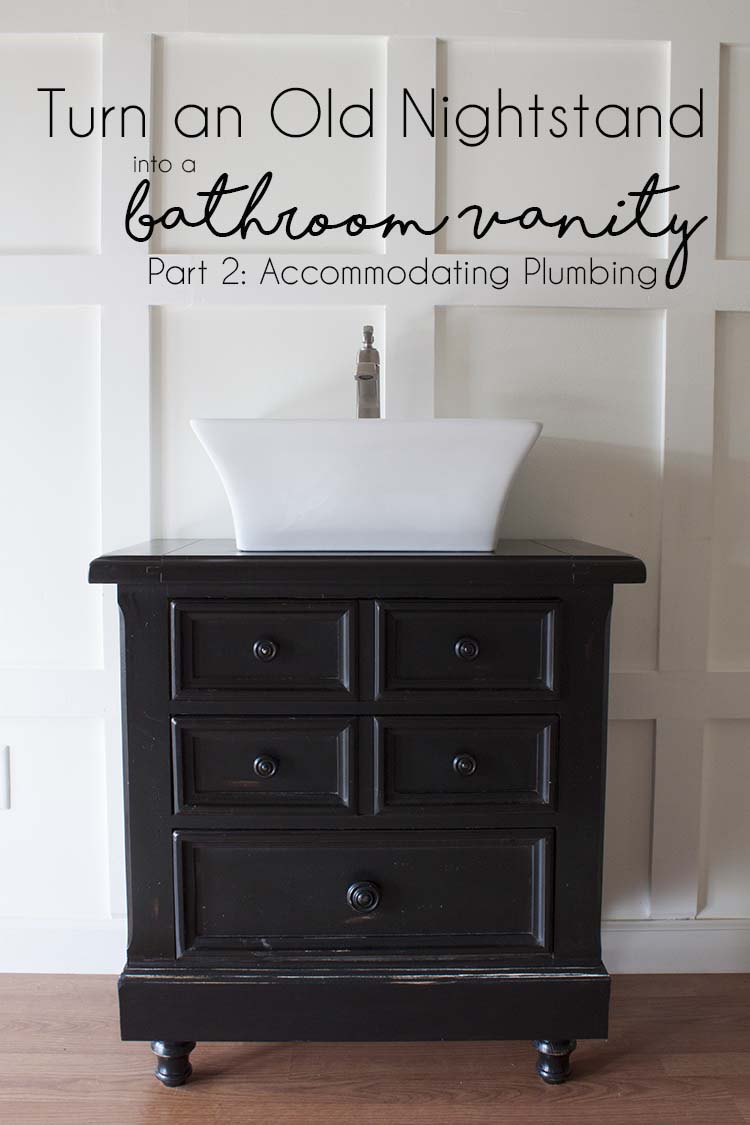
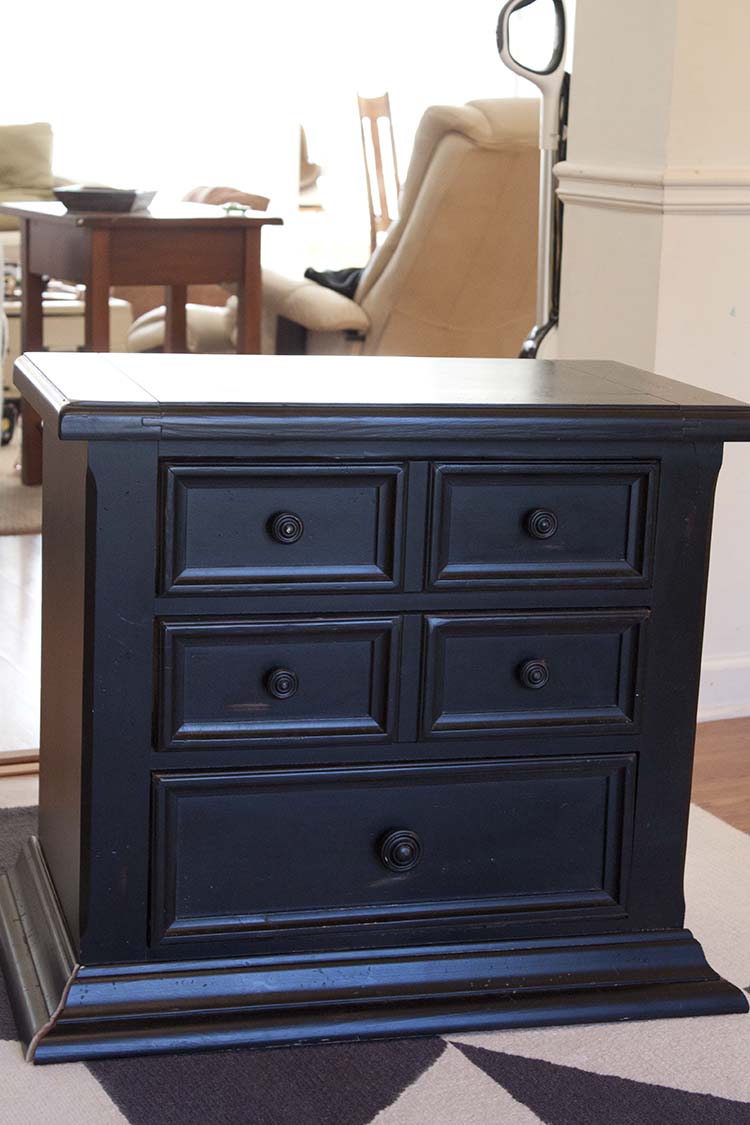
Back when we first completed our guest-friendly boys’ nautical bathroom makeover I couldn’t have anticipated how many people would want to know exactly how we turned that old nightstand into a bathroom vanity. I probably should have, though.
Afterall, maybe a lot of you also regrettably spent your entire tax refund on bedroom furniture over a decade ago and still feel guilty about it. (I should have spent it on vacation) So what better way to assuage that guilt than by continuing to make what’s become unuseful, useful again?
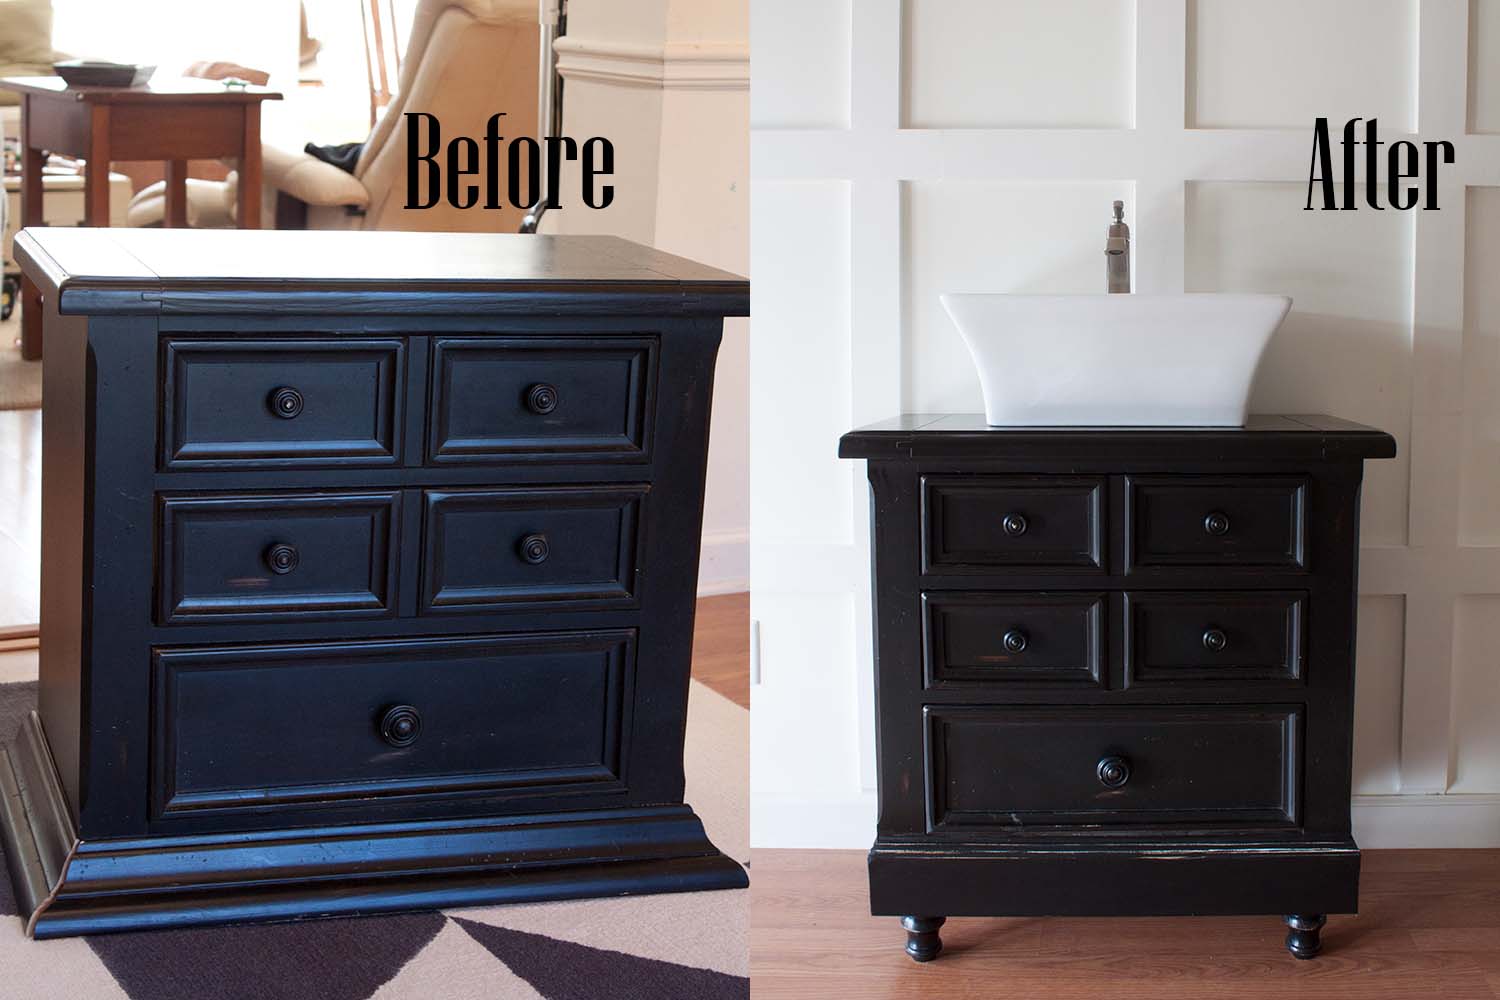
Plus we were working with this really tiny space and I needed something that would get the job done without taking up unnecessary space the way those built-in cabinets do. This one offers all the storage we needed but takes up about half the amount of space.
Sure it can’t fit everything the old cabinet could but we didn’t really need it to. We use it for keeping just what we need close at hand and the rest goes into a well-organized linen closet in the hall. This makes it easier to keep everything tidy and removes the temptation to hold on to stuff we don’t really need or use.
I also get a custom look, too, and for free. So that’s definitely a bonus. And I really like that this one sits up all off of the bathroom floor. Maybe it’s all in my head but it makes the space feel cleaner to me. But to achieve all of this turning our old nightstand into a bathroom vanity required a little imagination and a lot of modification.
How to Turn an Old Nightstand into a Bathroom Vanity
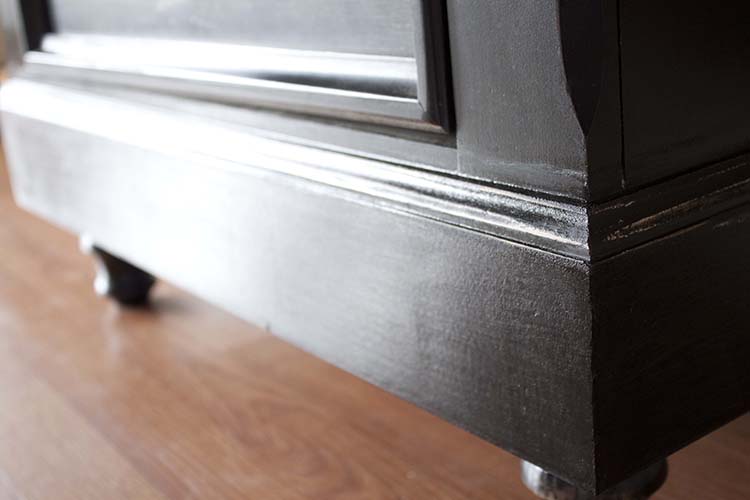
We started by removing the molding at the base of the nightstand. We need to make the cabinet taller so the existing molding had to go because it’s the wrong kind of molding to pair with legs.
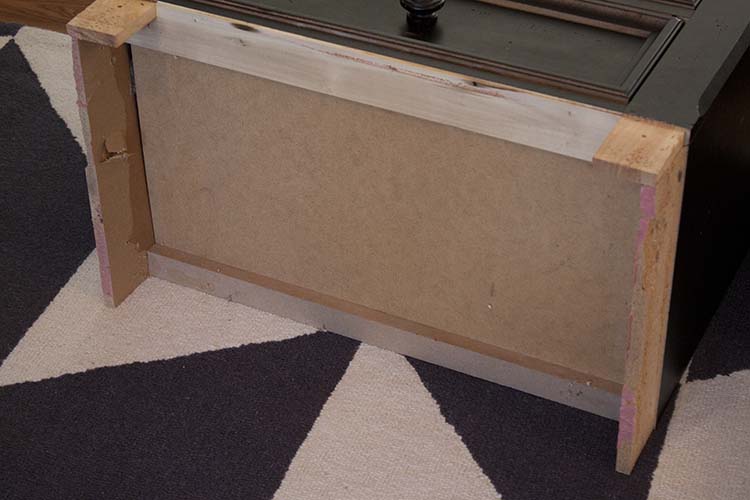
Plus, we needed to access the underside so that we could add a solid panel in order to attach the legs and add height. We used MDF because it’s sturdy and because we already had some on hand but you could also use plywood.
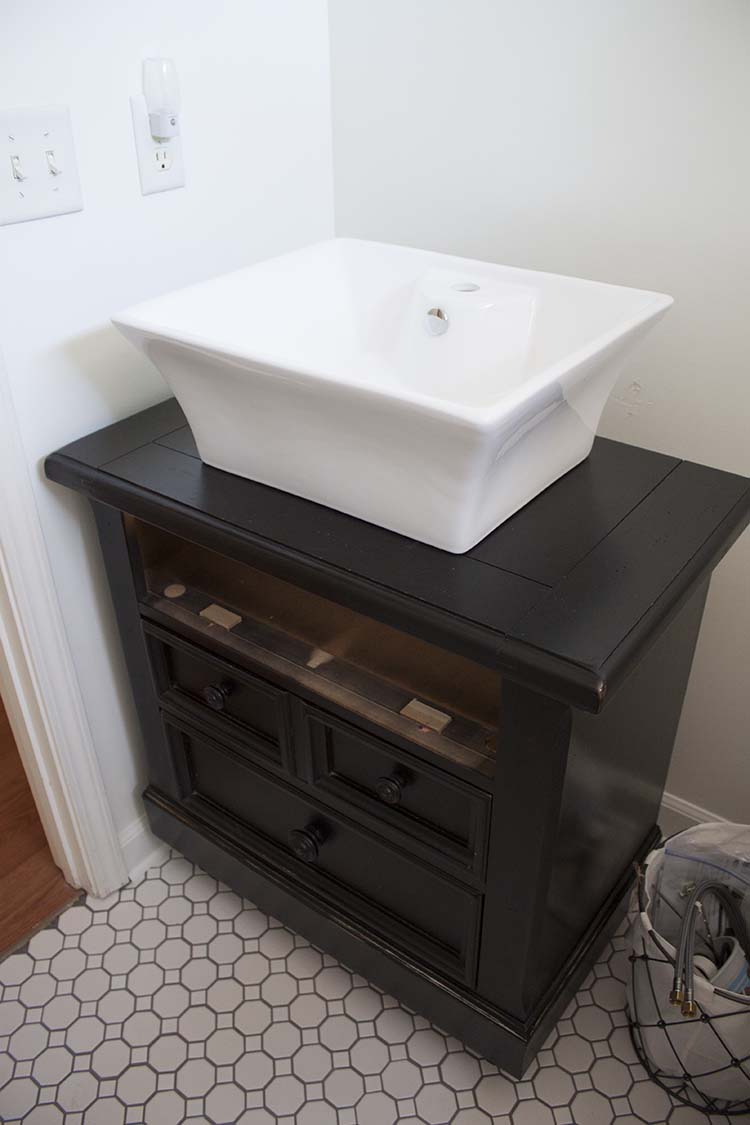
At this point, I had already decided what kind of sink we’d be using so we knew just how much height to add without making it too tall once the sink was added to the top of the vanity. We also realized that using a vessel sink wouldn’t take up valuable space within the cabinet since it sits on top instead of inside. (But more on that later)
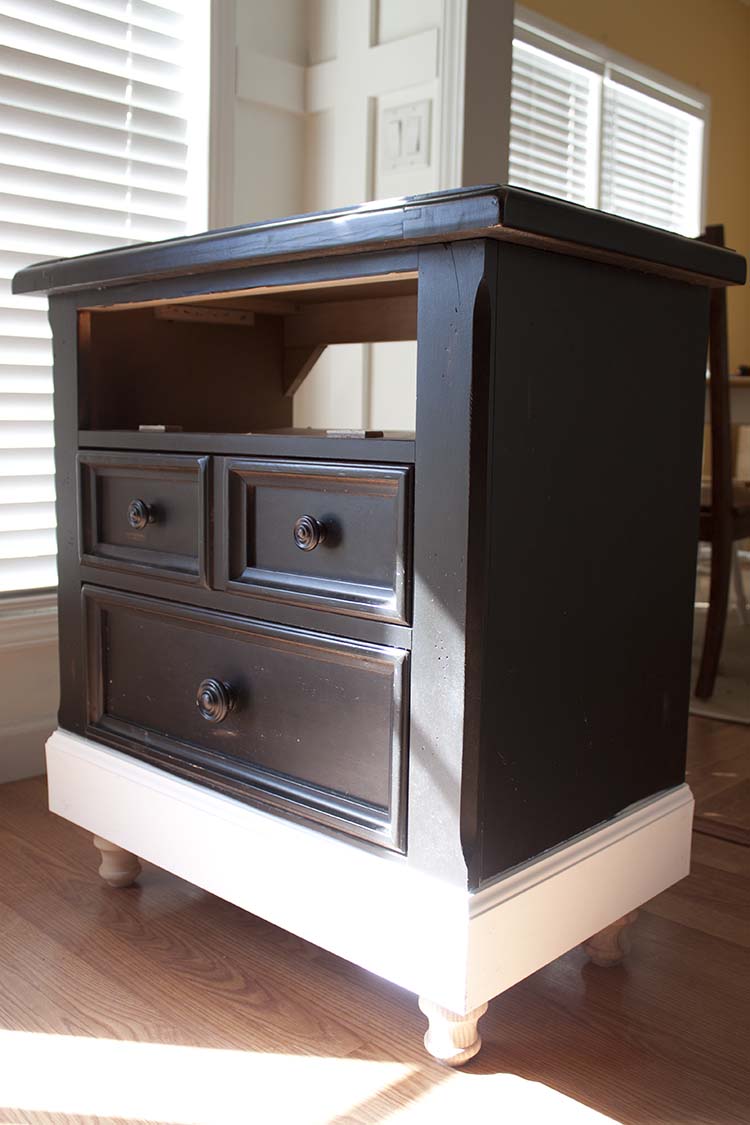
After we removed the existing molding, added the MDF panel and legs to the bottom, we removed the top drawer. We cut everything away from the drawer front leaving just the front as a removable panel in case we needed to access anything in the future and, because of the plumbing, this drawer was rendered fairly useless anyway.
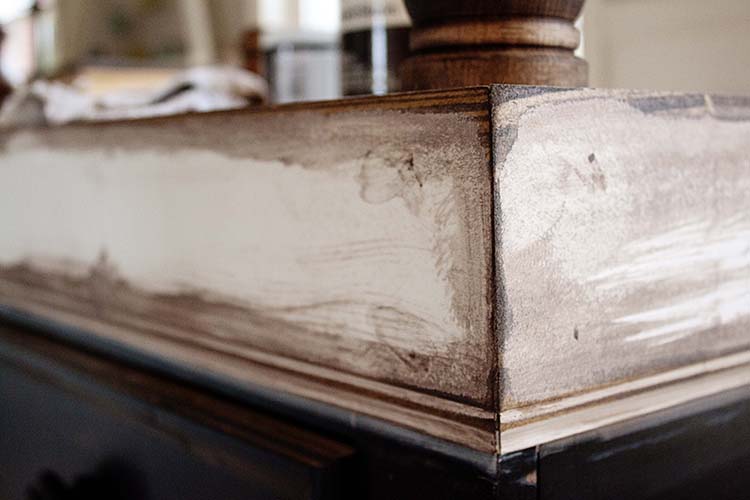
I stained the legs and stained and distressed the molding a little prior to painting.
This way it would match the existing finish better in the end. You can get more details on the painting process in Turning Our Nightstand Into a Bathroom Vanity | Part 1.
Planning & Accommodating the Sink
So remember that part about planning the sink so you know how tall to make the cabinet? Well the thing about planning, in my experience, is that it almost always sets you up with a false sense of preparedness. As in this case, otherwise known as the sink saga. I’m still a huge fan of planning but I’ve learned over the years that plans are more like outlines and outlines have to be flexible.
The sink we wound up going with I sent back once and ordered twice. I was worried it would make the whole set-up too tall, which it did. So I sent it back. And after finding nothing else I liked better or would work better, or that I could afford, I ordered it again. Pretty sure I’m banned from Overstock now.

The solution, since we were sacrificing the first drawer space already, was to drop the sink down into the cabinet a little. We did this by cutting a sink shaped hole into the top of the cabinet. But since this sink wasn’t meant to sit in the cabinet that was a little tricky.
The sides of the sink aren’t perfectly smooth so we wound up having to use a wood file in certain places to make the sink fit in those places without making it too big in others. I don’t recommend this process at all and it’s why I had initially chose not write about the process. That, and you likely don’t own this very same nightstand.
We used clear silicone caulk around the sink to seal any gaps and keep any water from making its way between the sink and the wood. We also sealed the top with a sealer designed for use around water. I recommend a product called
Accommodating the Plumbing
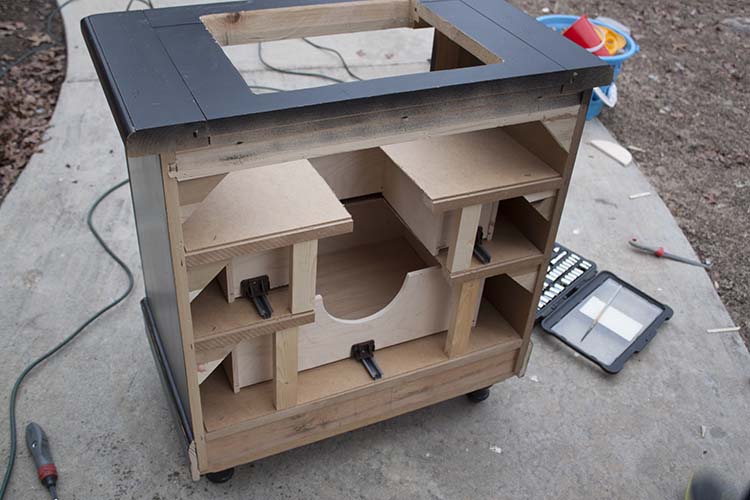
In order to accommodate the plumbing, we had to cut out a large rectangle out of the panel between what was formerly drawer number one and drawer number two.
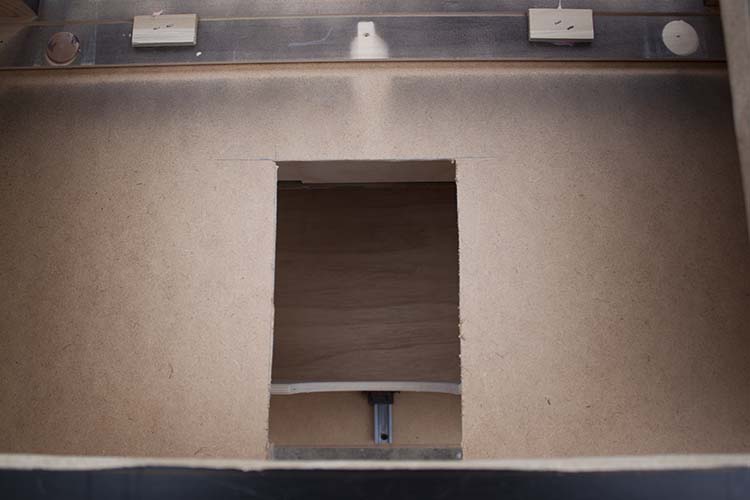
You can see that a little better from this angle, a shot from the top looking through the sink hole and the hole we made in the panel.
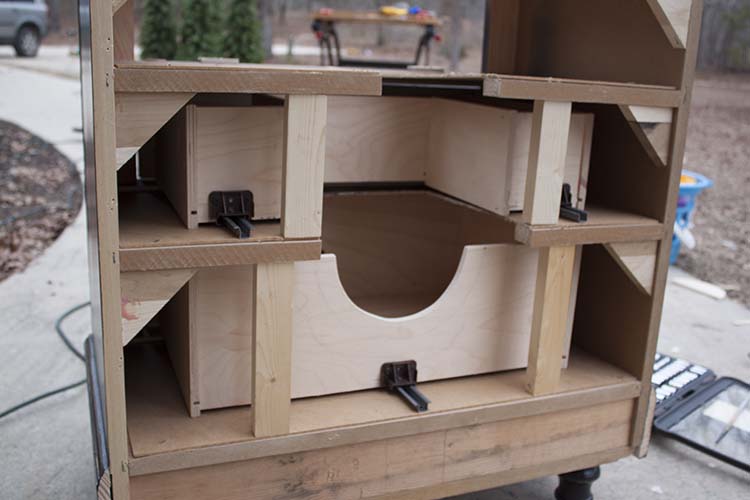
And because we had to drop the sink down into the cabinet a little that meant the plumbing dropped down a bit, too, so we had to make space for it in the remaining two drawers.
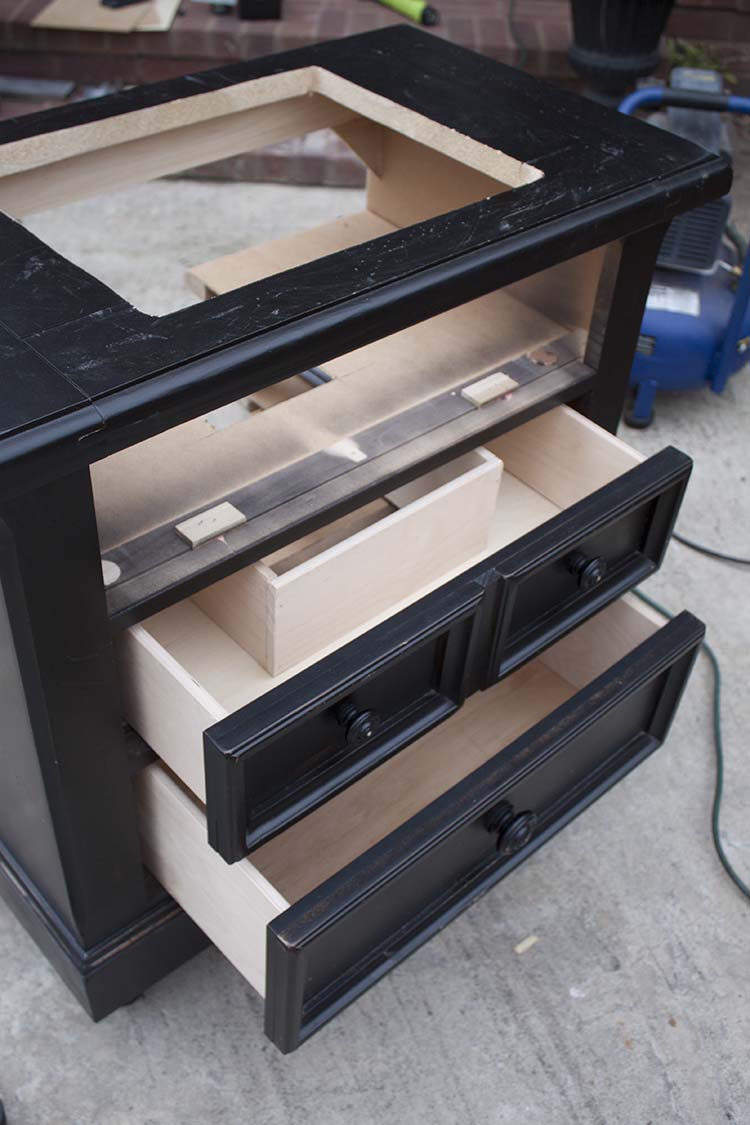
We used some of the wood we cut away from drawer number one in order to rebuild drawer number two into a U-shaped drawer. This way it closes around the plumbing behind it but still leaves us with a somewhat useable drawer. And, it actually worked out perfectly. One side is the toothbrush/toothpaste space for one child and the other side accommodates the same for the second. The front of the drawer stores hairbrushes, etc.
The bottom drawer is a full drawer, though we did have to remove a portion of the back (see pic above this one) in order for the drawer to close because it just so happens to be the exact location of the p-trap. But it holds everything else we needed to store in the bathroom, like extra toilet paper and a blowdryer and none of the stuff we don’t need to keep in there, like cleaning supplies. Those are in kept in our newly made-over laundry room which I get to share the reveal of soon!
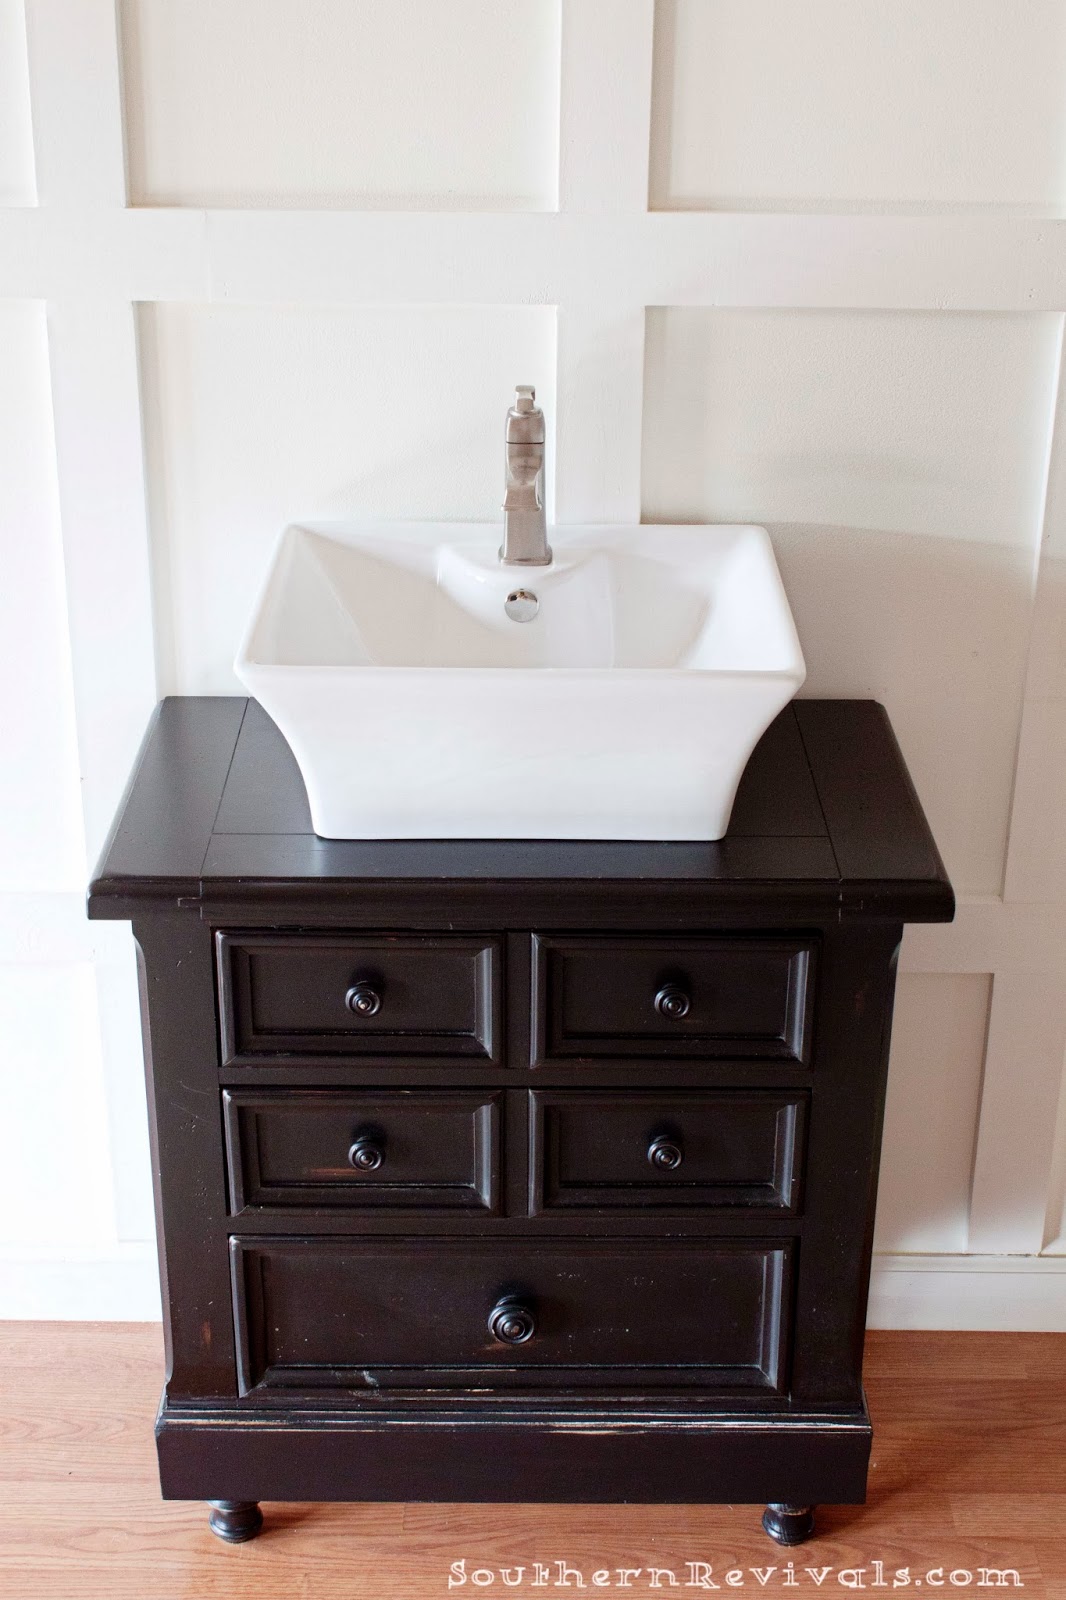
Luckily I already had this beautiful faucet so that was the easiest part of the entire project. Is this a project you’d tackle? As for me…
Would I ever do this again? Absolutely!
Would I do things differently next time? You betcha!


Great work, Jamie! Never thought I’d see a nightstand turn into a bathroom vanity. Indeed, a great approach to repurposing old furniture! Keep it up and I look forward to your next project. Happy Holidays!
Hi Paul,
Thank you! I appreciate that!