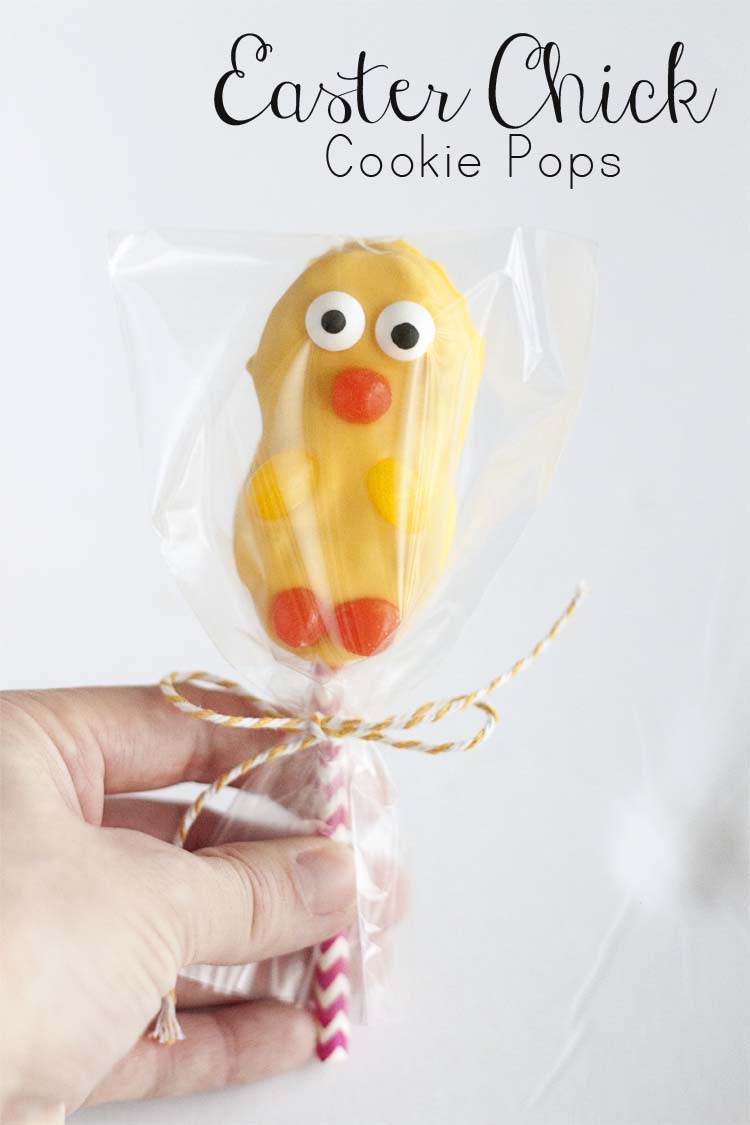
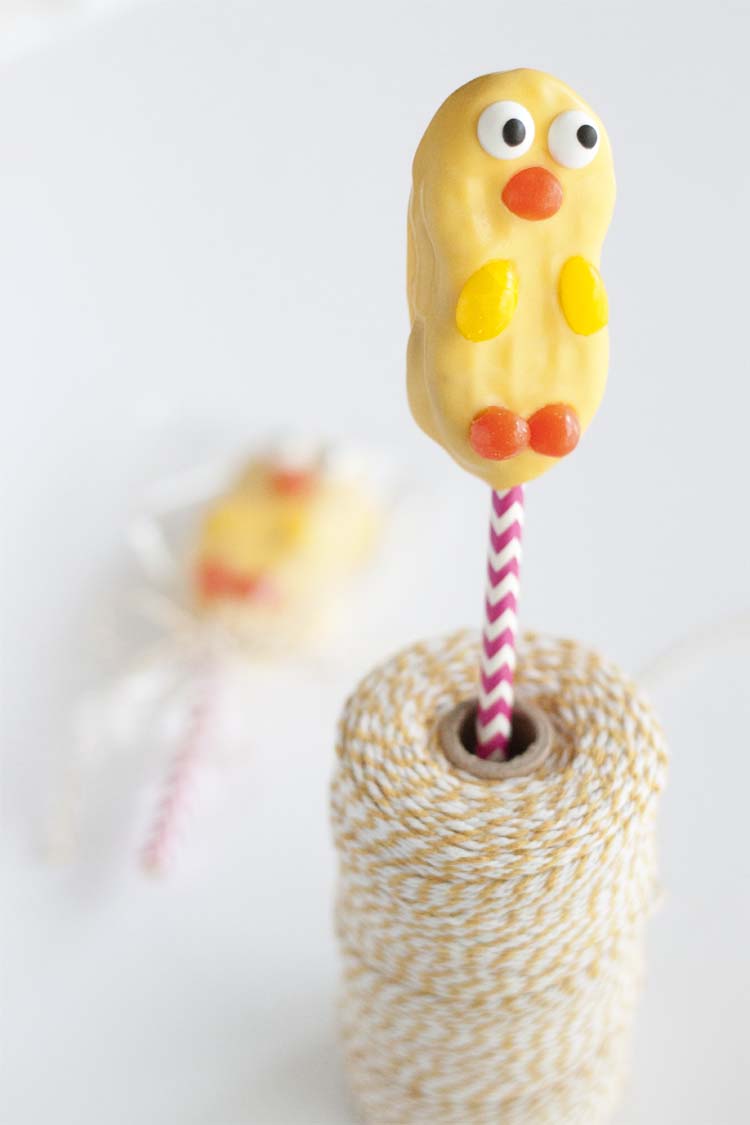
These adorable Easter Chick Cookie Pops are as easy to make as they are fun to eat. They’re also pretty fun to give! They’ll be the hit of your Easter gathering, class party or any other spring festivities. And while you’re waiting to gobble them all up, they make a pretty perfect decoration, too. Here’s how to make them.
Easter Chick Cookie Pops
This post may contain affiliate links. Please see my full disclosure for more information.
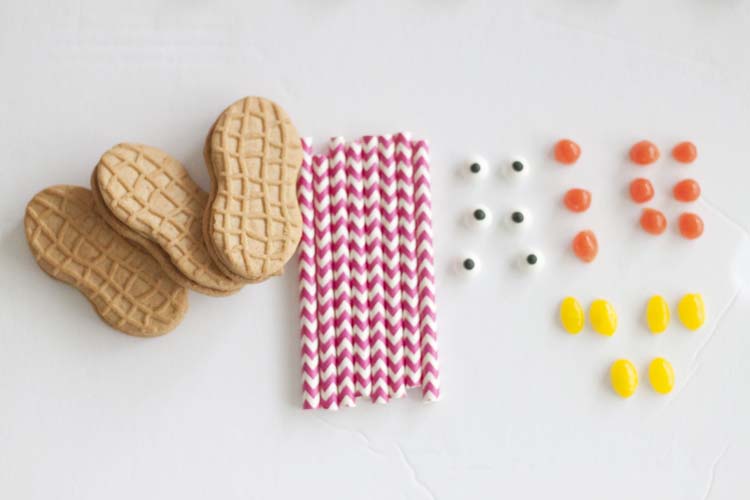
You will need:
- Peanut shaped sandwich cookies, such as Nutter Butter
- Yellow Candy Coating, melted per package directions
- Edible Eye Decorations
- Jelly Beans (yellow & orange)
- Paper Straws
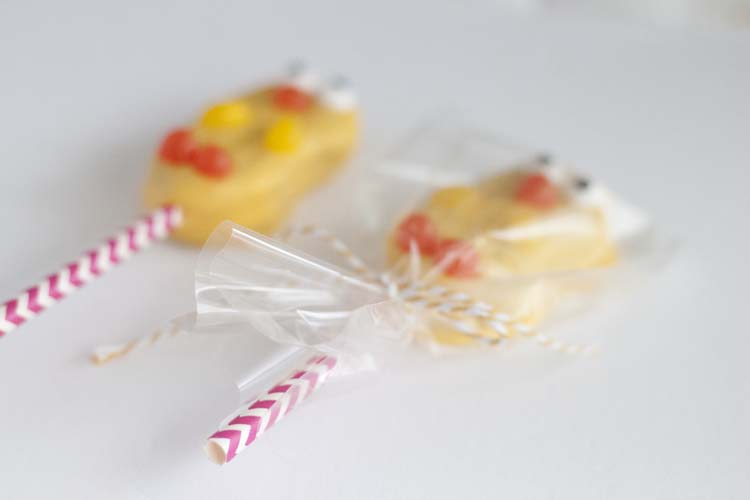
- Cello bags
- Baker’s Twine or ribbon
Begin by getting your decorations ready to use so that once you’ve dipped the cookie into the candy coating you can add them immediately before the coating begins to dry. It will dry pretty quickly. Having your prep done ahead of time will allow you to move quickly.
Count out enough eyes for each cookie and have them in pairs. Cut enough orange jelly beans in half for two feet and one beak per cookie. Cut enough yellow jelly beans in half, lengthwise, for the wings.
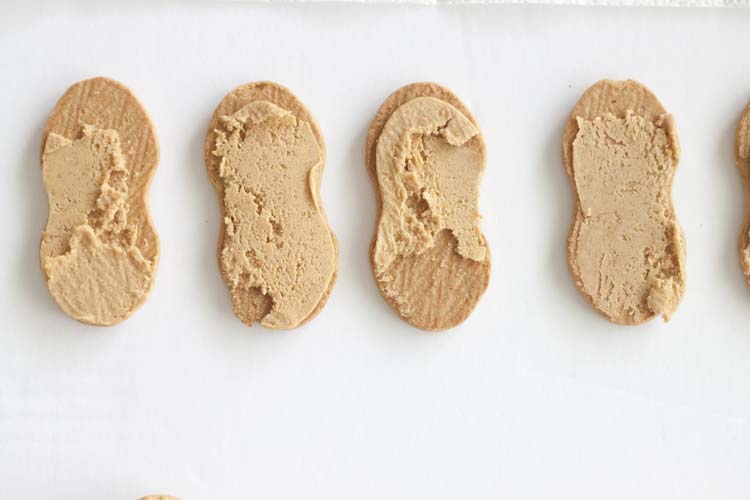
Step#1:
First, gently take cookie apart by sliding a small knife between the cookies. Move a bit of the peanut butter filling away to expose cookie. The peanut butter filling may prevent the candy coating from adhering to both sides of the cookie otherwise.
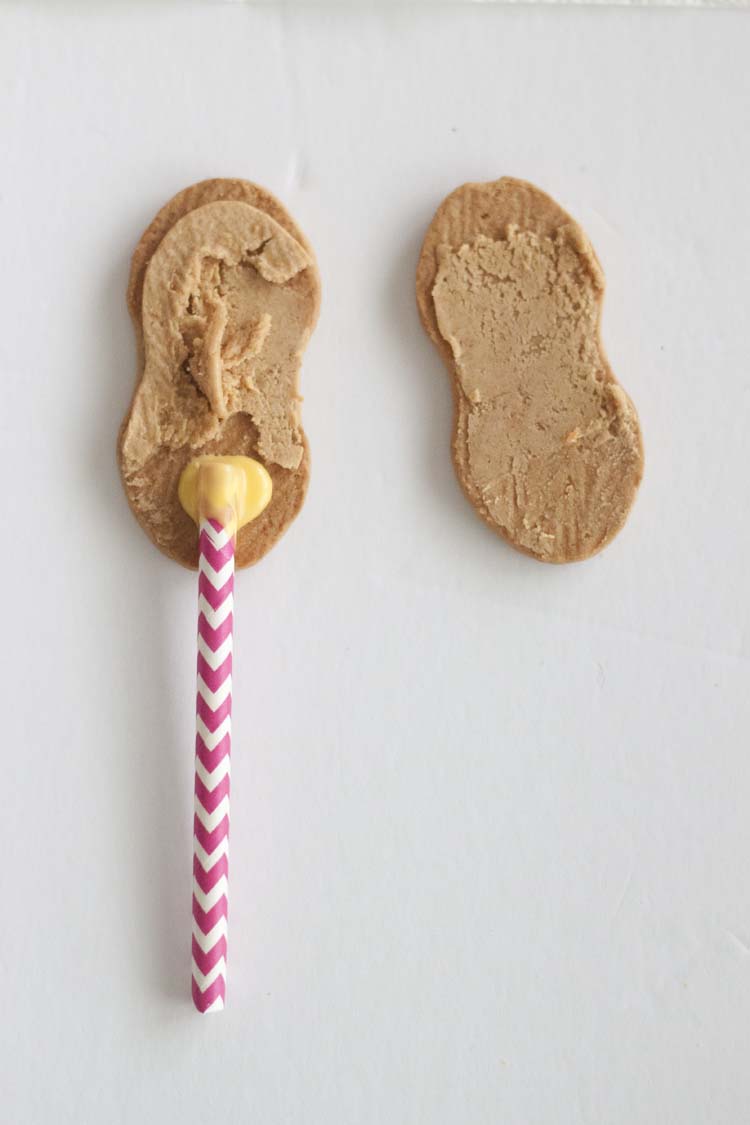
Step#2:
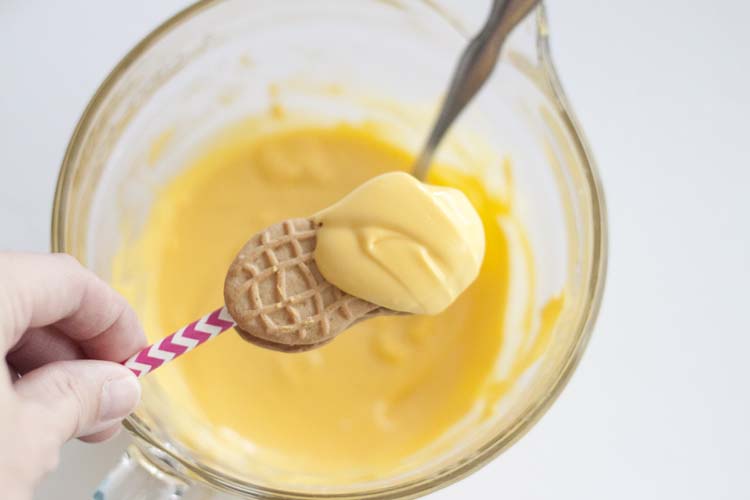
Next, dollop in a little of the melted candy coating onto exposed cookie area. Place paper straw inside and sandwich cookie back together. Allow to harden.
If your cookie wobbles or doesn’t appear secure it may need more time to dry or you might not have removed enough of the peanut butter filling for the candy coating to form a secure bond to each side of the cookie. If this happens simply open the cookie, add in a little more candy coating or scrape away any extra peanut butter filling, if necessary.
Step #3:
Finally, once cookies are completely secured to staws, dip cookies in melted yellow candy coating to completely cover. Allow to drip back into melted candy coating bowl. Gently twirl to remove any excess candy coating.
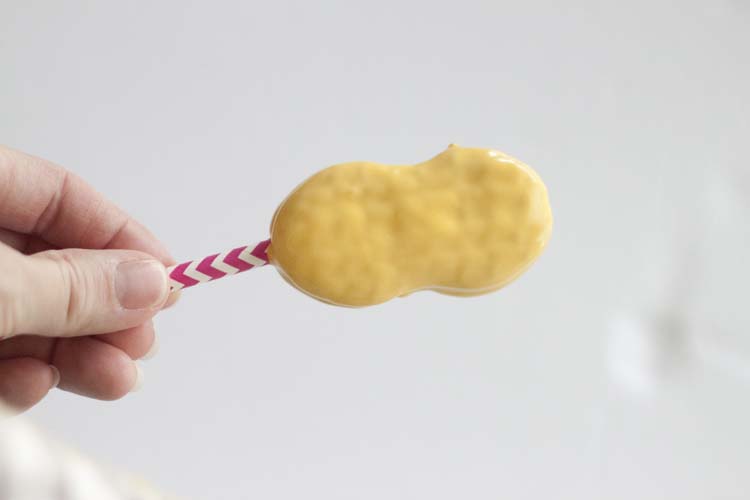
Place on cookie sheet covered in waxed paper. If you have a lot of puddling under the cookie you might want to try allowing more of the candy coating to drip away before placing on wax paper to dry.
Step #4:
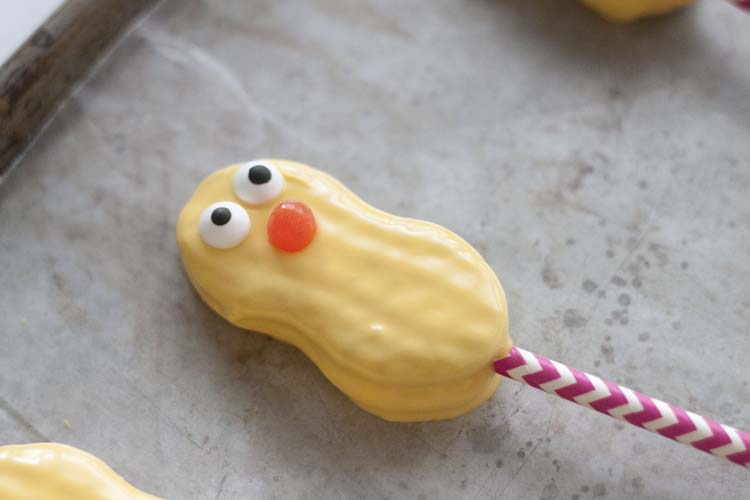
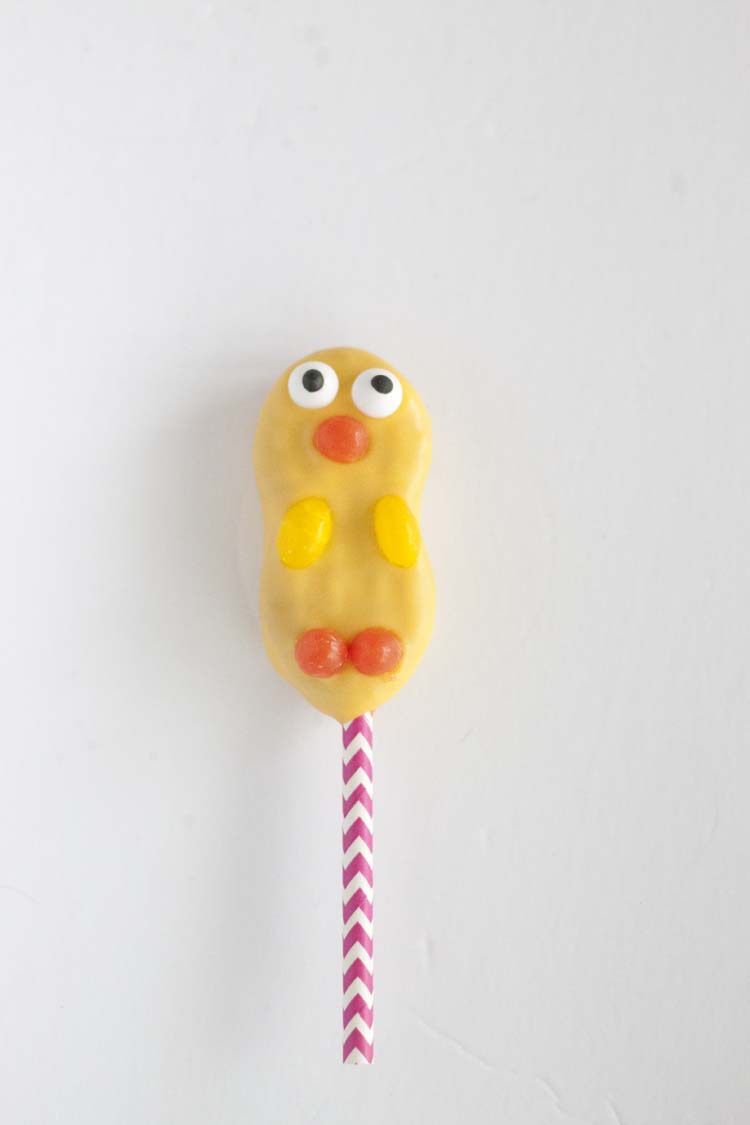
Immediately add-on googly eyes, half an orange jelly bean for the beak and another two cut in half for the feet. Add the yellow jelly beans that you cut lengthwise, for the wings. Allow to set approximately 30 mins, depending on temperature and humidity. To speed up the process you can pop them in the fridge and they’ll be ready to bag in about 10 mins.
Once your cookie pops are completely set place them in cute cellophane treat bags and tie them up with string. These would be adorable served in a basket poked into edible Easter grass. Enjoy!


Leave a Reply