It is no secret that I like “old” things. My child used to make me pictures at preschool then crunch the paper up into balls and unfold them again before giving them to me because as he said, “Mommy, I know how you like old looking things”. Gahhh I love that little boy!
It isn’t just about how old things look, though my favorite color is ‘chippy blue’ because it isn’t my favorite unless it’s chippy, it’s also about the story old things tell. They are so much more interesting than something shiny and new.

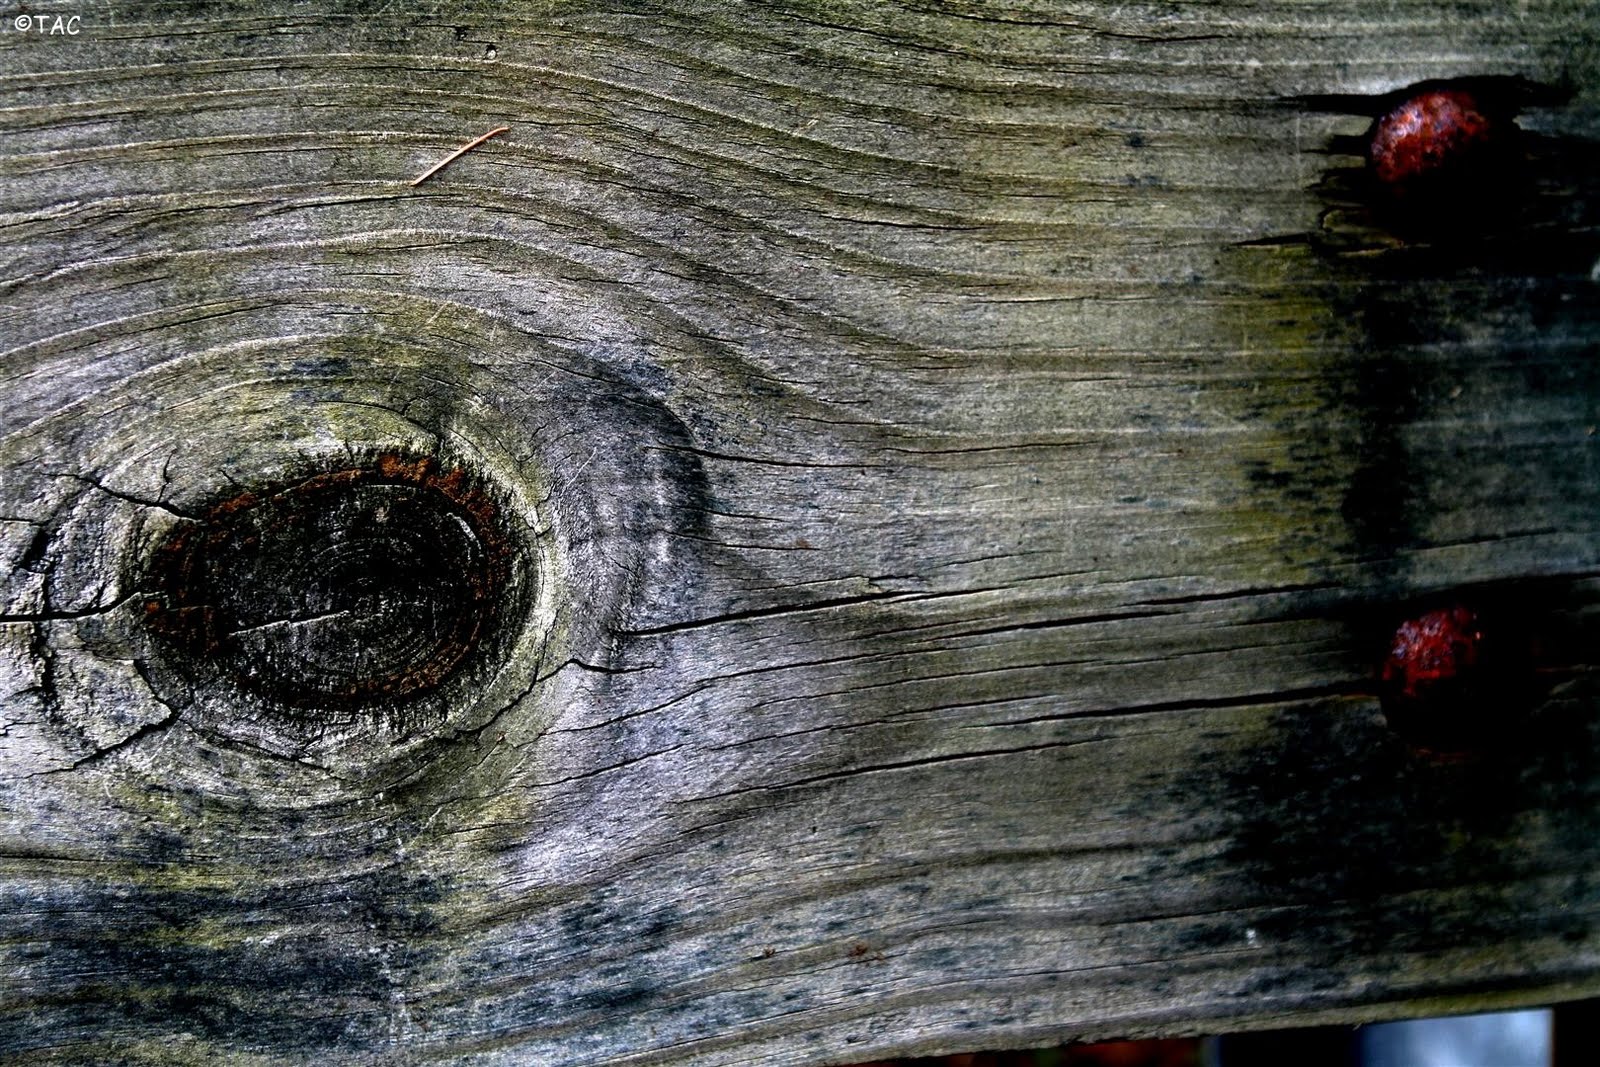
I saw the coolest thing on DIY Network last night on This NEW House (Japalachia – Episode DTNH-201H). A man who was building his house in the North Carolina mountains wanted his wood exterior to have an instant weathered wood look. I wish I could show you a picture of that house. It was huge! And each and every board had been treated with a vinegar and steel wool stain.
Apparently using different vinegars can produce different stains. For example, an apple cider vinegar (or white vinegar, though apple cider seems to produce quicker results, some say it’s the extra acidity of the apple. The DIY guy used Apple Cider Vinegar) makes a slate gray stain (think Restoration Hardware!) and with a nice Balsamic you get a brownish green color. Some folks even mix tea or a Rit dye to vary the color results.
So. Choose your vinegar.
Wash steel wool in warm water to remove oils used to prevent rusting.
Use REAL steel wool. Apparently there are generic versions out there that aren’t the real thing and that just won’t work.
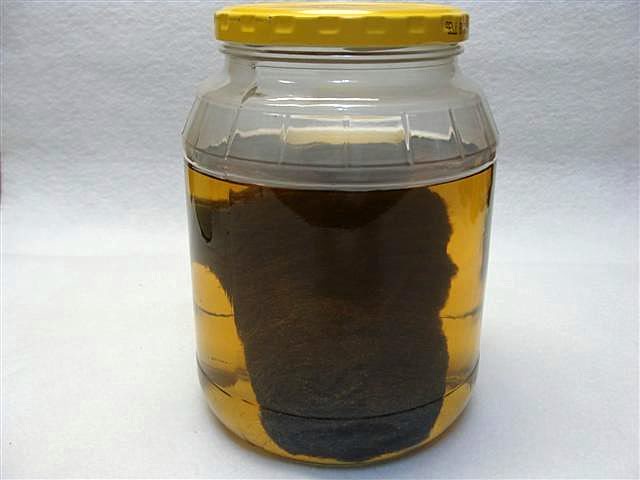
Choose 00000 steel wool. Completely cover steel wool with vinegar of your choice. Some variations say to use half water, half vinegar but that might water the color of your stain down – again, the DIY guy used just vinegar and steel wool. However, if you find that your stain is too dark, you might decide to add a little water. Keep in mind though that you’ll be sanding the final product and that will lighten it up a bit as well.
Soak your steel wool overnight covered tightly in a glass jar. It may take up to 48 hours but if you’ve used the right steel wool (remember real steel only) and washed any oils from it prior to use, you should see results pretty quickly. The stain is ready for use when the steel wool has completely dissolved.
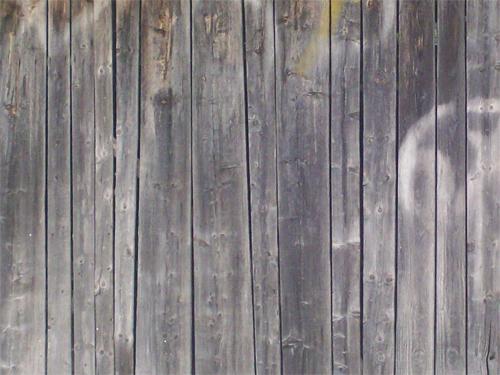
Test your stain in an inconspicuous spot or on a scrap piece of wood. Just be sure to use the same kind of wood. As with different vinegars, different woods will respond differently giving you different colors.
Brush or wipe stain on in even strokes just as you would any other stain. Wipe off any excess. If you find you want a deeper/richer color tone, try soaking the wood in the stain.
Allow the wood to dry completely then sand lightly with 220-grit sandpaper. Seal the finished product with an oil, such as Tung oil or a natural wax. Be sure to research which of these would work best for your project and the finished look you desire as some of them can change the color or finish when applied.
Oh. And I guess I should tell you, it stinks. Alot.
Finally, and most importantly, send me some pictures or a link! I wanna see!!


I’ve been using vinegar and steel wool for about a year now and I think it might be the most amazing tool in my garage! And cheeeeaaaap, too. Here’s a link to one the projects I used it on: http://thefriendlyhome.blogspot.com/2012/07/oxidized-x-coffee-table.html
I’ve been wanting to do this on my beautiful but huge and ugly white oak farm house table but I really don’t want all the sanding ugh.. It will get done
I can’t wait to try this! My Hubby just built a toy bookshelf for the family room.. it makes sense to age it. Any thoughts on doing this with birch wood? we have our test scraps, but I want more gray, with hints of brown & maybe even green in there… Any pointers?
The types of wood you use and the type of vinegar you use will all affect the color of the stain. I would try using the white vinegar and apply cider vinegar on several different wood types to get the look you want. And maybe even apply the two vinegars in layers to the different wood types to see what you get. It’s a trial and error thing for sure but a one of kind finish! Have fun and I’d love to know how it turns out!
did you need to rinse the surfaces so you don’t get any residue on your figures from the dried items?
I think after the stain has dried you could easily wipe the surface if needed.
You should NOT put the lid on tightly! It can explode. It should be on loose. I’ve heard of this happening..google it.
As with any fermentation process, a tight lid is necessary for the chemical reaction to take place. A close eye can be kept on it but with the opening and testing part of the process, I have never found the pressure to build up enough to explode, not even in high-temps. Still, do as you’re comfortable doing.
Can you use this for staining a deck?
Hi! You can use it to stain any type of wood but it will not take the place of a sealer!