• About
  • Contact
  • PRIVACY POLICY
  • Image Map

Southern Revivals

A DIY, home decor, lifestyle and interior design blog based near Savannah, GA.

  • Home
  • Furniture Makeovers
    • All Furniture Projects
    • Client Files
  • DIY Tutorials
    • Home Improvement
    • Projects
    • Style & Design
  • Crafts
  • Entertaining & Recipes
    • Entertaining & Party Ideas
    • Just Recipes
  • Travel & Life
  • SHOP

DIY Handpainted Snowman Christmas Cookie Platter


Super easy and oh so cute! If you have at least one hand and some paint brushes you can DIY your own Snowman Christmas Cookie Platter, too. Here's how!
If you’re an avid painted you’re probably all like, I got this! If you’re new to painting you might be thinking, Me? Paint glass? Permanently?! But the truth is if you have at least one hand (and if you don’t, don’t let that stop you!) and a couple of paint brushes, you can make your own DIY Handpainted Snowman Christmas Cookie Platter. I’ve even included a FREE printable image painting guide!
Super easy and oh so cute! If you have at least one hand and some paint brushes you can DIY your own Snowman Christmas Cookie Platter, too. Here's how!

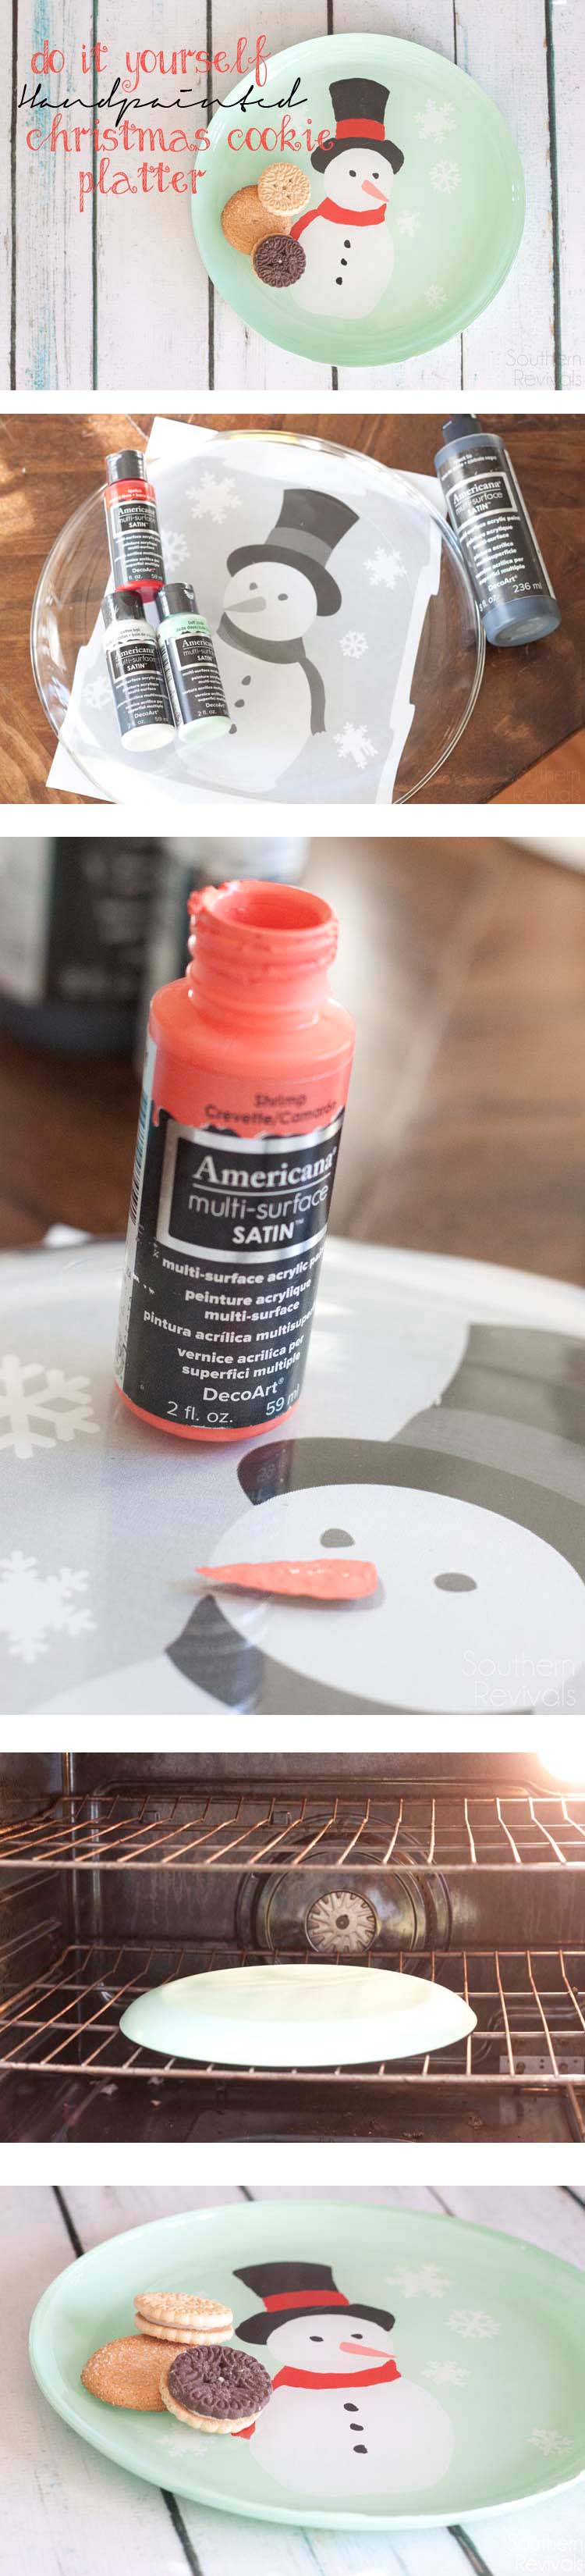
So first things first, you’ll need a few supplies. And you’ll actually need a couple more things than your hands and some brushes. But not much more.

Supplies:

  • Glass plate – a dollar store is a great place to find one. Mine is approx 11″ in diameter
  • DecoArt Americana Multi-surface paints
  • Paint brushes – I used one small pointy one, one small flat edge, one medium flat edge and one large flat edged brush. The kind you get in a craft pack.
  • Rubbing alcohol – for cleaning the glass prior to painting
  • Paper towels – as a cleaning cloth
  • Printer – or some way to print out the Snowman Image (<–Click this link, right click on image, save & print)
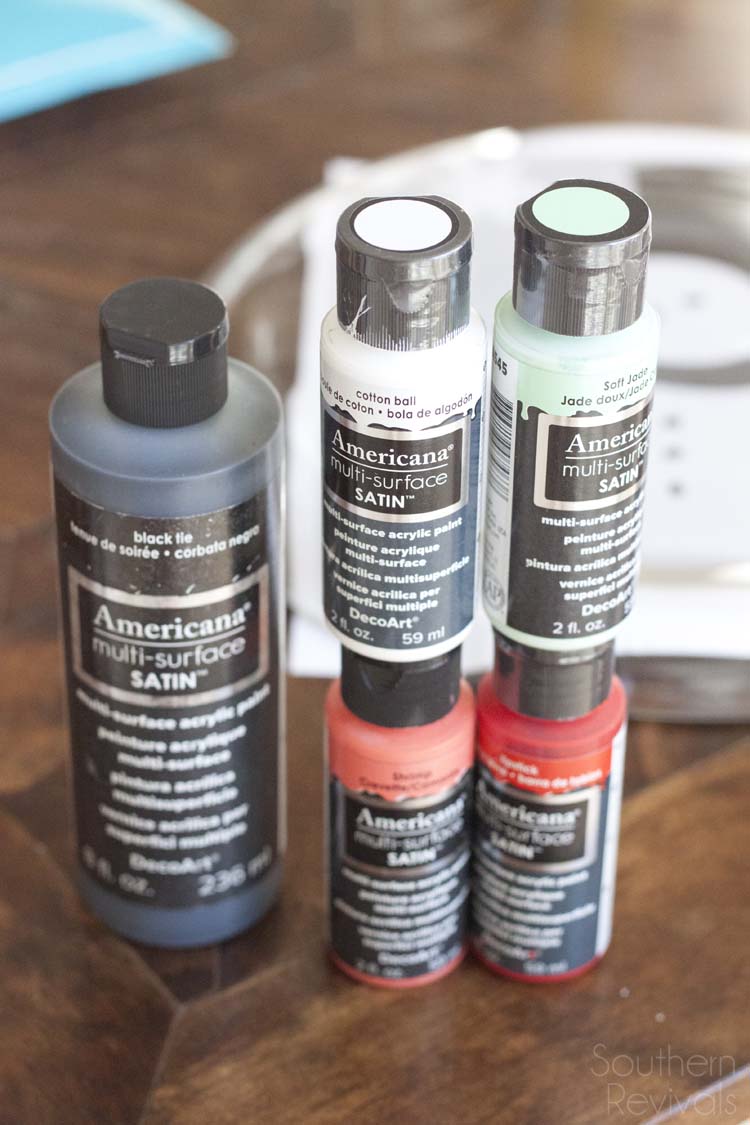
Super easy and oh so cute! If you have at least one hand and some paint brushes you can DIY your own Snowman Christmas Cookie Platter, too. Here's how!

Colors I used:

  • Black Tie – for hat & coal
  • Lipstick – for hat trim & scarf
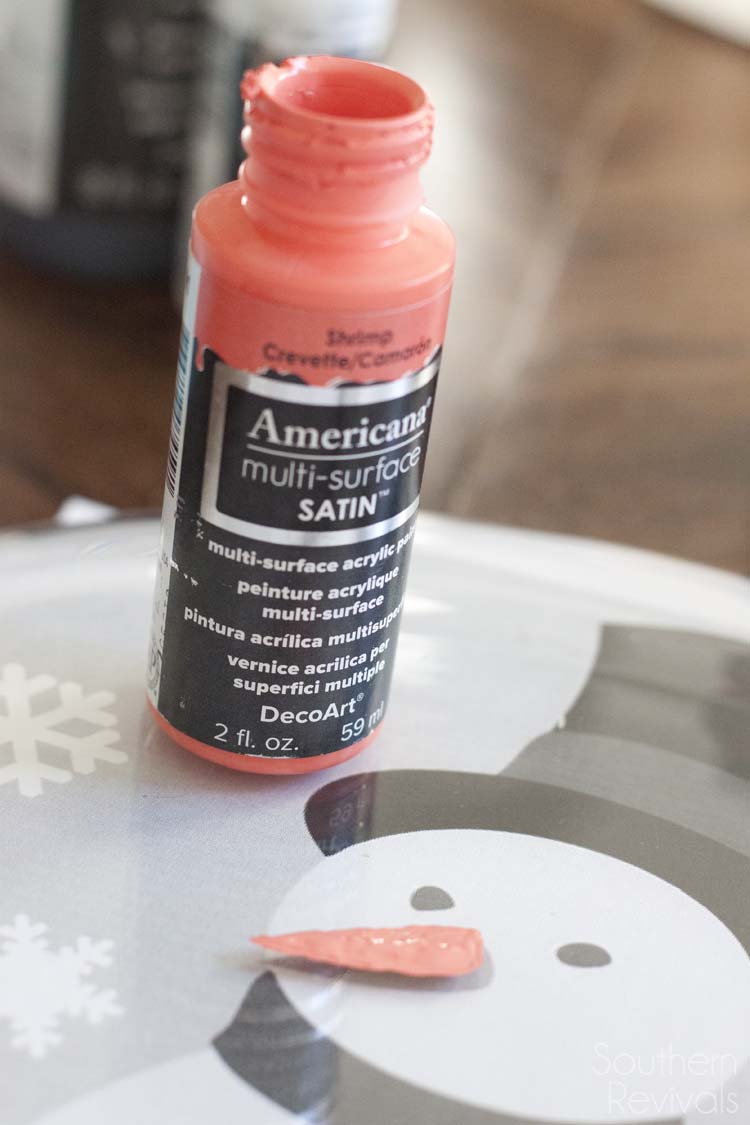
  • Shrimp – for carrot nose
  • Cotton Ball -for snowman & snowflakes
  • Jade – for background color

Super easy and oh so cute! If you have at least one hand and some paint brushes you can DIY your own Snowman Christmas Cookie Platter, too. Here's how!

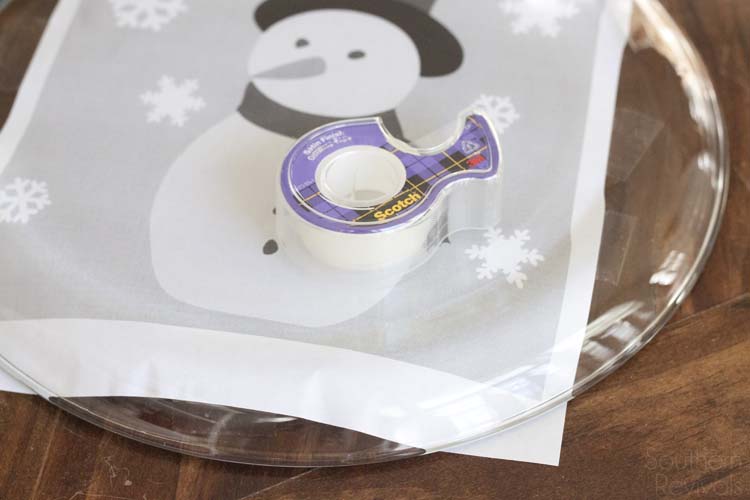
After you’ve printed your image place it on the inside of your plate, tape it in place and turn your plate upside down. You will actually be applying the paint to the bottom of your plate. My plate is a little over 11″ in diameter. For that reason, I made this image approx 8″ x 9″. If that’s too big or too small you can adjust that prior to printing.

An important note about the image: The image I have provided for you to download is already an inverted, mirror-image. All that means is, once you flip the plate back over and view it from the top, the image will appear just as it should.

Super easy and oh so cute! If you have at least one hand and some paint brushes you can DIY your own Snowman Christmas Cookie Platter, too. Here's how!

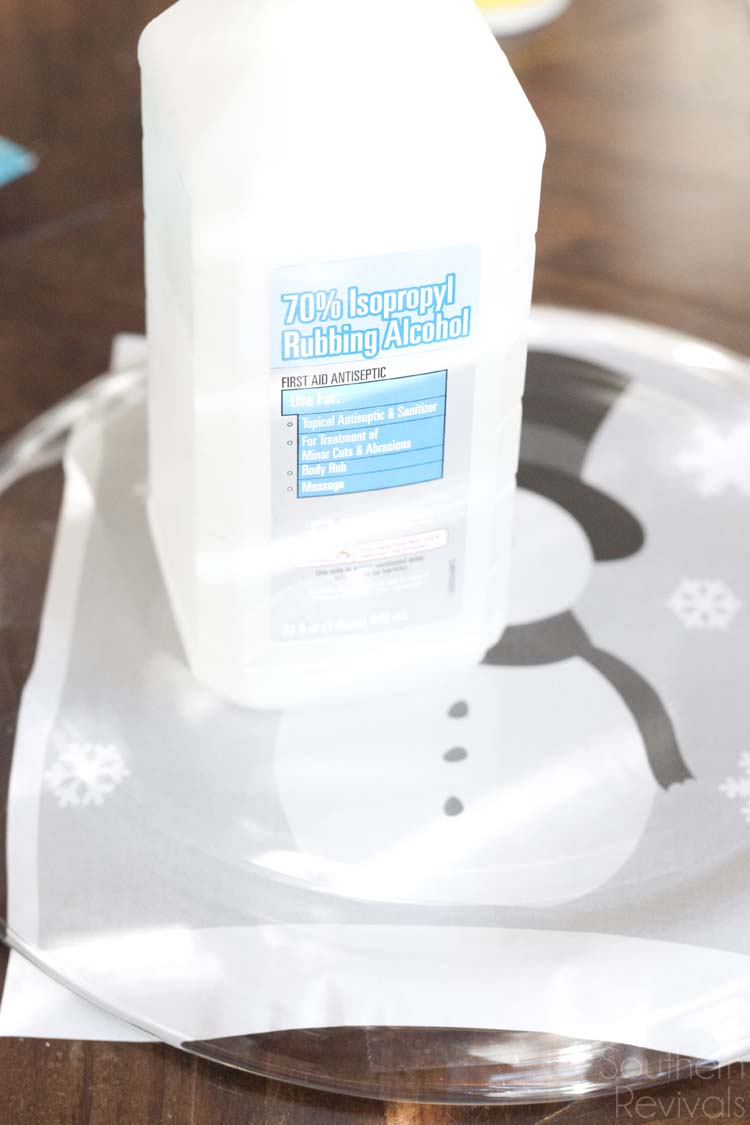
After affixing your image to the inside of the plate and flipping it over, clean the bottom with a lint free paper towel and rubbing alcohol to the entire surface you intend to paint. Allow to dry.

Super easy and oh so cute! If you have at least one hand and some paint brushes you can DIY your own Snowman Christmas Cookie Platter, too. Here's how!

Your first steps are to paint the nose, hat sash, scarf…

Super easy and oh so cute! If you have at least one hand and some paint brushes you can DIY your own Snowman Christmas Cookie Platter, too. Here's how!

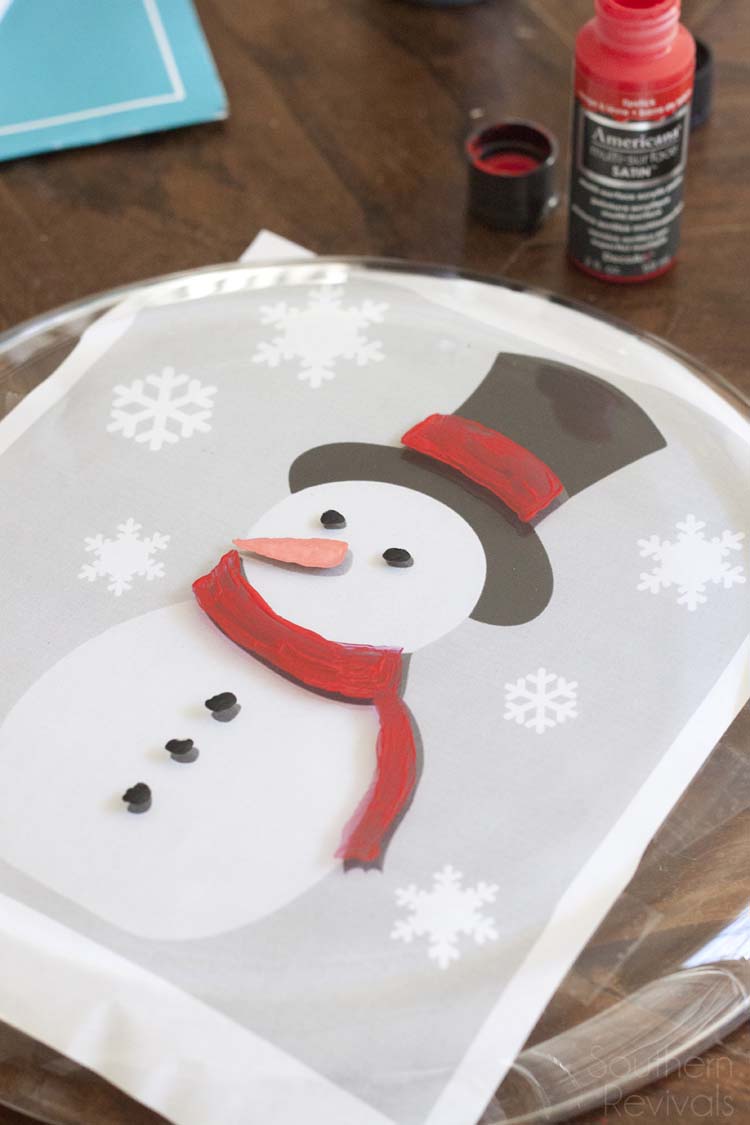
The hat, eyes, and buttons.

Super easy and oh so cute! If you have at least one hand and some paint brushes you can DIY your own Snowman Christmas Cookie Platter, too. Here's how!

You will be tempted to glop on the paint since it will appear thin.

DO. NOT. DO. IT.

Super easy and oh so cute! If you have at least one hand and some paint brushes you can DIY your own Snowman Christmas Cookie Platter, too. Here's how!

It’s pretty quick to dry so just apply thin coats and reapply to reach desired coverage. I applied 4 coats of each color.

Again, it’s pretty quick to dry so I just walked away and did other things while I waited for it to dry.

Super easy and oh so cute! If you have at least one hand and some paint brushes you can DIY your own Snowman Christmas Cookie Platter, too. Here's how!

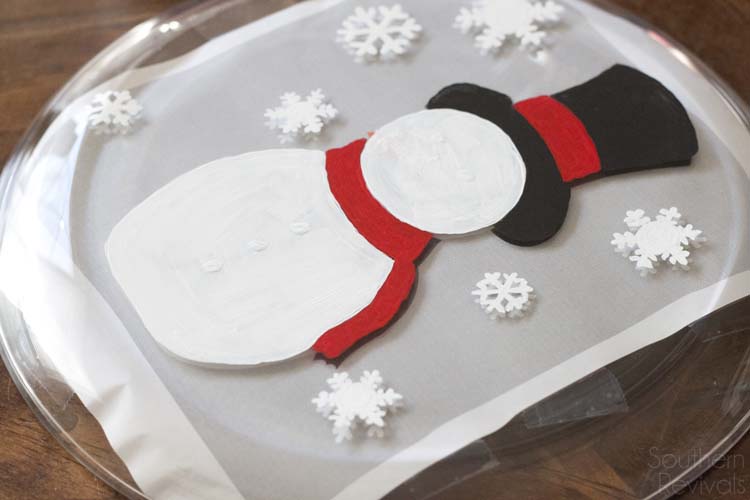
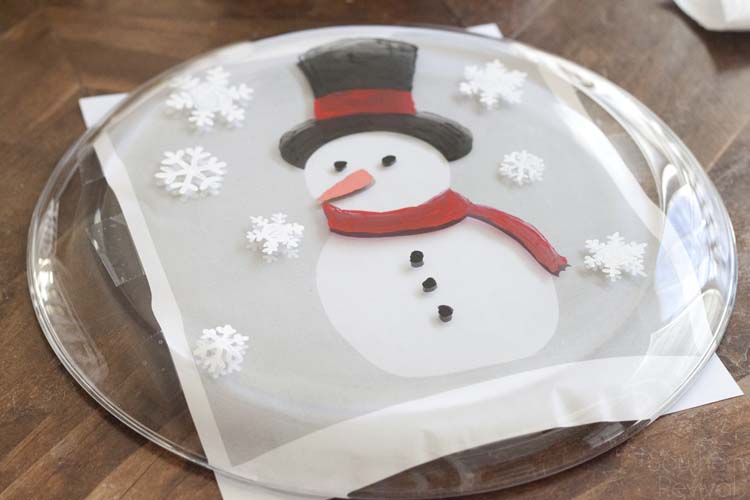
Your next step is to paint the snowman and snowflakes. Here’s where it might look a little confusing. Since you won’t be viewing your snowman from the bottom there’s no need to paint around his small nose, eyes, and buttons. Just paint that entire area in. Again, another 3 – 4 coats. At this point I allowed it to dry overnight.

Super easy and oh so cute! If you have at least one hand and some paint brushes you can DIY your own Snowman Christmas Cookie Platter, too. Here's how!

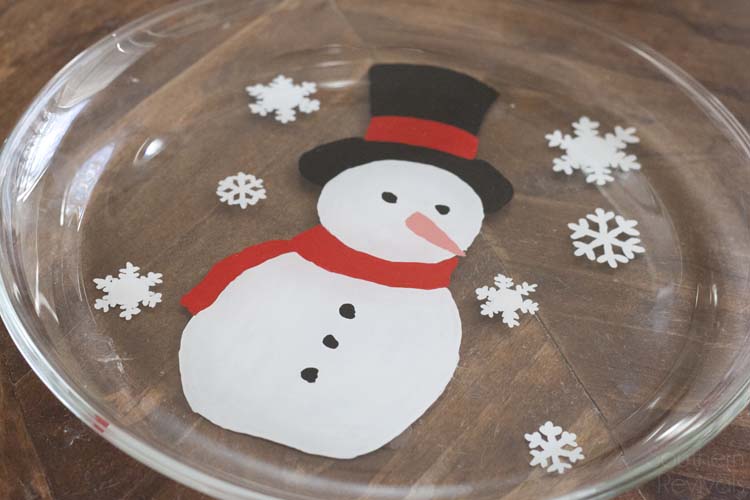
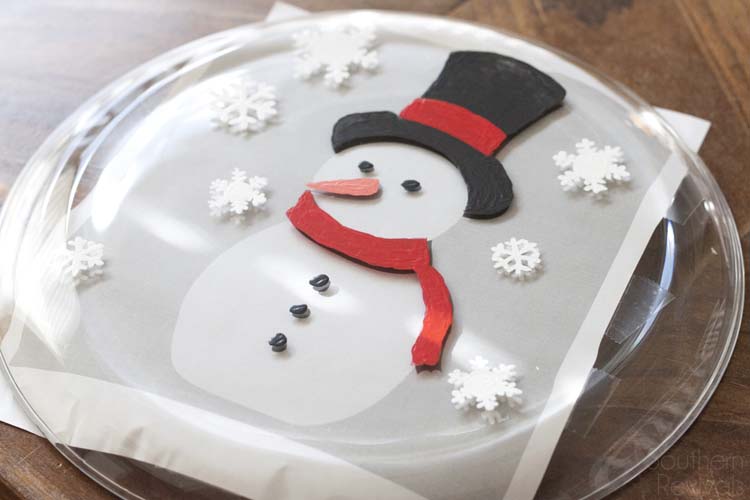
The next day, flip your plate over and view it from the top to check and see if there are any gaps in your paint job. If so, fill those in, allow to dry thoroughly before moving on to the final painting step.

Super easy and oh so cute! If you have at least one hand and some paint brushes you can DIY your own Snowman Christmas Cookie Platter, too. Here's how!

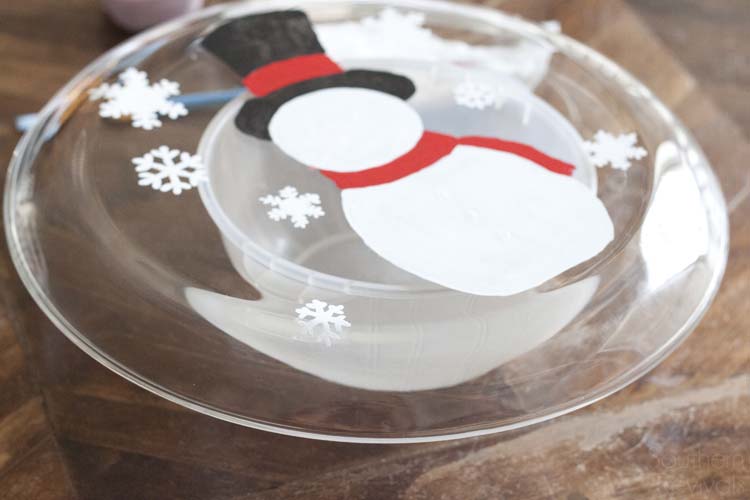
Your final painting step is to add your background color. Place your plate upside, again, this time on top of something to lift it up.

Super easy and oh so cute! If you have at least one hand and some paint brushes you can DIY your own Snowman Christmas Cookie Platter, too. Here's how!

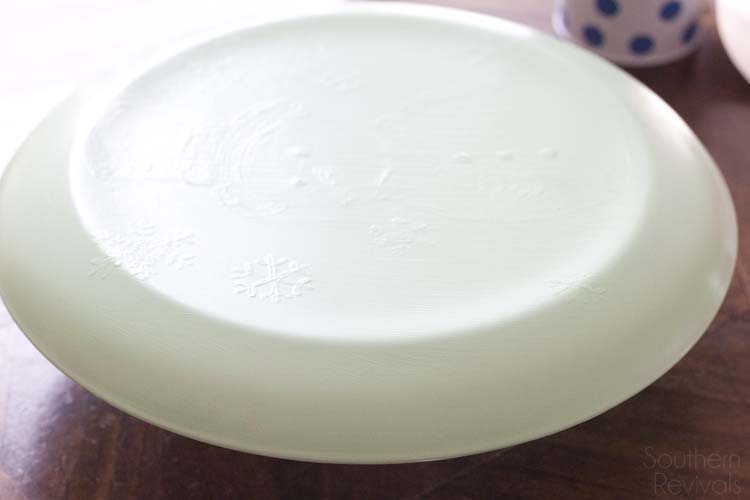
Paint the entire outside of your plate, 3 – 4 coats, allowing to dry in between.

Super easy and oh so cute! If you have at least one hand and some paint brushes you can DIY your own Snowman Christmas Cookie Platter, too. Here's how!

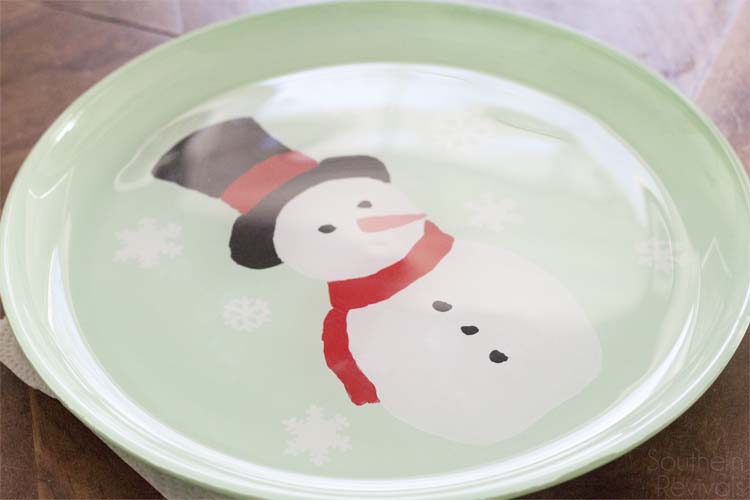
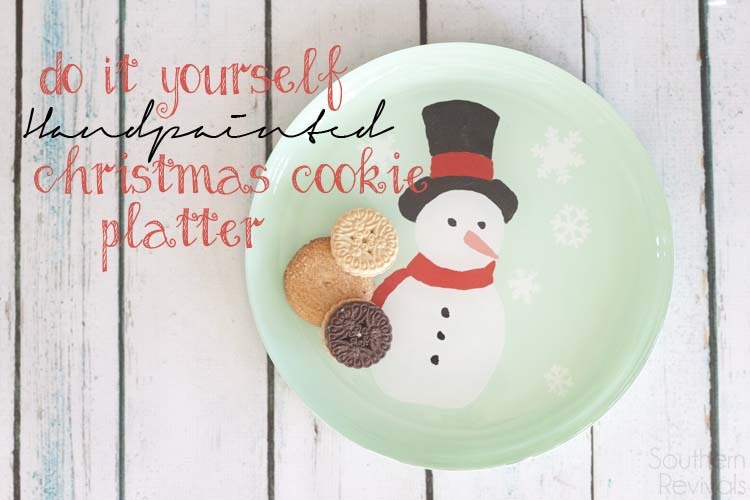
Then flip it over and check it out. I mean, it’s SO cute, am I right?

Give it 4 days to air cure. After your patience, you’ll be rewarded with an adorable, one of a kind, top-rack dishwasher safe cookie platter. Yay, you!

Super easy and oh so cute! If you have at least one hand and some paint brushes you can DIY your own Snowman Christmas Cookie Platter, too. Here's how!

After you’ve given your platter at least 4 full days to cure, pop it into a NON-preheated oven. Bake 30 mins at 325. Cool with oven door open.

If you’re not interested in your platter being dishwasher safe you’ll need to allow it to air cure for 7 days instead.

Super easy and oh so cute! If you have at least one hand and some paint brushes you can DIY your own Snowman Christmas Cookie Platter, too. Here's how!

I. Am. In. Love.

Super easy and oh so cute! If you have at least one hand and some paint brushes you can DIY your own Snowman Christmas Cookie Platter, too. Here's how!

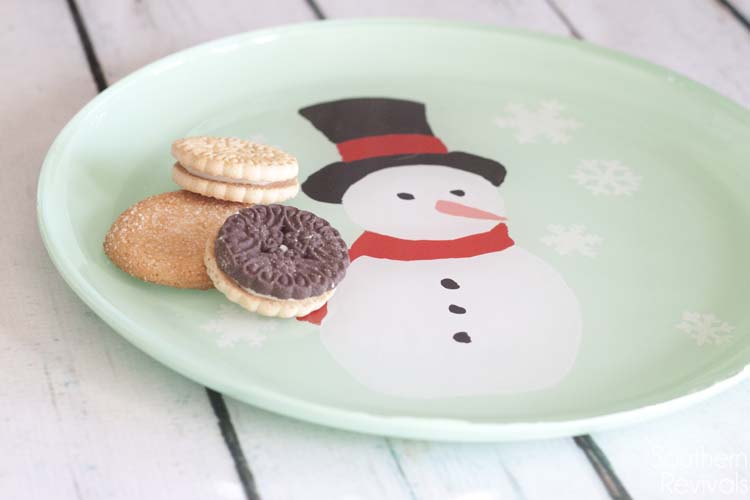
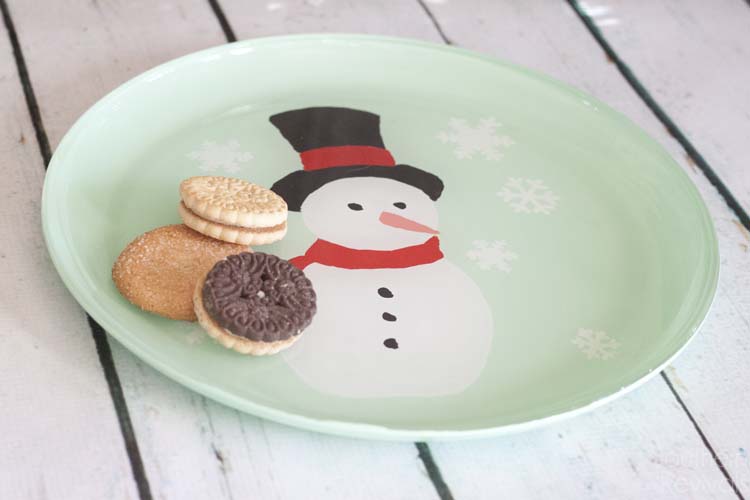
Santa will be having his cookies on a brand new, one of a kind, I-did-it-myself Snowman Cookie Platter!

Super easy and oh so cute! If you have at least one hand and some paint brushes you can DIY your own Snowman Christmas Cookie Platter, too. Here's how!

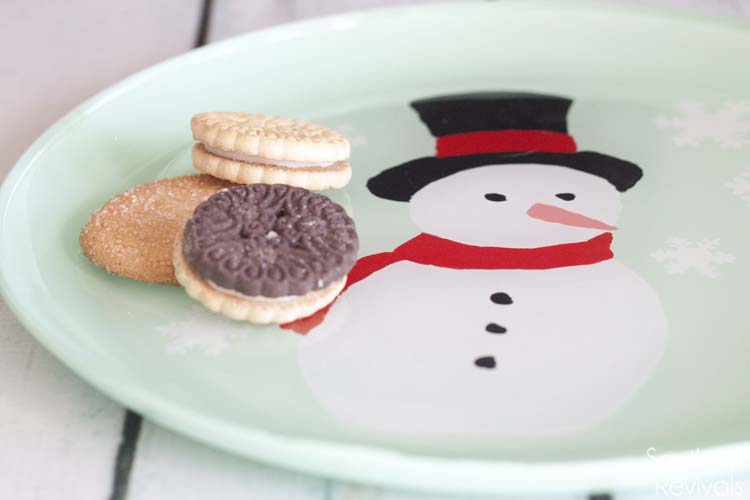
The best part is this is a project that anyone can do! You could even get the kids in on it.

Want to make dessert plates instead? Go for it! The possibilities are endless. You could even do several all at once. You’ll want to plan ahead about a week from start to finish. Day 1: Painting snowman and snowflakes, Day 2: Painting background and Days 3 – 7: air cure then bake on the 7th day.

So what do you think? Are you game for hand painting your own plates or platters this year?

Super easy and oh so cute! If you have at least one hand and some paint brushes you can DIY your own Snowman Christmas Cookie Platter, too. Here's how!

More Posts You'll Love!

  • LAST MINUTE DIY GIFT IDEA | FREE PRINTABLE GIFT WRAPLAST MINUTE DIY GIFT IDEA | FREE PRINTABLE GIFT WRAP
  • DIY Hand Stitched Bear PillowDIY Hand Stitched Bear Pillow
  • Scandinavian Winter Wonderland Party IdeasScandinavian Winter Wonderland Party Ideas
  • Farmhouse Christmas Entryway Styling IdeasFarmhouse Christmas Entryway Styling Ideas

Filed Under: Crafts, Southern Revivals Leave a Comment

IF YOU LIKED IT THEN YOU SHOULDA PUT IT IN YOUR INBOX

* indicates required
Email Format
« DIY Wooden Reindeer Stocking Holders
How to Host a Holiday Coffee Bar | And Save Money Doing It »

Leave a Reply Cancel reply

Your email address will not be published. Required fields are marked *

This site uses Akismet to reduce spam. Learn how your comment data is processed.

Follow Me

Image Map


Popular Posts

Pottery Barn Inspired Dresser Makeover
Southern Revivals | Nautical Guest Friendly Boys Bathroom Reveal

MORE FROM SOUTHERN REVIVALS

Farmhouse style DIY Garden Fence

Farmhouse Style DIY Garden Fence

Southern Revivals | Nautical Guest Friendly Boys Bathroom Reveal

Nautical Guest Friendly Boys Bathroom Makeover Reveal

DIY Minecraft Birthday Party | How to Pull off an Awesome Party with Limited Resources

DIY Birch Log Candlestick Holders

DIY Birch Log Candle Stick Holders

The Best Primer for Painting Furniture

Southern Revivals is a participant in the Amazon Services LLC Associates Program, an affiliate advertising program designed to provide a means to earn fees by linking to Amazon.com and affiliated sites.

Copyright © 2023 · Southern Revivals · Log in