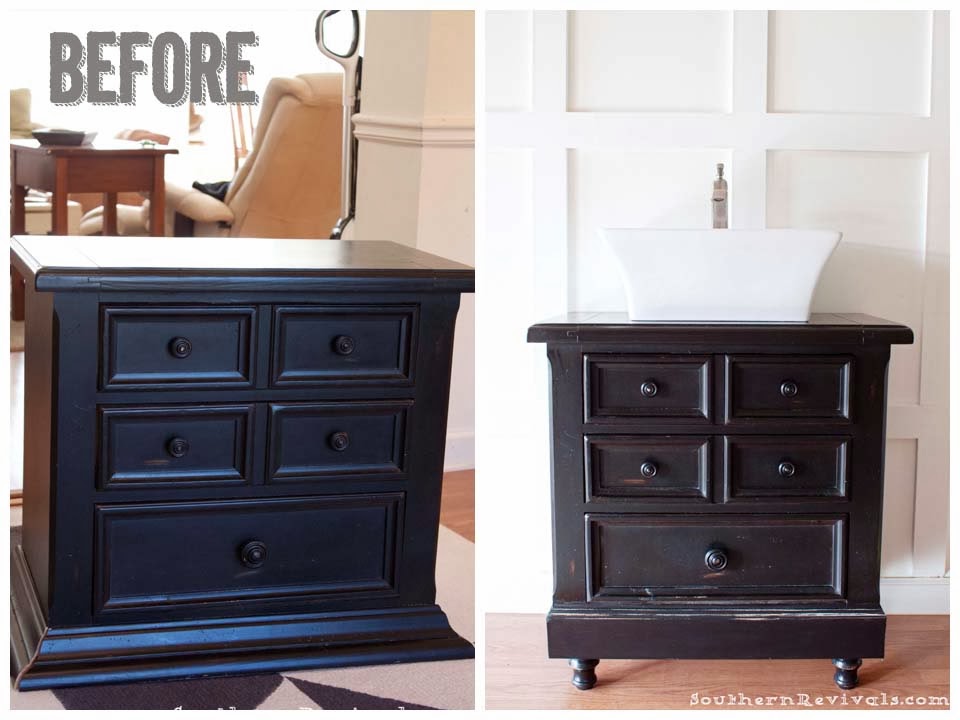
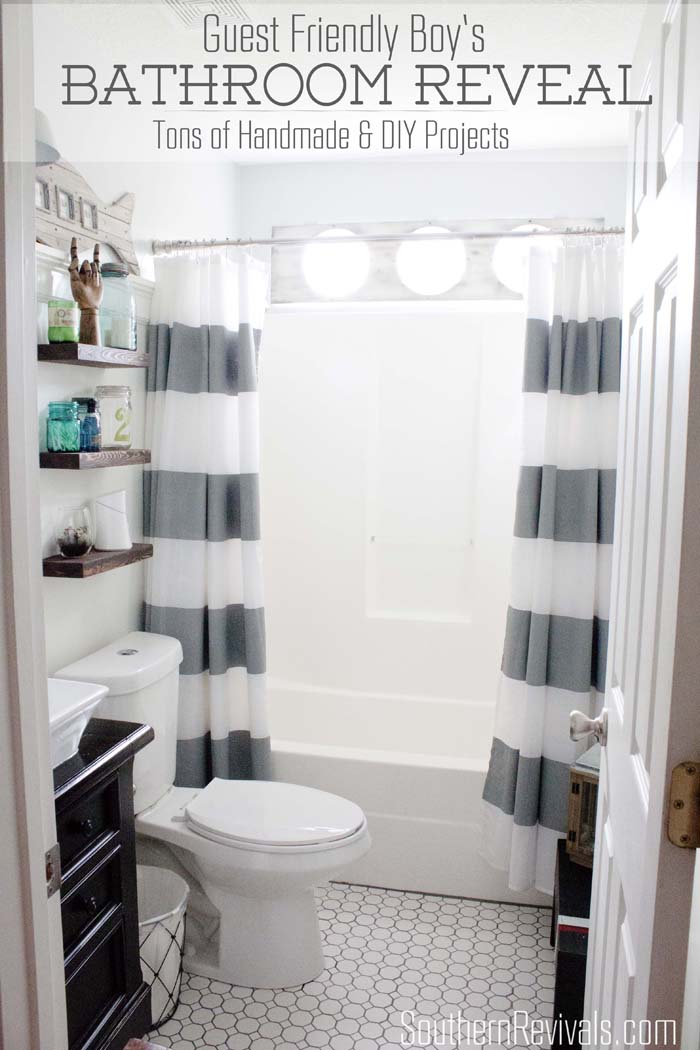
Well. Most of it. The other piece, a nightstand, you’ll find in our newly remodeled bathroom. Here’s how we made the transition from nightstand to bathroom vanity and tested out some new chalky finish paint in the process! {And you won’t believe how easy it is to find and at half the cost of other chalky-finish brands!}

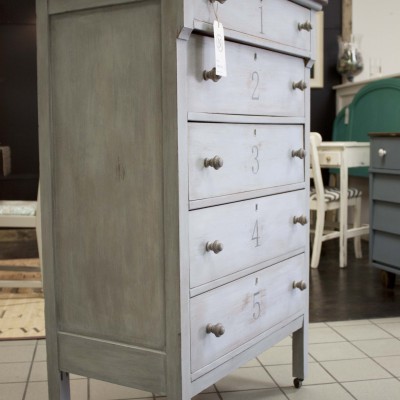
So here she is. One of the furniture pieces that I will probably keep forever out of guilt. I am just glad she’s still stylish!

She doesn’t need that bottom piece of molding though. We need her taller for her to be a vanity with a sink so we’ll remove this and add some height.

Here she is without her skirt!

Originally I had envisioned building her up enough to add a shelf big enough for some wire baskets underneath but then I realized that would make her entirely too tall to be functional.
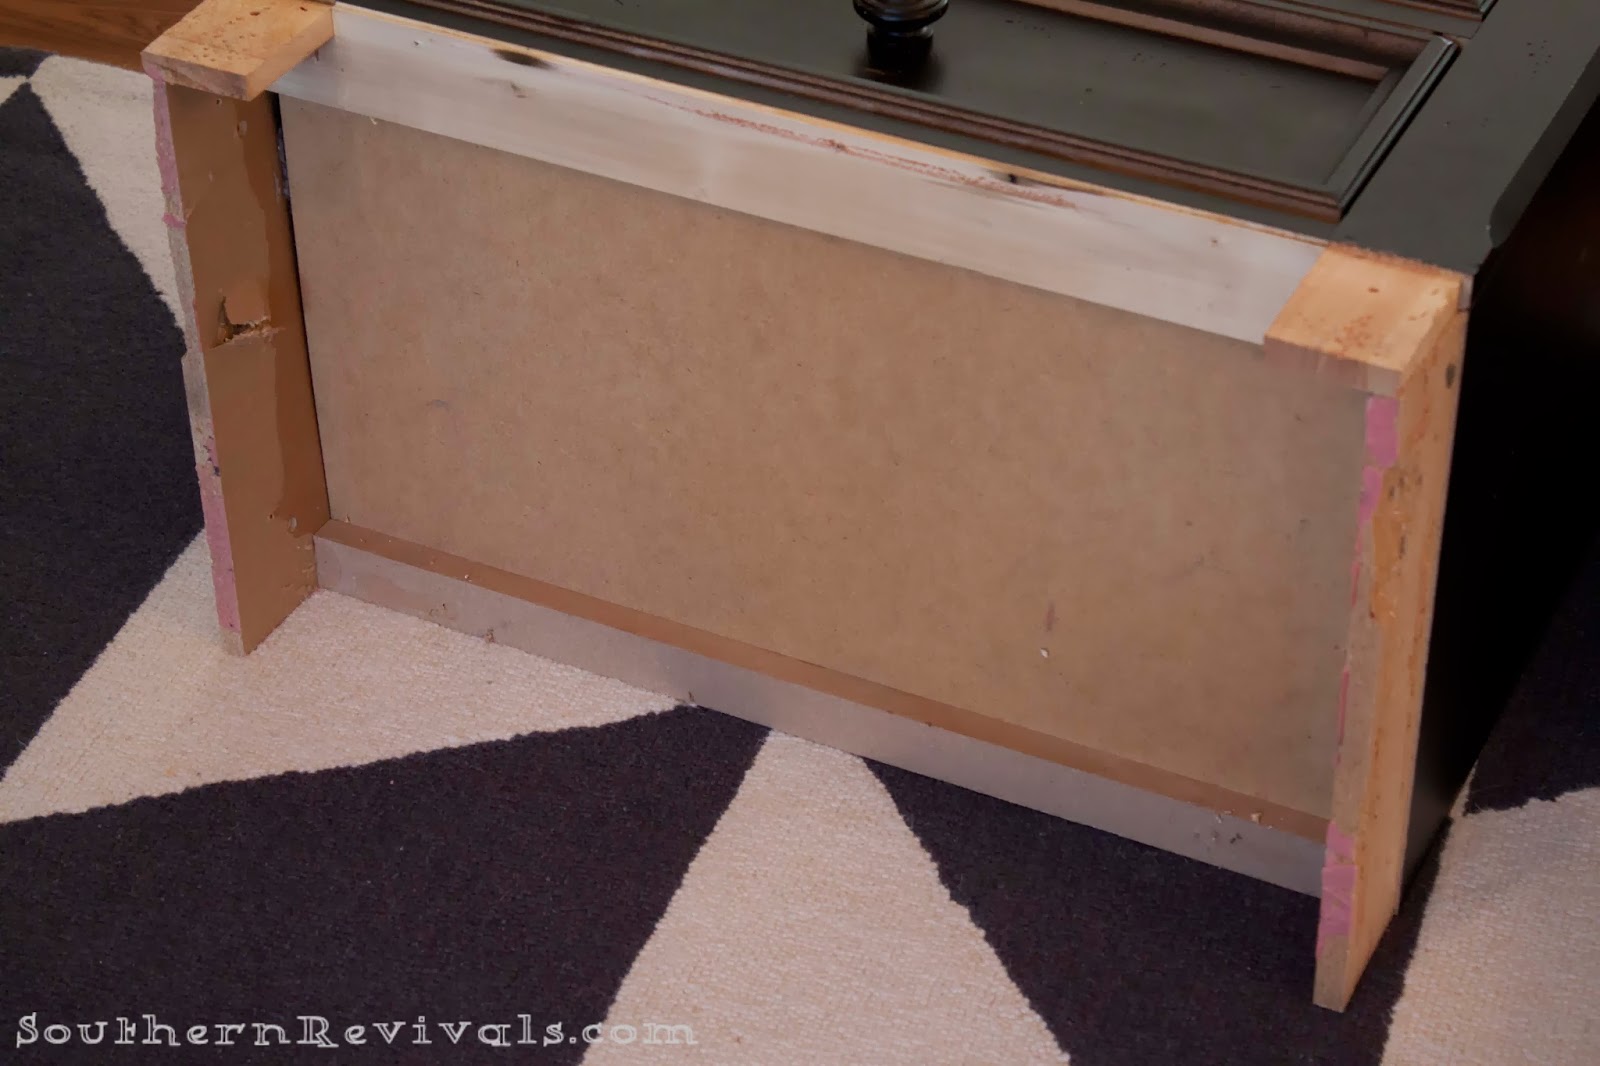
Instead we decided to add an MDF panel underneath to giver her stability.

We attached legs to the MDF panel to give her the right height for the sink we’d chosen.

When we were done adding the MDF panel and attaching legs, that left a gap between the existing piece and what we’d added. So we covered that with molding.

In order to make the added components blend better with the existing cabinet, I sanded the molding down (in certain areas) to bare wood and stained those areas along with the legs we added.

This pre-primed molding was an unauthorized purchase made by my husband. I was truly skeptical as to whether I’d ever be satisfied with how it blended. The last thing I wanted was for it to be obvious what we’d added.

I was excited to try this new Chalky Finish paint from Americana® Décor available at Home Depot.

I have used a lot of chalk-style paints, and while there are only a few I never want to have to use again, I do have my favorites. And this is one of them!
Silky smooth, ultra-matte finish that adheres to most surfaces without the need to prime or sand. These pint-size darlings come in 29 amazing colors and, the best part? They are available at your local Home Depot!
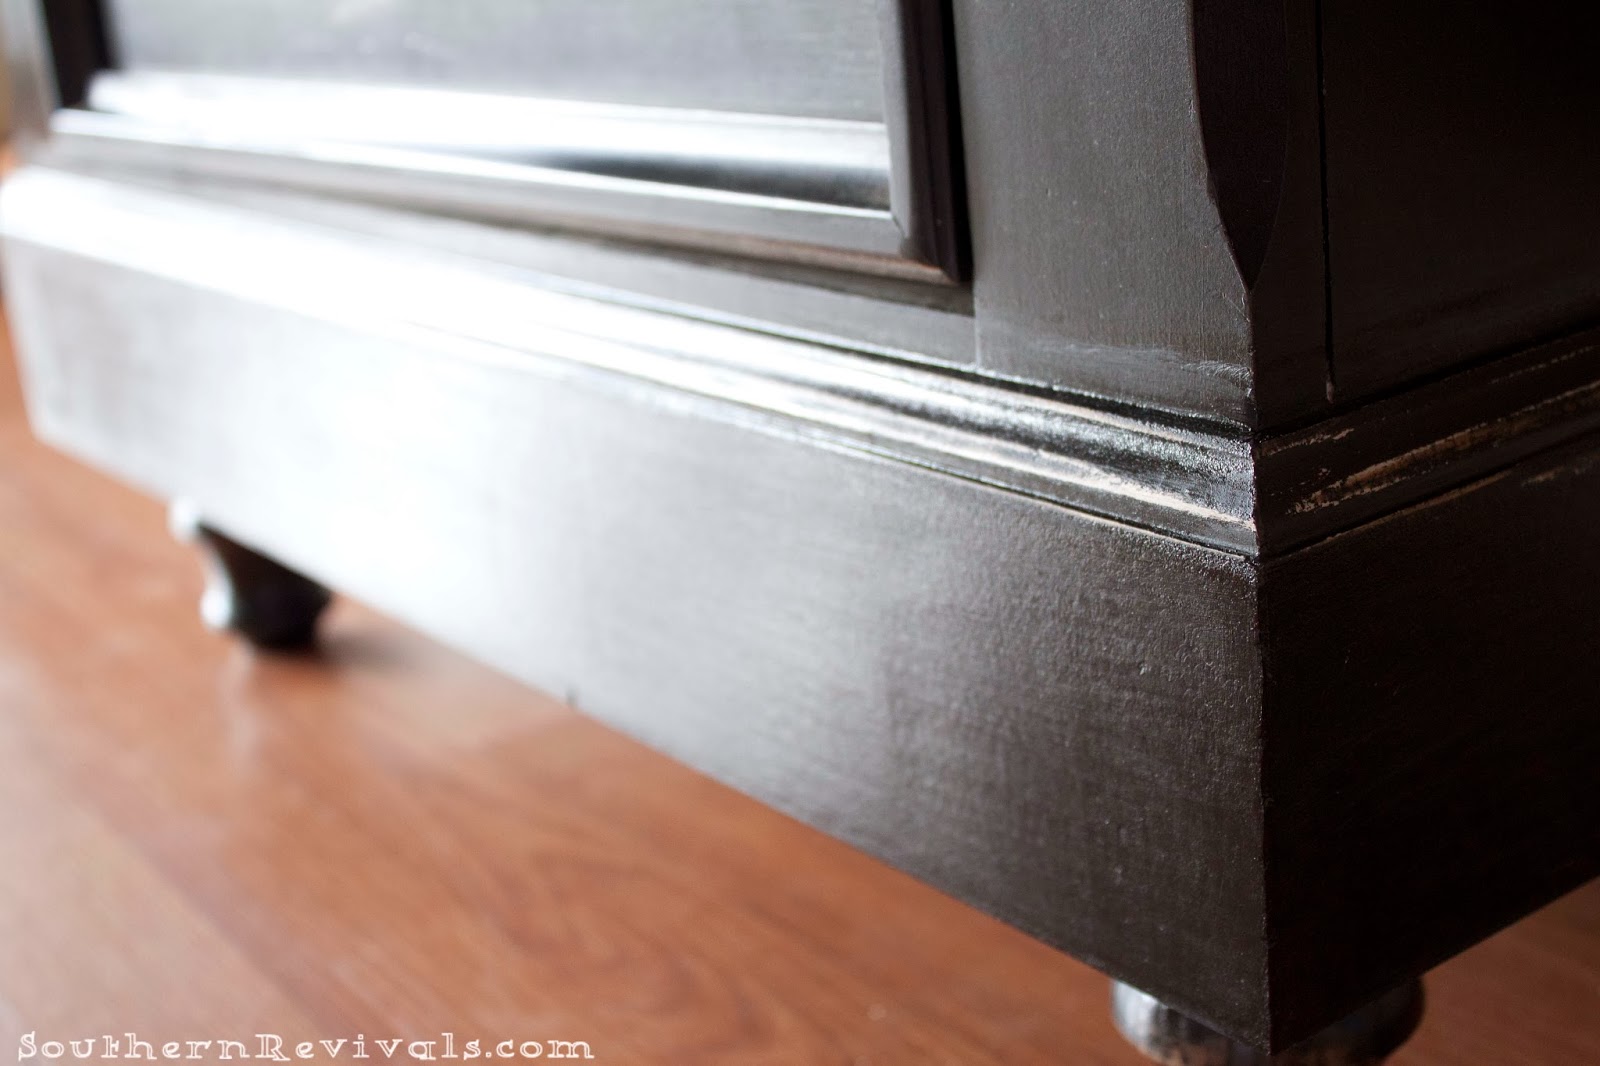
While the coverage was amazing after just one coat, I added a second just to be sure. Some light distressing to uncover those stained edges I’d created before to help it blend and….
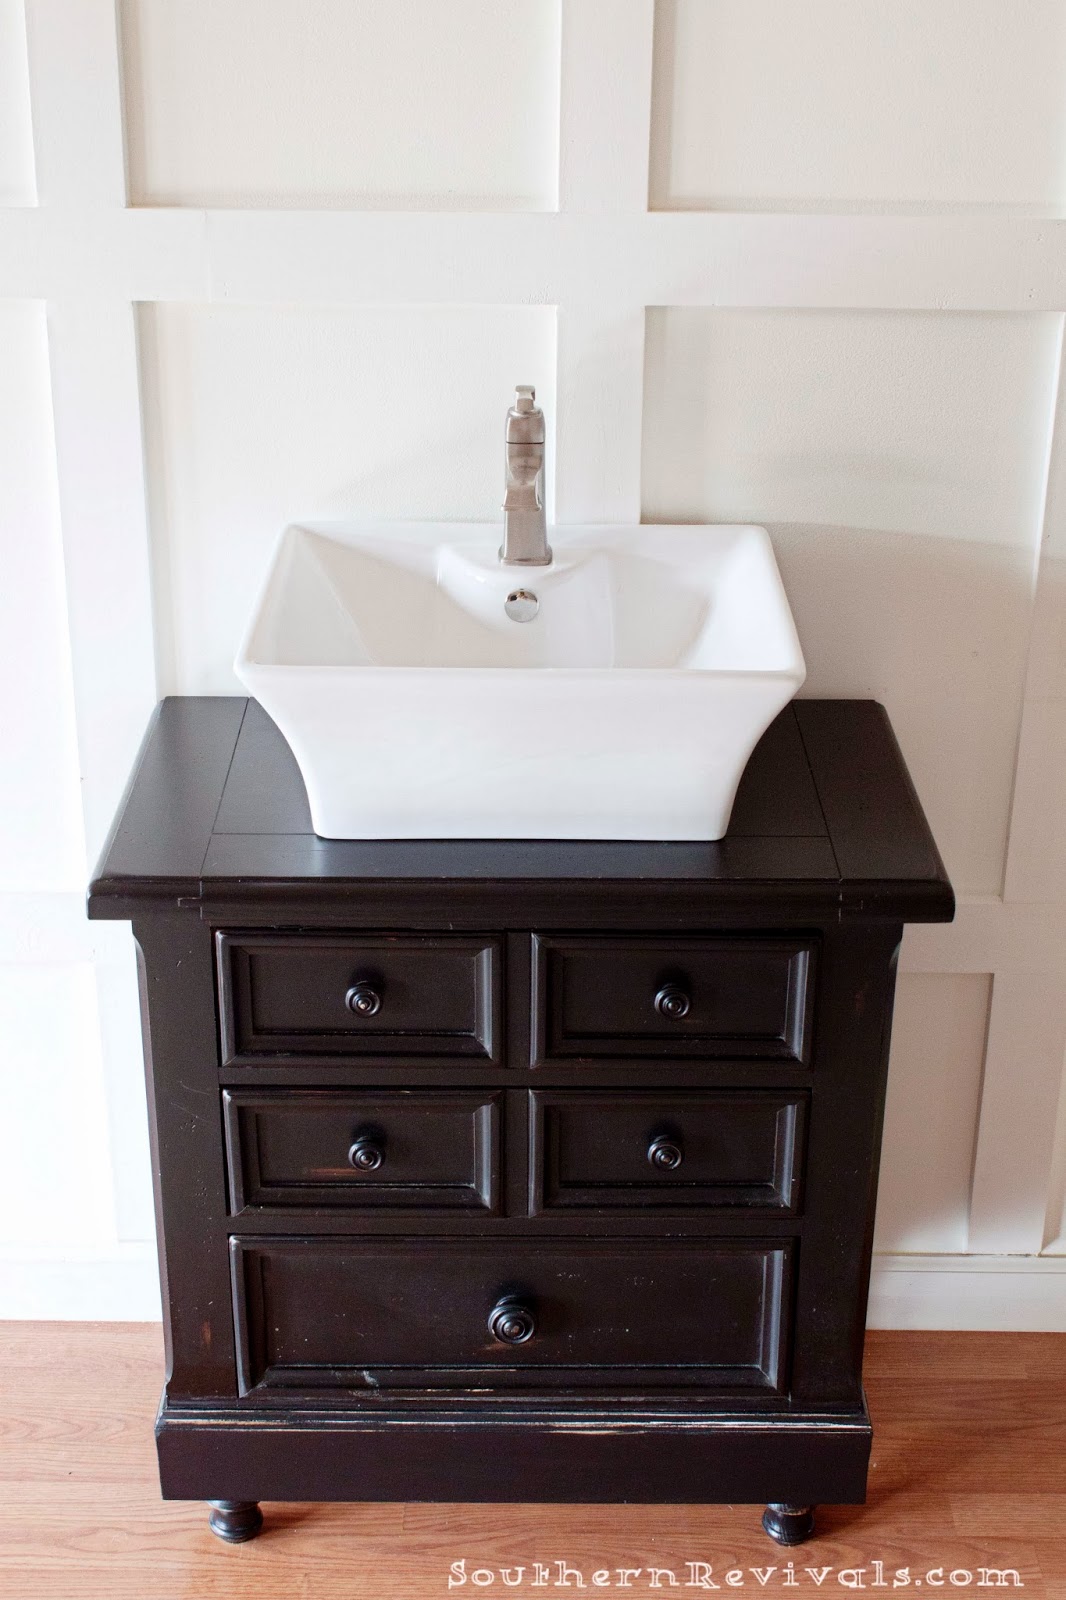
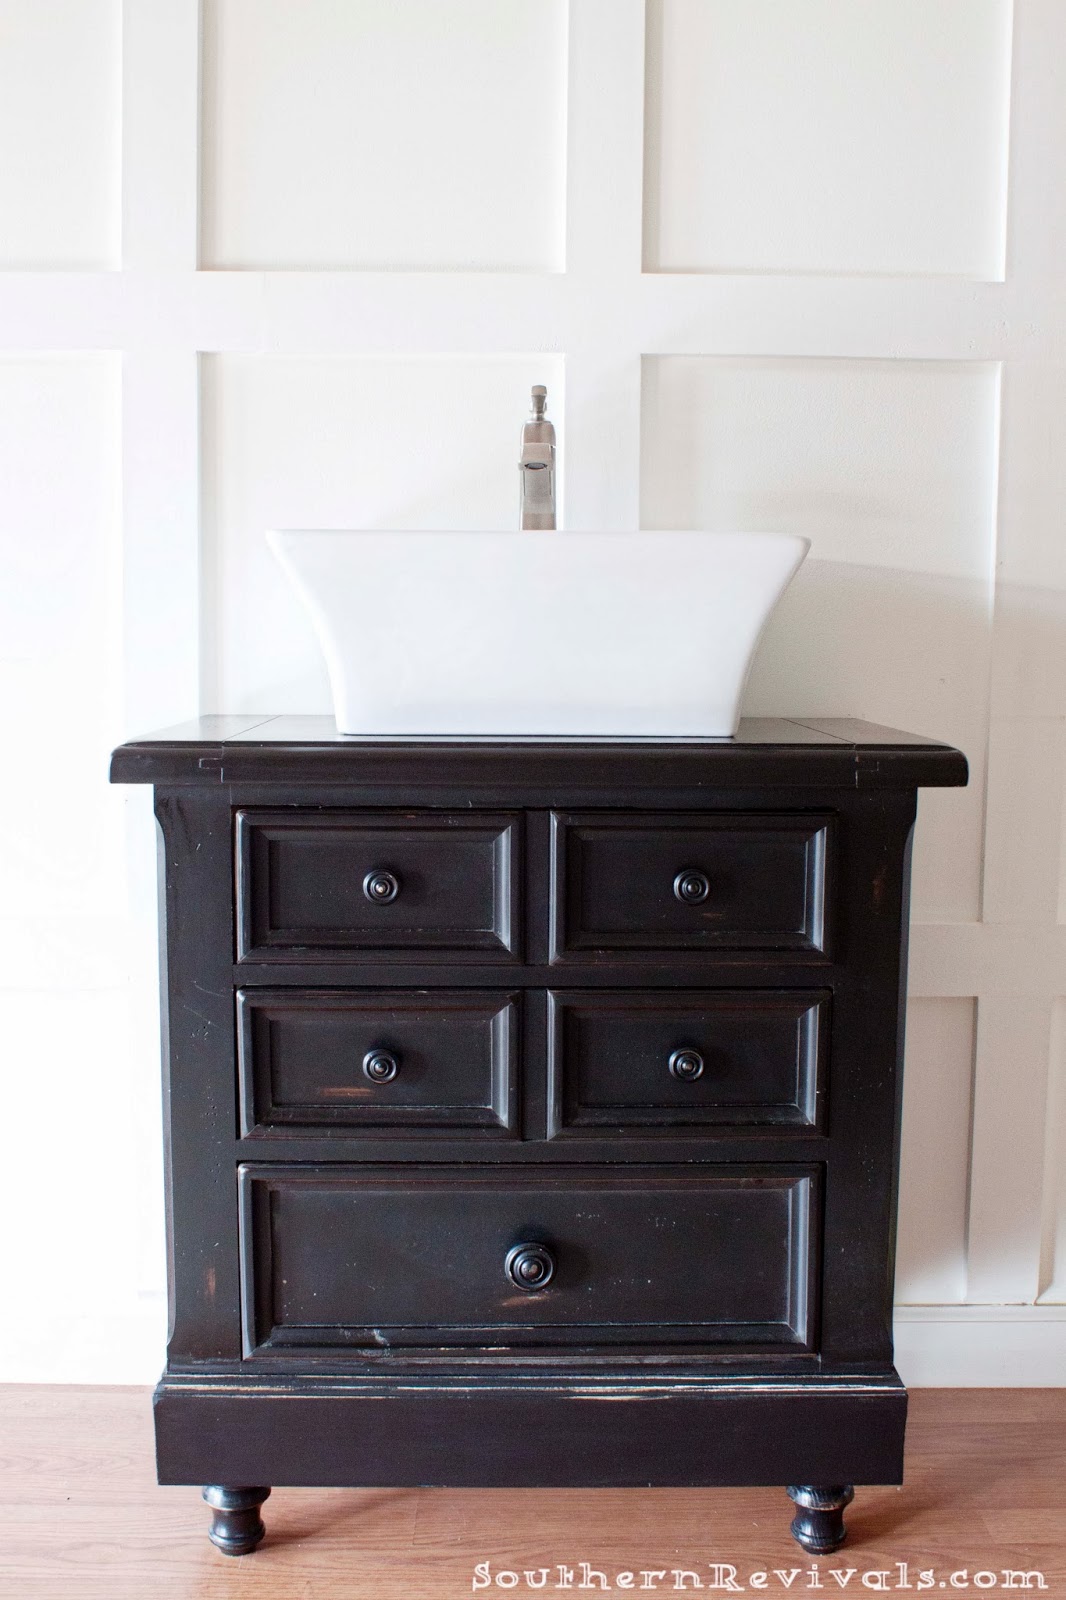
It’s amazing, right? You literally cannot tell what was original and what was added. No fancy tricks. No using my years of experience and tweaking things here and there (which I seriously thought I’d have to do). This is just how our DIY bathroom vanity turned out. Of all of the projects I’ve done lately, especially the ones that were supposed to be easy but took days, this was by far the easiest and most rewarding!
If you’d like a full run down of how we modified this nightstand and turned it into a DIY bathroom vanity, check out Part 2 of how to turn a nightstand into a bathroom vanity. If you’re wondering about that gorgeous faucet here’s how to install an updated faucet to your existing sink.
So what do you think? Isn’t it exciting that you can just head on over to Home Depot to get you furniture painting on! Are you ready to give the new Americana® Décor Chalky Finish paints a try?
See the entire Bathroom Makeover…


Does the sink sit on top with the pipes hidden where the top drawers are? Do you just have the front of the drawers at the top?
Actually, that was the plan and would totally have worked but we decided to do it a little differently. I will be posting a full tutorial on this very soon!
Thank you for sharing about this paint. I was wondering about it. Will be heading out to get.
Hi,
Your bathroom is very pretty. Can you tell me how you finished the top of the vanity? Did you seal it with something? How is it holding up? Etc, etc. I am using an old dresser as a vanity and am not sure of the best way to protect it from water.
Thank you,
Stacey
Hi Stacey,
Yes, definitely seal a vanity top to be used near water. I like Waterlox. It can be a tad costly but totally worth it.
I love this. Wondering how you sealed the top part of it, in case it gets wet??
Thanks you! Yes, definitely seal against water damage. I recommend Waterlox.
I love this! I found the Americana Chalky Paint at Hobby Lobby and can’t wait to try it out on my next project!
Thanks Jeffrey! Have fun!
Jamie,
Have you posted the full tutorial, as you stated you would back in March…. We are going to be remodeling
our girls’ bathroom and love this idea.
I’m sorry, I did not. Mostly because my cabinet is original to my situation, the sink I used, etc. I was afraid it would be too specific to my project and wouldn’t be of much help. Maybe I’ll try and revisit it anyway if readers feel it would help them. Thank you!
Hi Jamie. I think the tutorial would be very useful regardless of how specific it is to your project. Especially the part about what you did around the bottom with the MDF and sealing the top! Thanks for posting!
Thanks so much for you input, Ann! I will post a post together soon. I’ll be sure to address these things specifically. Thanks again!
Hi, just wondering what color paint you used. Thanks!
Hi Laura,
This color is called, Carbon. Thanks!