If you’ve perused a home decor blog, magazine or tv show lately you’ve probably seen a tree of some sort on a wall. And no matter what your style, Modern or Whimsical, there’s a tree for you!
So you want a tree on your wall? Well it’s easier than you might think!
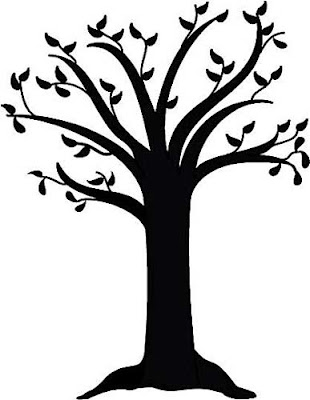
You start off with the silhouette of an image. It can be a tree or a giraffe. Whatever floats your boat. It also doesn’t have to be a silhouette but since they’re solid, they’re just easier to work with. Feel free to get fancy.
(Here’s the silhouette of a tree that I got from searching “tree silhouette” in google images. If you want to use this tree, click on the image. It will open, making it larger. Then print it or save it to your portable drive. Take it to your local office supply store or print shop and have them make you a transparency.)
You’ll need an over-head projector (Don’t worry if you don’t have one. You can rent one from your local library or office supply store or if you have a teacher friend you should be able to borrow one.), a transparency, tape, pencil, pencil sharpener (cause the wall will eat up your pencil lead and you will need to sharpen it like a million times). And some paint. Obviously. A paint brush or two and a mini paint roller.
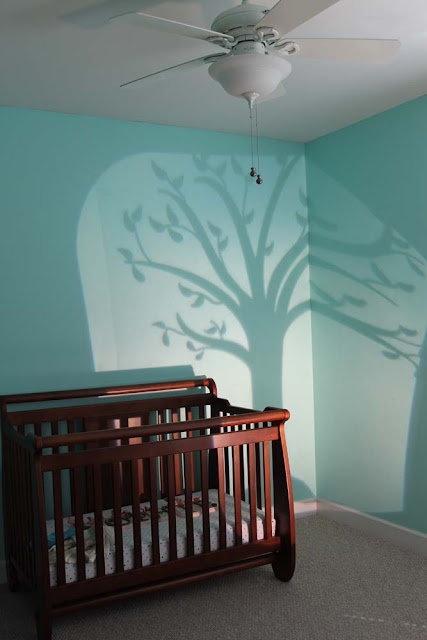
Pick out the perfect spot for your tree. Here I’m going to make the tree extend from one wall to the other. To do this you’ll project your image so that it bends over to the other wall. Be careful here, the refraction of the image when it bends over to the other wall will cause the image to stretch making it out of proportion to the rest of the image. Trace the portion of the tree that isn’t bent first, and then trace the refracted image keeping in mind the proportions of the first part of the image and adjust accordingly. Don’t worry it isn’t that hard. You can do it.
If you want to go the simplier route, just project your image onto a flat surface. If you’ve never used an overhead projector before, here are some things to know. The “arm” of the projector has two main parts: the mirror and the adjustment knob. When you turn the adjustment knob it moves up or down making the image bigger or smaller. If you move the whole projector forward, it will make the image smaller. If you move the projector back, it will make the image larger. Moving the mirror up or down will move the image up or down.
Place the transparency onto the projector. You will tape it down later, but not yet. Plug the projector in. Turn it on and point it where you want it to project the image. Don’t worry if it’s not big enough or askew. We’ll fix that in a minute. Using the mirror and/or moving the projector, adjust until the image is the size you want it and is where you want it on the wall. Now, you can adjust the transparency until it is straight or like you want it. When moving the transparency, keep in mind that this is a projected image so moving the transparency to the left will move the image on the wall to the right, etc. Once you get it where you want it, tape it down on both sides. Or it will move and you will be irritated.
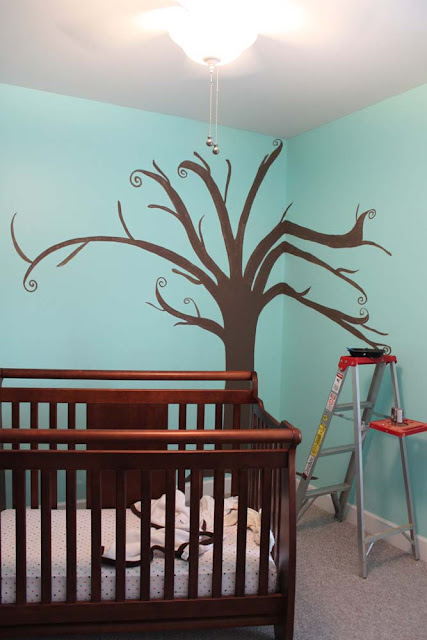
Trace the image. Don’t press down too hard. Just enough to get a faint outline on the wall. Don’t forget that pencil sharpener. I’m telling you, you’re going to need it. If you have a fabric pencil, use that. It will be easier to get off the wall later if you have places where it still shows. You will cover most of the pencil markings up with paint. But you may make changes along the way or you might have a line showing here or there. Most of the time, (except for this time when I was doing my niece’s nursery) the pencil markings will come off the wall with a damp washcloth. If that doesn’t work, the Magic Eraser will.
You can really use just about any paint you like. In this case, I’m using regular old craft paint. I might’ve spent $3. It’s Mississippi Mud (I was totally saying the rhyme in my head while typing that. M, I, crooked letter, crooked letter, I, crooked letter, crooked letter, hump back, hump back, I – but I digress). I only used about two bottles of the stuff for the whole tree. Two coats. Can’t beat that. But if you’ve gotta be all Fancy Nancy, you can use “real” wall paint.
I use regular ol’ craft brushes when doing my wall murals mostly because they’re cheap and mostly because I will ruin a brush by forgetting to wash it and letting the paint dry or worse putting the brush in water so the paint won’t dry and forgetting about it. Leaving it in that water till the wooden handle soaks it all up and begins to crack. I know. I’m a brush murderer. But also because, I swear, you don’t need the expensive ones. You will also need a mini roller brush for the bigger spaces (like the trunk space) since you will need to do two coats for a solid image. If you’re going for a watercolor image, a brush and one coat will do the trick. If you’re doing an intricate image, even a mini roller will be too big and you will just have to tough it out and do two or three coats with a brush. This is at least a full day or weekend project, so plan accordingly.
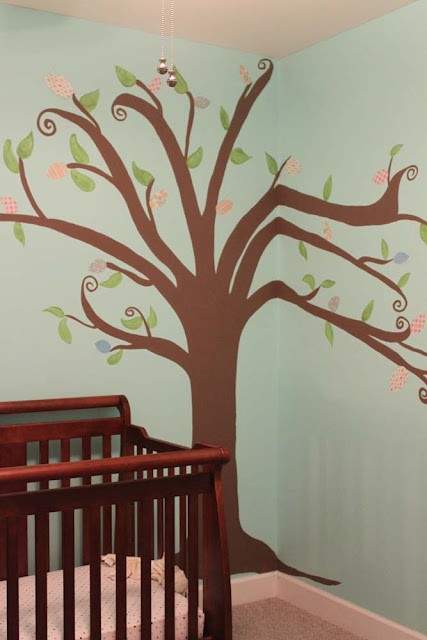
You might want just the tree. It’s cute as is. And if it’s a mod version you’re going for you’ll probably want to do just a silhouette. But if it’s whimsy you’re after, add some fun leaves and curly q branches. Here I did some leaves with paint, in Apple Barrel’s Leaf Green and then I added some funky patterned leaves which you can do with patterned paper or wall paper and some Mod Podge.
And since my SIL will be hanging the custom letters I made for my niece on the branch of her tree, I used some of the same patterns I used in her letters. And voila’! You’ve got yourself one fine custom tree. Now wasn’t that better than paying someone way too much to do it for you or using vinyl?







Leave a Reply