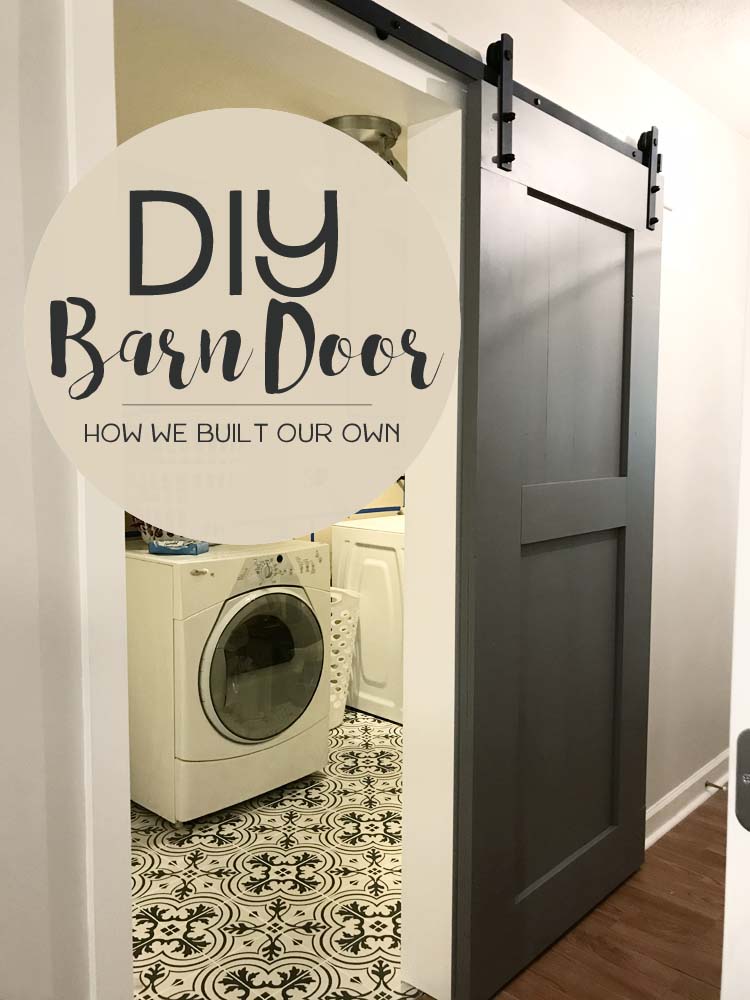
Hello One Room Challenge Week #4! I hate you. Week #1 was off to a nice enough start but by Week #2 disaster struck and I just completely skipped Week #3 because, let’s be honest, at this point I’m just playing catch-up. But! We did build a DIY barn door and I learned a lot that I could not have anticipated prior to installing my first barn door. So, today I’m sharing a DIY barn door building plan AND 5 lessons I learned installing one.
DIY Barn Door
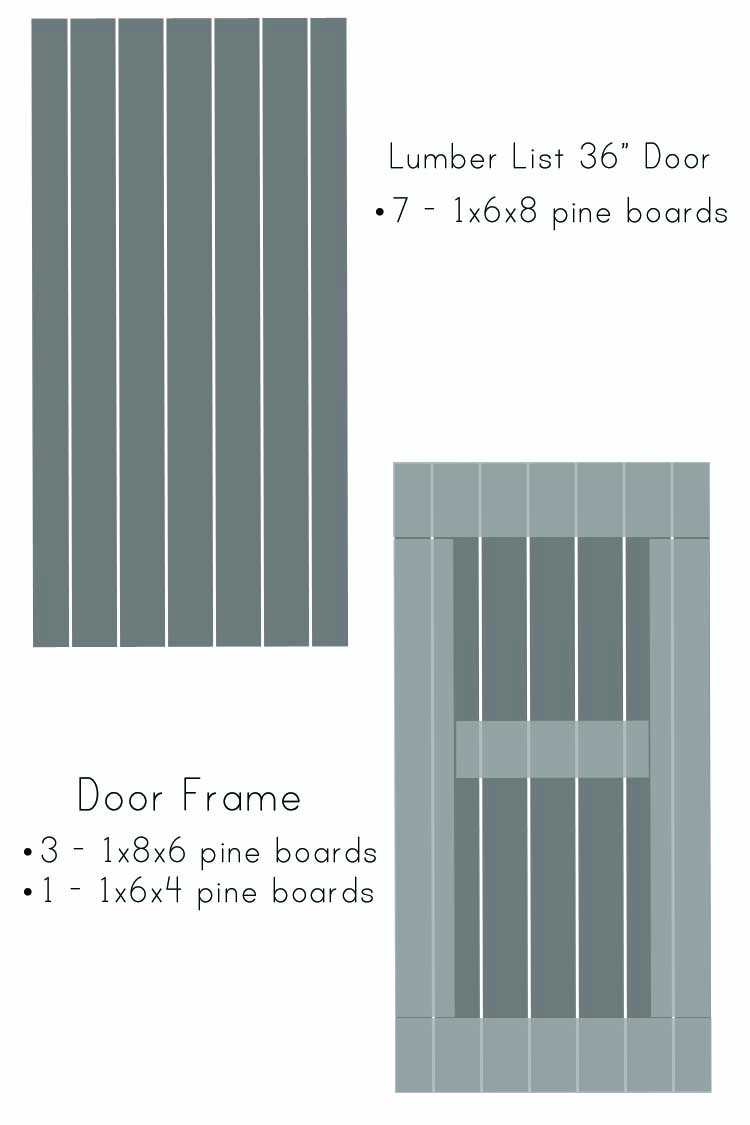
For Door – you will need:
- 7 – 1x6x8 pine boards
- 3 – 1x8x6 pine boards
- 1 – 1x6x4 pine boards
- wood glue
- brad nailer
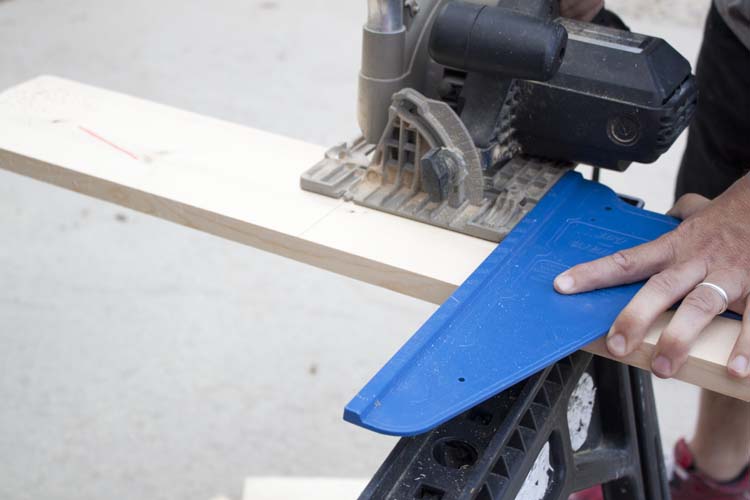
- table saw
- circular saw
- bar clamps
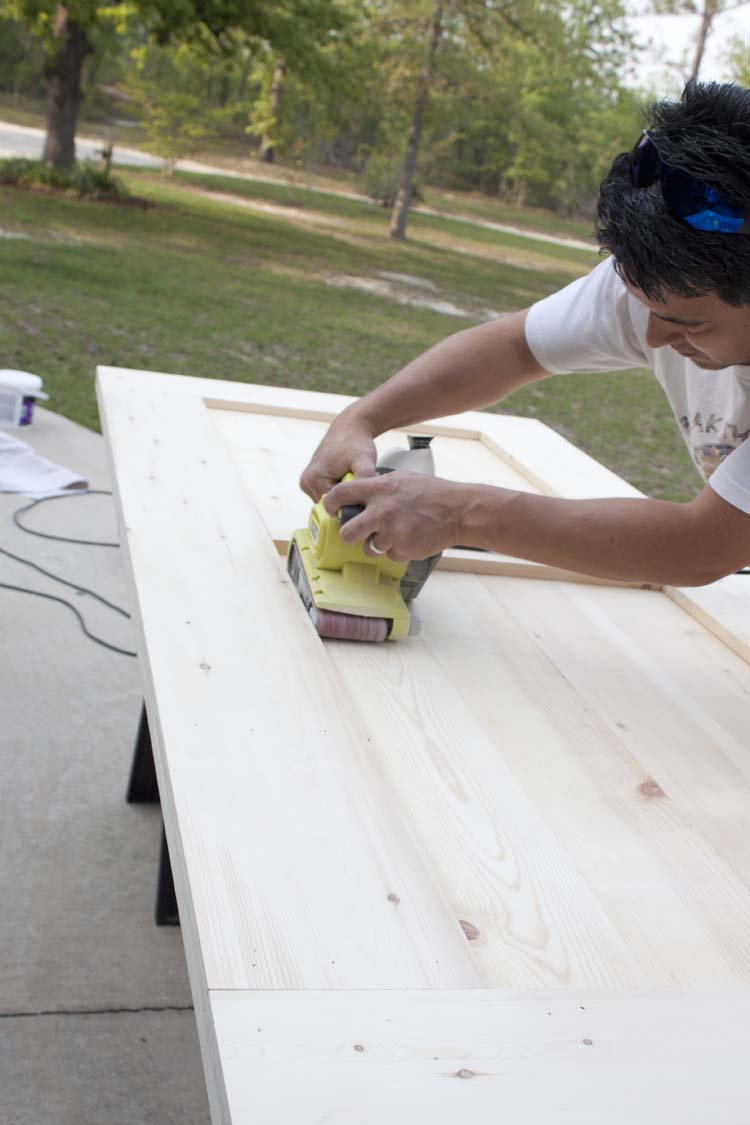
- sander
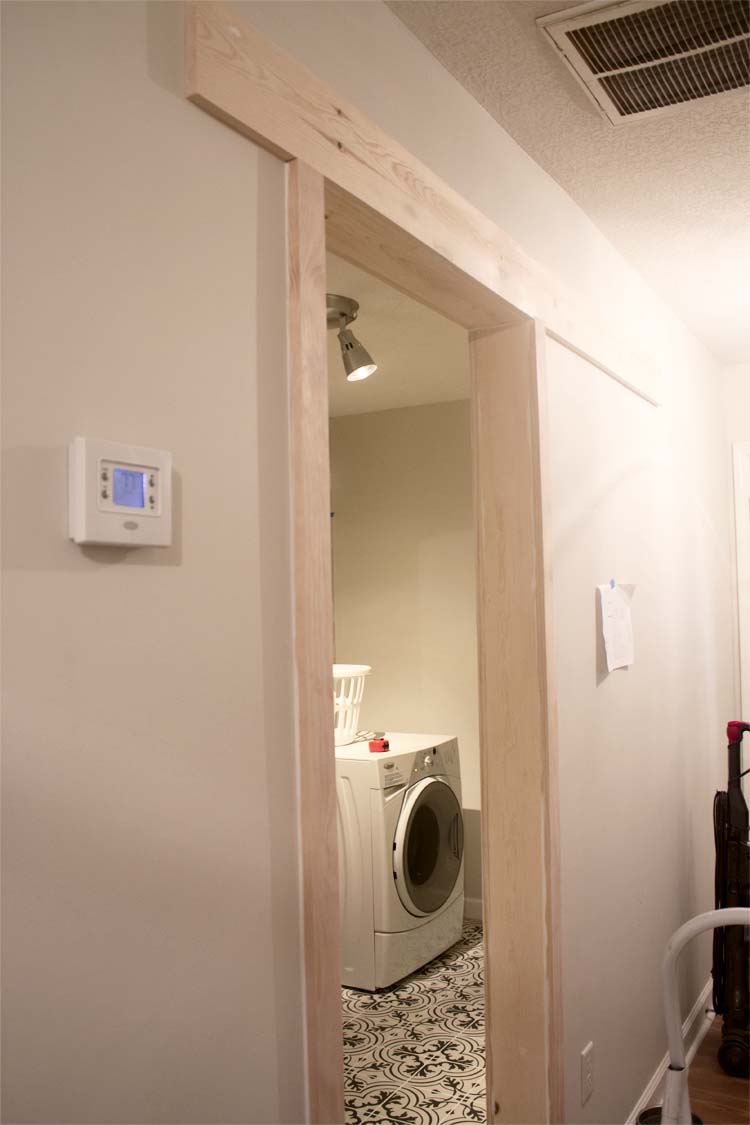
NOTE: Prior to building and installing our barn door we took out the door and frame of our existing 32″ pre-hung door. That’s what this 36″ door will be replacing. We also built out a new door frame (see in pics below) which is not necessary. I was just going for a certain look (also: see how going for that look actually saved the project below). We also made the door larger even though the door opening is still about the same size after we re-framed it. We did this so that it would slightly overlap the molding on the new door frame.
Step One:
Keep in mind this is for a 36″ door. You may need or want a smaller or larger door.
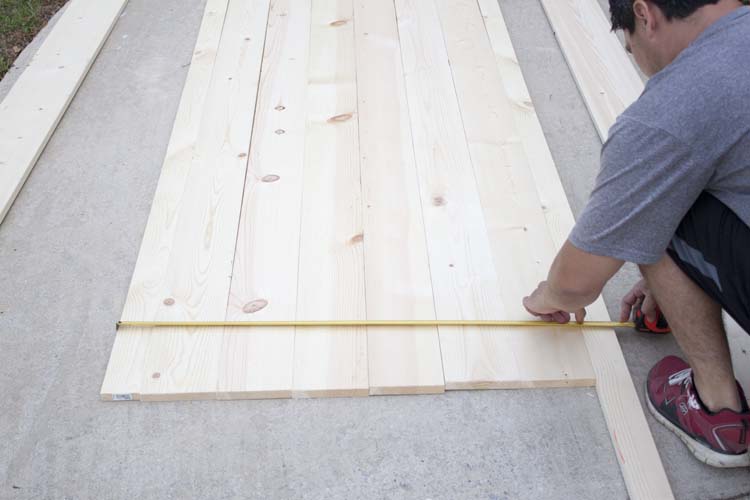
Decide how tall your door will be. [Helpful tips on doing this below]. Lay your 1x6x8 boards on a flat surface and mark where you need to cut off excess. Our door measures just under 82 1/2″ tall.
Cut off the bottom excess of each board until they measure the desired height of your door.
Step Two:
Rip 1 1/4″ off the width of two of the boards. Place these boards on each side of the outside of your door. These will be hidden by the door’s frame giving the appearance the each board is the same width. My “drawing” above is not to scale and doesn’t depict this as accurately as the actual pictures here of the door, but…it helps to illustrate my point.

Step Three:
Now you’ll cut your 1x8x4s into two framing sections to fit the width, top and bottom, of your door. For our door these pieces were 36″ wide.
Step Four:
Cut your two 1x8x6s into framing sections to fit on either side of your door. For our door these sections were 68″ tall.
Step Five:
You’ll cut the cross piece for the center of your door. I was going for more of a modern look so I placed this piece straight across and just above center. For our door that measured 21 1/2″ wide.
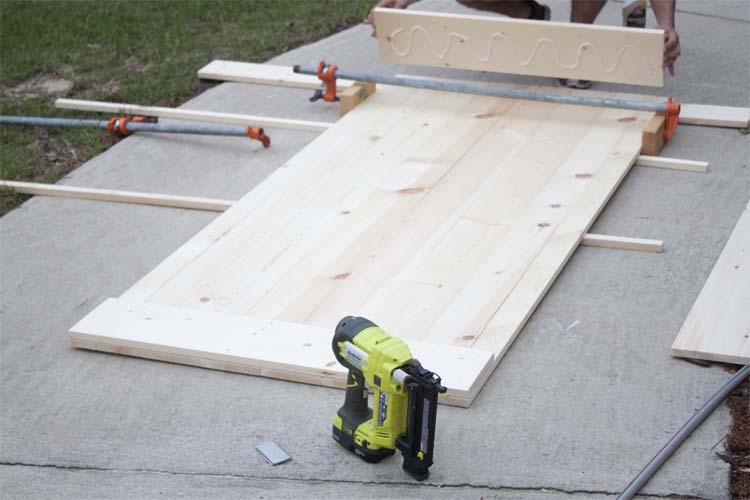
Assembling the Door:
Usually when we are doing a project like this we make the cuts and assemble as we go along. And even if we already have a cut list we measure each new step as we go along. That way we’re less likely to make a mistake. Measure twice, cut once!
So, first we cut the boards for the height of our door, removed the excess width off two of the boards and then laid these pieces out on a flat surface. From there we cut out each of the top and bottom framing pieces, careful to measure each new one as we went along. Then we measured and cut the side framing pieces.
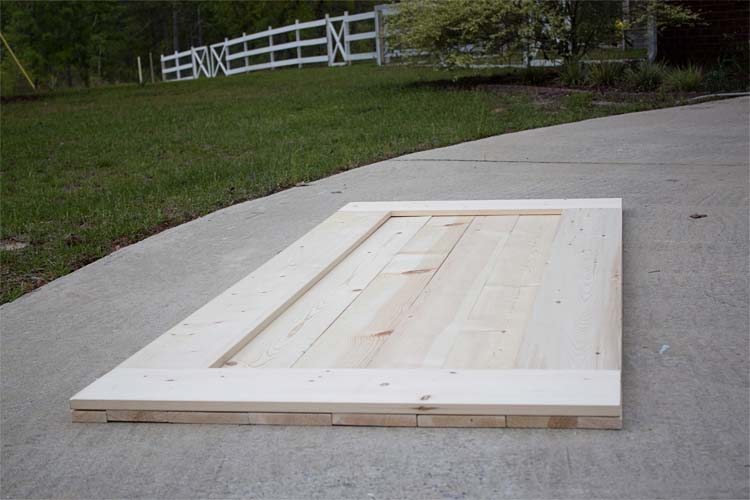
For the final assembly, we started with the top and bottom of our frame. We used glue and brad nails and clamped each section as we went along. Then we added on our side framing pieces in the same way. Finally, we added in the middle piece of the frame, just above center.
5 Lessons I Learned Installing a Barn Door
#1 – Have your hardware before you make your own door.
It seems so obvious in hindsight but either purchase a door that’s made for the hardware you choose and purchase them together OR, if you’re making your own door, wait until you have the hanging hardware before building your door, especially if this is your first time. This helps to make sure your door and hardware match, you’ll have length to cover door opening and height to leave room on floor for the door guide and to accommodate your flooring. For example, we’ll be installing new flooring soon throughout our home. My current floor is 7mm, my new flooring will be 12mm. Definitely something to think about when deciding on the height of your new door! For additional considerations on door height, see #5 below.
#2 -How long is your door track?
This might be eye-rollingly obvious right now but, I swear, when you get elbow deep into a new project, especially one with several steps, this is an easy oversight. Generally speaking, barn door tracks come in two sizes: 6ft & 8ft. Don’t get all excited about a big, chunky barn door, build a 40″ wide one for a 6ft long door track. If you do, you won’t be able to get your door to completely clear your doorway. Wonk. Wonk.
#3 – What will you anchor your door track to?!
Right now you’re like, Duh! Above the door, Jamie. But I didn’t ask you where you would put it. I asked, what will you anchor it to?
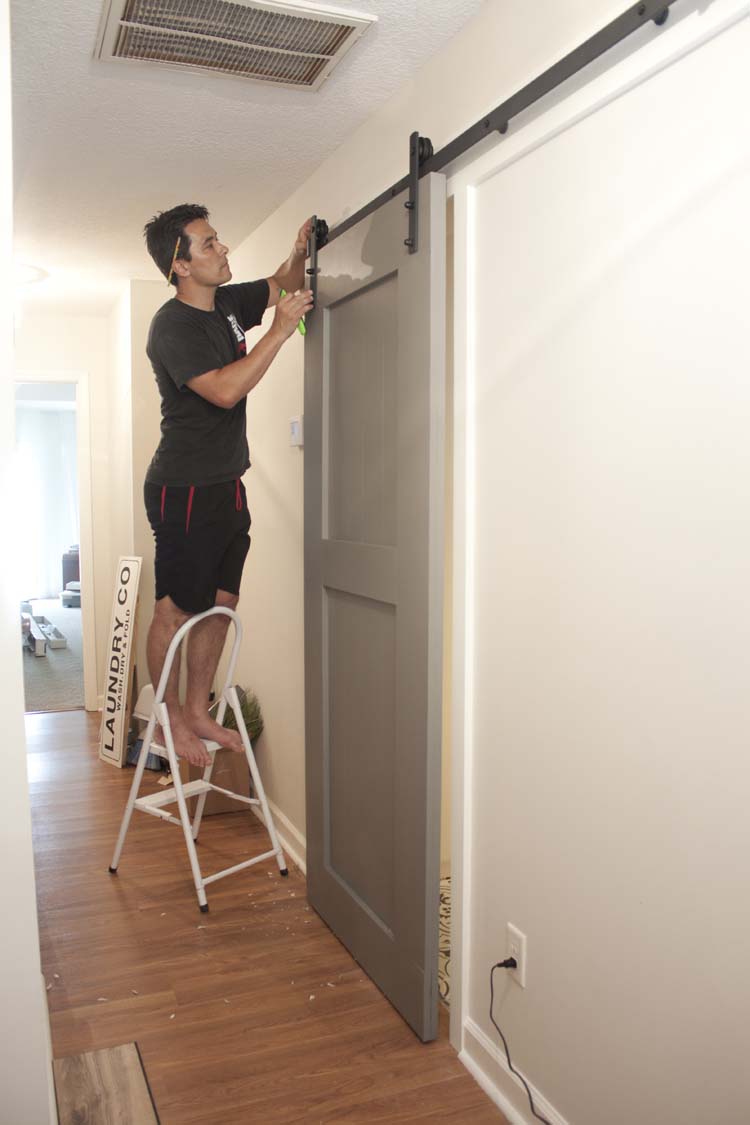
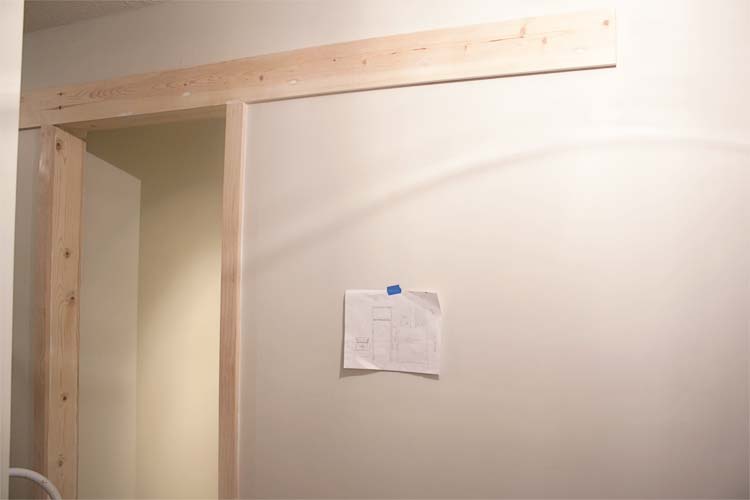
I mentioned above that I had a very specific idea of how I wanted all of this to look in the end. From the new door frame to the top header piece above the door, I had been stalking this look out for quite a long time. As we’re preparing to hang the hardware onto my freshly painted new door frame my husband turns to me and says:
Him: Good call on this design, J!
ME: Yeah? Why’s that?
Him: Because the holes on this door track don’t match up with the studs.
ME:
It’s at this point that I really wanted to pat myself on the back and say, Yeah I totally thought about that when I was designing this door. But this is one of those times I can honestly say I was truly only focused on design and not so much functionality.
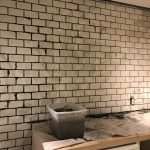
As it turned out, the header board was necessary (not just pretty) because it IS anchored into the studs. Stud spacing is 16″ apart. The holes on the door track are 12″ apart. Without the addition of this header board the door track would only have hit something called a header inside the wall, which is basically two 2x4s stacked on top of each other, in a couple of places over the doorway. Which is great if you’re only ever going to have your door closed. But if, like me, you’ll leave it open a good bit of the time, the door will hang on a part of the track that is not anchored into the studs.
You could use drywall anchors, if your door is especially lightweight, but our door is big and heavy and I would have been totally uncomfortable with that. Since then I’ve looked at several barn door tracks and they all seem to have spacing that doesn’t match up with stud spacing. So now you know!
#4 – Door gap or not enough clearance for molding
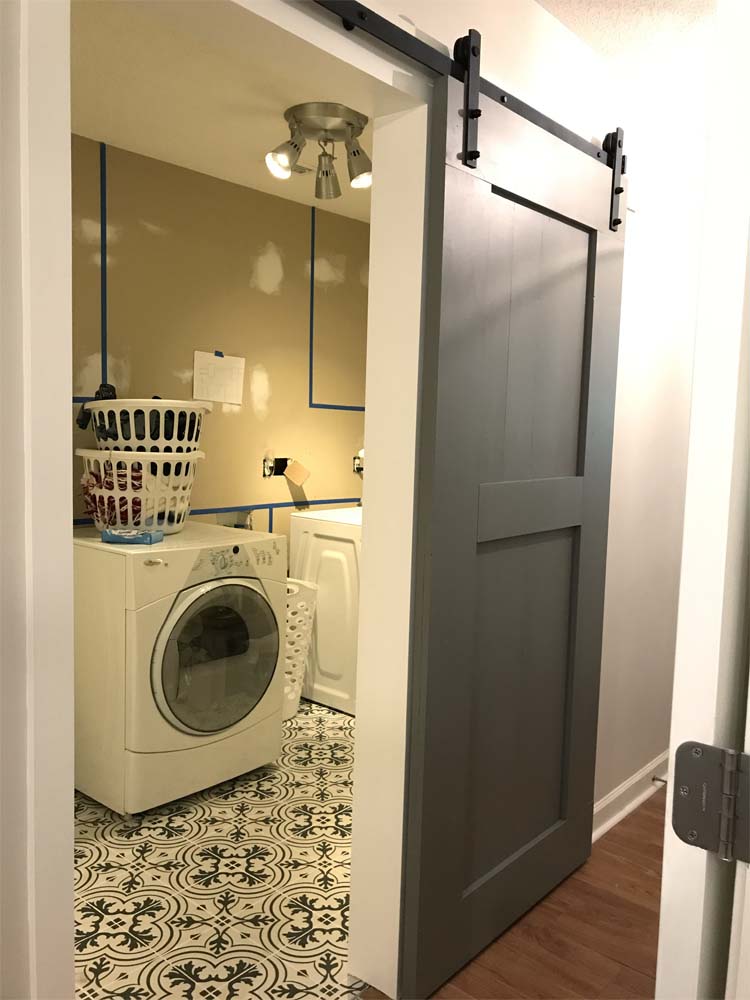
So another thing that I didn’t totally anticipate is the fact that, with the addition of the header board on top of the door frame, the door, once hung, would push the door out further from the wall/molding. In other words, the header board is 3/4″ thick and that is exactly how big the gap is between the molding and our door. Which isn’t a great big deal and it actually doesn’t bother me and really isn’t at all noticeable. But this is a laundry room…and not a bathroom, know what I’m saying? This could easily be remedied with some molding pieces on the sides of the inside of the door if I chose.
It is definitely something to keep in mind as is making sure you have enough clearance for your molding which the door track should already be designed to accommodate but, if you’ve got big fancy molding, it may not be something you want to take for granted.
#5 – That Darn Door Guide
I had never given this little nugget a single bit of thought. Not before this project, not during this project and not even a single second before it came time to install it (which was after the door was already up). In fact, I don’t ever recall even having seen it until that time. Once I did see it, once I did think about it, I knew we had a problem.
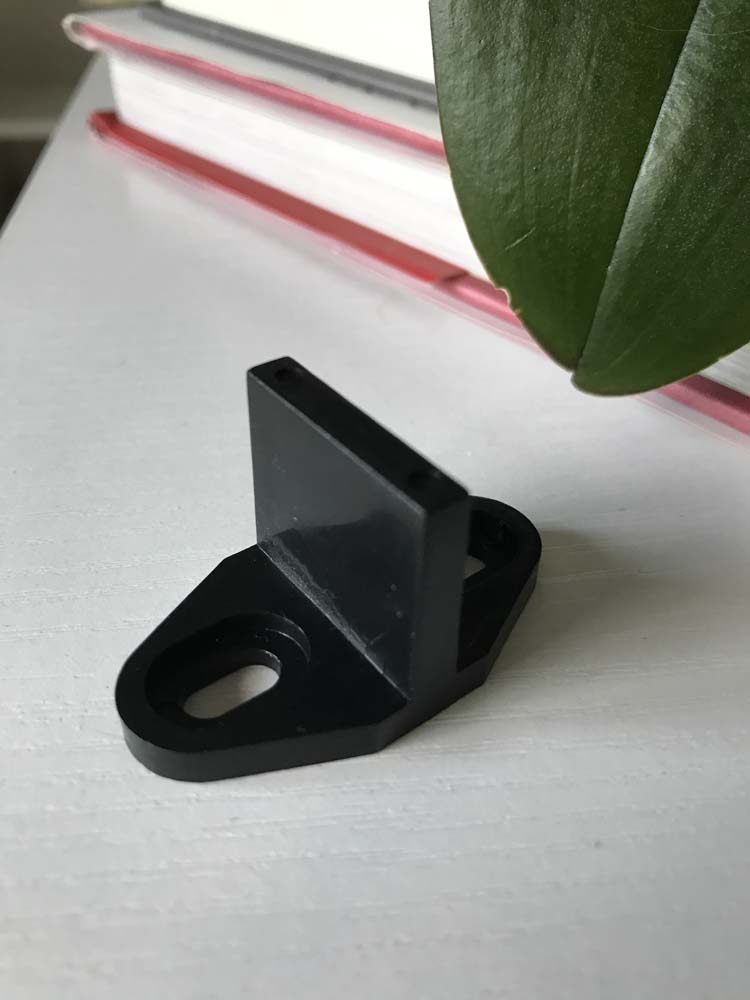
This is the door guide that came with our barn door hardware kit. This is the ugly stepsister to that big beautiful door track hardware that you have at the top of your door. It essentially serves a similar purpose but, whereas your door track is what your door hangs from, the door guide stabilizes the bottom.
The problem with this one is that it requires a groove that runs along the entire bottom of your door for it to fit into which, clearly because I’ve never even met this door guide, I wasn’t prepared for. And at this point I’m not willing to take it down and try to figure out how to route one out.
Also, it requires being secured to the floor. My issues are twofold with that: 1) My flooring will increase 5mm in the next couple of months and I’d have to reinstall the door guide all over again and 2) I’m not even willing to drill into my old, ugly floors much less my new ones! So my quest for door guide alternatives commenced and I wound up having to spend another $35 just. for. the. guide. which made my “good deal” on door hardware not quite the good deal I thought it was.
BUT new door guide is a wall-mount guide so no drilling into the floor. Plus, it’s universal so it’s made to accommodate just about any door thickness and your door just glides between the rollers instead of having to cut a groove into the bottom of it. So, more money spent but problem solved.
What’s next for me and the ORC?
In less than two weeks I have to complete another tile job for this room, build out and paint the washer and dryer partitions, install the countertop AND cabinets and then build a new sink stand because I wound up not being able to rework the old sink cabinet to accommodate the new design. I’m not particularly sad about that last bit because I was actually kind of digging on an all new space but I was trying to be frugal. Y’all keep me your prayers, yeah?
![]()


Excellent instructions!! I’ve been considering a barn door for our laundry room, but I’m not sure if we have enough room. Yours looks so great!
I’ve always wanted one and thought there wasn’t really any place in the house where one would work. I finally realized the laundry room was the ONLY place in the house that could accommodate one. I am so excited!
Oh this is totally one of my fav ORC posts. I’ll have to copy cat this fab door in the fall. Thanks for sharing such great directions. Looking forward to seeing more! Susie from The Chelsea Project
Your door turned out great, and I’m loving that tile floor! My husband just built a barn door for my ORC room, but we haven’t installed it yet. I did not think about anchoring the door, but my husband was one step ahead of me on that one. Great tips!
I can’t wait to see yours! Thanks!
wow!! that looks fantastic! can’t believe you did the either system with the door DIY style! bravo!!
Thanks so much, Tim!
Where did you get your hardware and door guide?
Hi Terry!
I got the door track and hardware from Wayfair because that was the best price I could find at the time.
Would you mind sharing which hardware and door guide you purchased from a wayfair? Thank you! I love your doors.
Hi Michelle,
I can’t seem to find it but, to be honest, I like the one I got from Home Depot for a different door even better. It looks almost exactly the same but it’s cheaper!
Can you post a pic of the door guide you ended up with and how it works? I’m a bit confused 🙂
Where did you get it? I am installing a barn door on a powder room that has minimal space and I’m not crazy about the floor mount style either. I am also getting my hardware at Walmart for best price, and even with the extra piece it will be cheaper than the others I’ve found.
Hi Debbi,
I haven’t installed the guide yet. The one that came with the door hardware is a floor guide. It required me to cut a groove into the bottom of the door in order to use it and then to screw the guide to the floor. And, as you said, not crazy about doing that to my floor. The door guide I got to replace it mounts to the wall and is basically a little shelf the door sits in to keep it from swinging out at the bottom. I got it from Amazon. It was kind of costly, about $25.
I haven’t installed it yet because I am waiting until we get our new floors installed. It’ll just be in the way otherwise. Hope that’s helpful!
Would love to see a better picture of the finished project where the door is actually closed. Wondering if that top horizontal mounting board looks odd when its closed. Hard to tell anything with that image and lighting.
Hi Mark,
Since I’m taking this pic in a small hallway, this is unfortunately about the best angle I’ll be getting. Lighting is also an issue here since there is no natural lighting in this space. I plan to have more photos of the door in the coming weeks when I post the finished room but there won’t be a head-on shot. I do have one that we recently installed in our master, which I will also be sharing soon, that will have better lighting and angles. In the interest of time though you can do a Google image search for header board barn door. Some good examples are available. As I mentioned in my post, it was necessary since the predrilled holes in barn door hardware don’t line up with studs. But I don’t find that it looks odd, I like it in both spaces. Thanks for stopping by!
Hi. What is the thickness of the header board that you are using? Thanks.
Hi Sam,
It’s a 1x so approximately 3/4″ thick.
This is an awesome post! I came across this as we’re thinking about adding a barn door to our basement. The one thing I am confused about is the clearance needed above the door. Can you guess what yours is?
Hi Rachel,
Thank you! I’m not sure I understand your question. Do you mean how much space is needed between the ceiling and door for hardware, etc. or something else?
This entire makeover is awesome!! I’m also looking to change our laundry door to a sliding door to gain some space. Can’t wait to see your finished product!!! It looks like your dryer vent is on the left (mine is too). Did you end up putting your dryer on the left side? If so, does your washer have a reversible door and how’s it working out? What are the dimensions of your back wall for some perspective?? Thanks!!????
Hi Julie,
I completely understand. Yes, we left the dryer on the left and washer on the right. We decided to leave it this way because trying to reroute water lines and vent was just too much trouble. Unfortunately, my washer does not have a reversible door but the space between the two keeps things from being too tight. I just pop the clothes from the washer into a basket and carry it over to the dryer. Less work than trying to reword the space. Hope this helps!
I could really use some advice on how you hung the barn door where the track did not line up with studs. I have three to hang and I have that situation and have pipes,pecans etc I can’t drill into Iwould appreciate any help you can offer.
Hi RJ
We drilled that header board into the studs and then the track into the header board since the track itself didn’t line up with the studs. Let me know if that answers what you are asking!