Uncle Joe’s Dresser Makeover Q & A:
I have a confession to make.
It might even be mind-boggling. Are you ready?
I didn’t start a blog to become a blogger. For real.
When I started this blog, I was already Southern Revivals. I had already made it a business. I wanted a place to show my clients, and potential clients, my work. An online portfolio, if you will. And this was an easy, free way to go and I already knew how to work it. So I started Southern Revivals “the blog”.
This was before Pinterest. Before I understood analytics before the term “social media marketing” was even in my vocabulary.
Honestly, I have been meaning to do an update on the Uncle Joe’s Dresser Makeover post. What I wanted to do was recreate the whole thing and show you how you could achieve the look. Maybe even do a video. But then time and life and other projects just kept happening. I would get to it one day.
This isn’t my first time at the rodeo. I was a blogger before {You can still see that old blog here: Peach Street}. It wasn’t any real success but I did it because I loved creating folk art. So I didn’t have any expectations for my Southern Revivals “blog”. In fact, I didn’t even consider it a blog. My only hope was that some local people would take a look and then maybe, just maybe, they’d hire me to do some work for them. Because frankly, we needed the income.
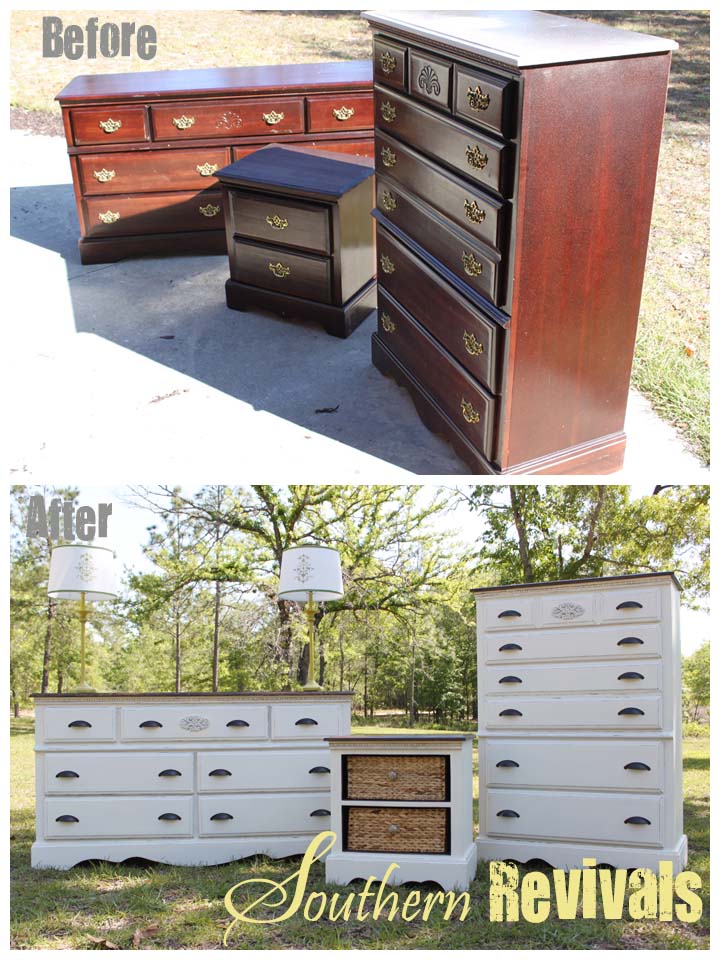
I officially started Southern Revivals, the business, in April of 2012. I had asked my SIL to “volunteer” her old bedroom suit for a revival so I could “try and make a business out of this”. She obliged me and the Full Room Revival post was born. That was my first actual post on this blog. All of the previous posts were imported from my other blog where they had originally been posted or backed dated to reflect their date of completion. In other words, prior to the Full Room Revival post, I was doing this stuff just to do it. Because it pleased me. With the Full Room Revival, I was starting a business and, unknowingly, starting something else, too.
Enter Pinterest. Do you guys remember when you had to be invited to Pinterest? Well, I jumped on the bandwagon early on and sent out my fair share of invites. It was that very month, April of 2012, that Pinterest went from just 5,000 users to 17 million and that’s when things started to happen.
I started the Southern Revivals Facebook page in order to sell my merchandise. My plan was to do the whole ‘the first person to comment sold would be the proud new owner of’ whatever new piece I was selling. I never got the chance to work it that way. I was getting commission work just as I had hoped and it was keeping me more than busy. Too busy, in fact, to create “inventory” to sell.
Then one morning I woke up to all these FB likes. And the same thing happened the next day and the next. Comments came pouring in – from people I didn’t know. People from places I’d never heard of. Where were all of these people coming from?
But then the craziest thing of all happened. I sat down to one of my nightly pin-fests on Pinterest and lo and behold, there was one of my projects posted on Pinterest. MY project. On Pinterest! And that’s when I realized I was heading in a very different direction. One I didn’t know very much about. One I didn’t know if I was prepared for and, frankly, one that I didn’t know if I wanted or not. Blogging hadn’t been my forte.
1. Why the big secret?
I’ve realized one very important thing about myself since all of this started, my dreams just weren’t big enough in the beginning. It took some time for me to catch up with you guys – and a couple of blogging conferences – but I think I am finally getting the hang of all of this.
First, it’s important to me that you all realize I did not ignore the questions you had about this piece, as some have suggested. If there was an email address provided with your comment, I emailed you the answers to your questions. I did this because, prior to that I answered questions in the comments section only, until someone told me you don’t do it that way because no one ever goes back to see if you answered. Clearly, that’s not always the case.
Lesson learned.
So what color is it already?
Some helpful commenters have told you it is Annie Sloan Chalk Paint. It isn’t. Or any variation of chalk or furniture paint. I didn’t really know anything about that kind of paint when I did this piece. Plus, I am unaware of any color of ASCP that comes close to this color.
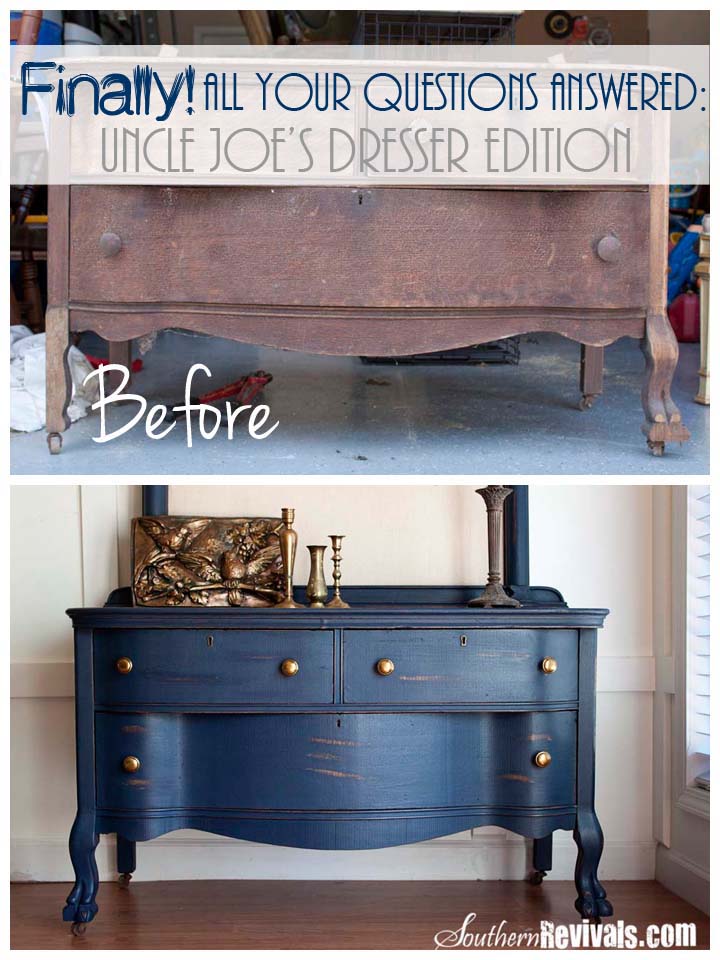
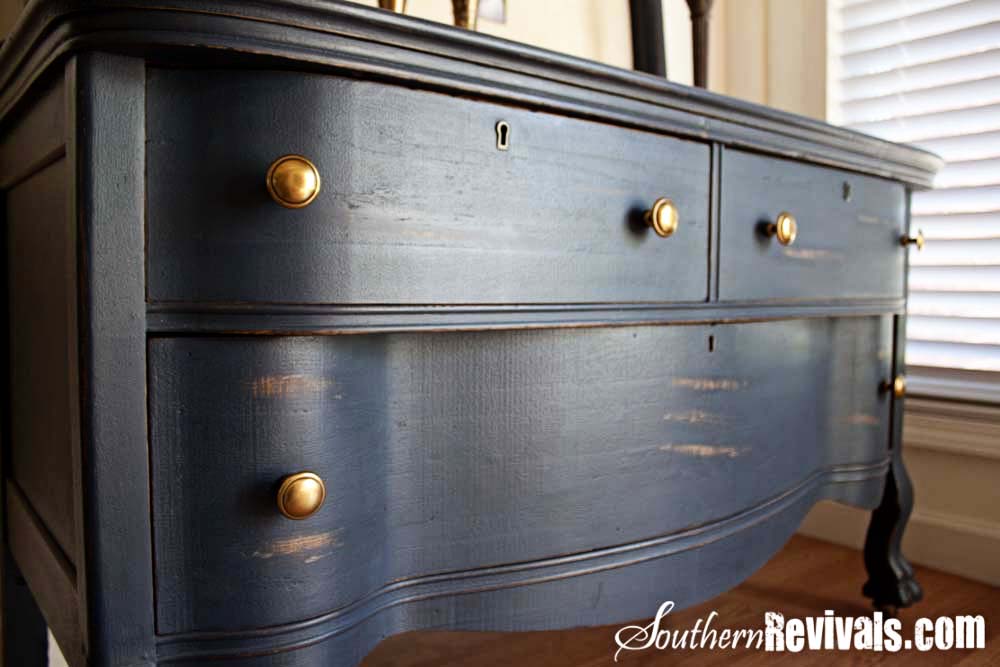
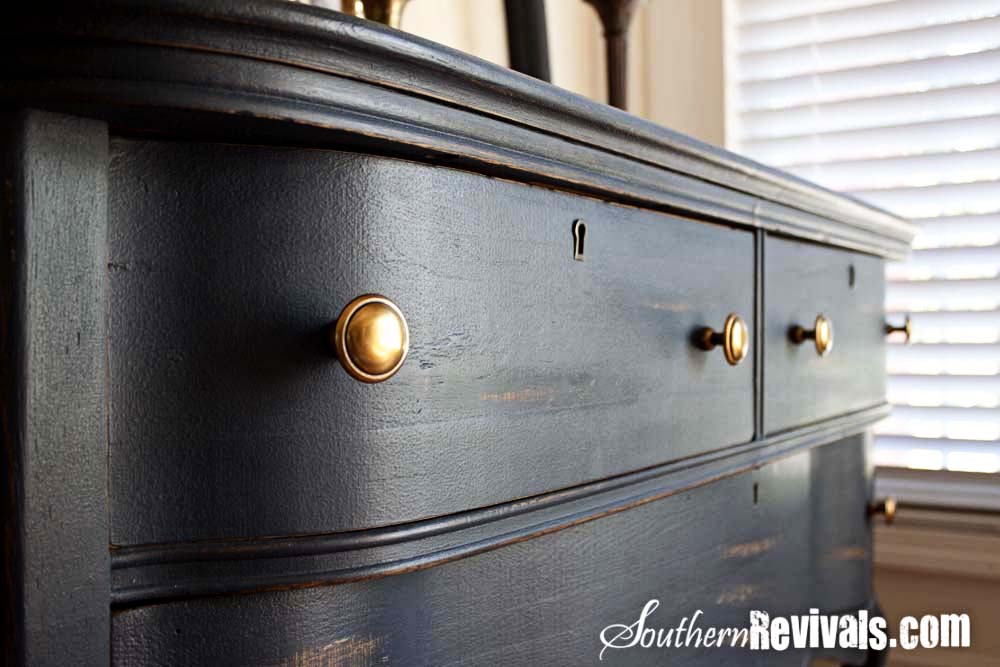
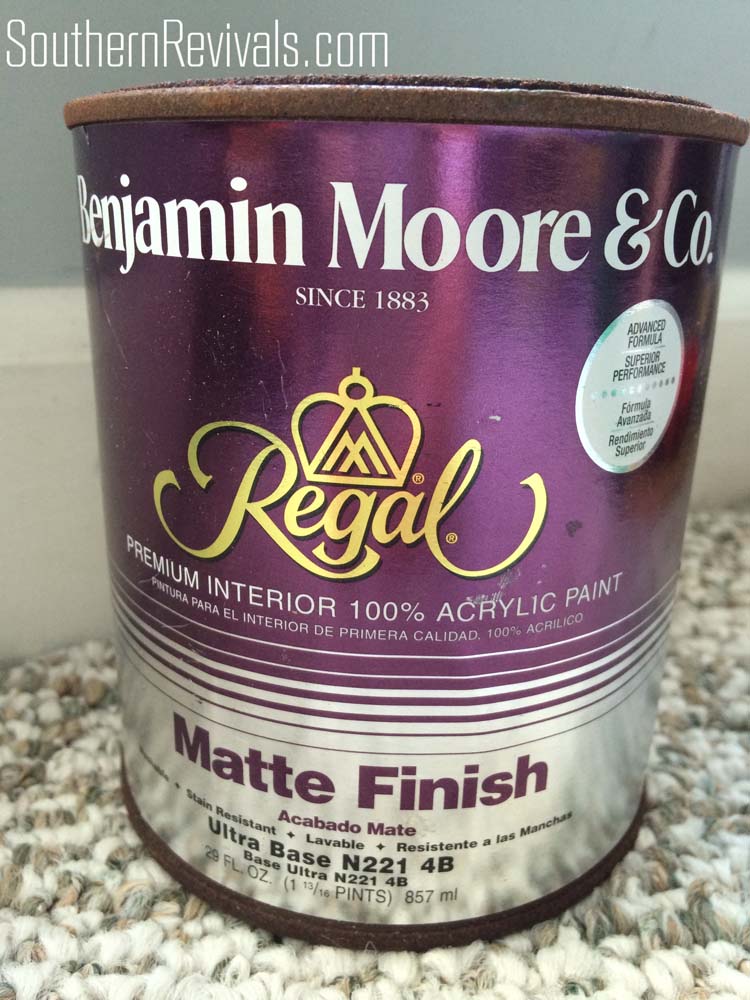
What it actually is, is a Benjamin Moore Regal Classic paint in a Matte Finish. And what I’ve had to tell many, many of you over the years is: I don’t know the color.
Here’s the deal, it never occurred to me to save the color formula and our local store didn’t have that handy computer program that saves the info for you. I worked directly with my client to figure out exactly what color of navy blue she wanted. I mixed up some paints I had on hand making up several variations of the color until she said, Yes! That’s the one! Then I took the sample I had created to our local store, they handed me a paint chip that matched it almost perfectly, and the rest is history.
I painted the piece. Tossed the can. Never thought a thing about it until you guys started asking questions. And I cringed every ttime youdid because I hated having to say – I don’t know.
Until that fateful day a couple of weeks ago…
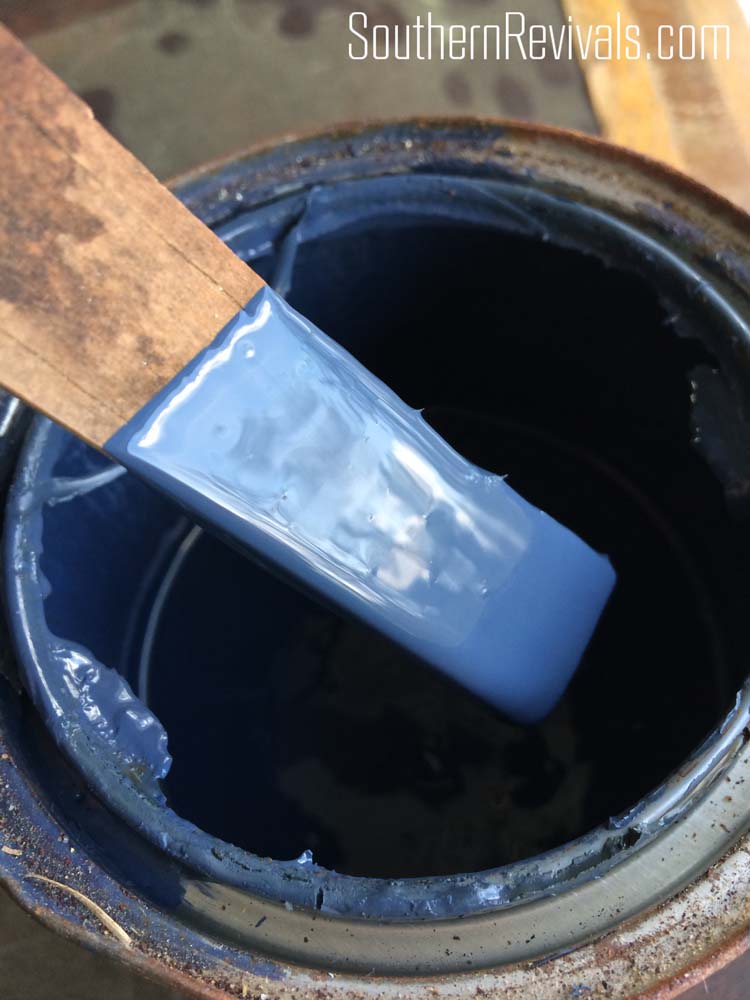
We were reorganizing our garage and building several organizational systems for both my wood and paints, which clearly I need. I came across this crusty topped paint can. It was unmarked. Which was odd, because these days, I label everything. I didn’t think anything of it at the time because I had looked for Uncle Joe’s paint a long time ago, many times and finally decided the can had been thrown out. But then, once my new shelves were built, I decided to open all of the paint cans and determine which were keepers and which were tossers. That’s when I found this…
And the clouds parted.
And the angels sang.
And I felt really, really silly.
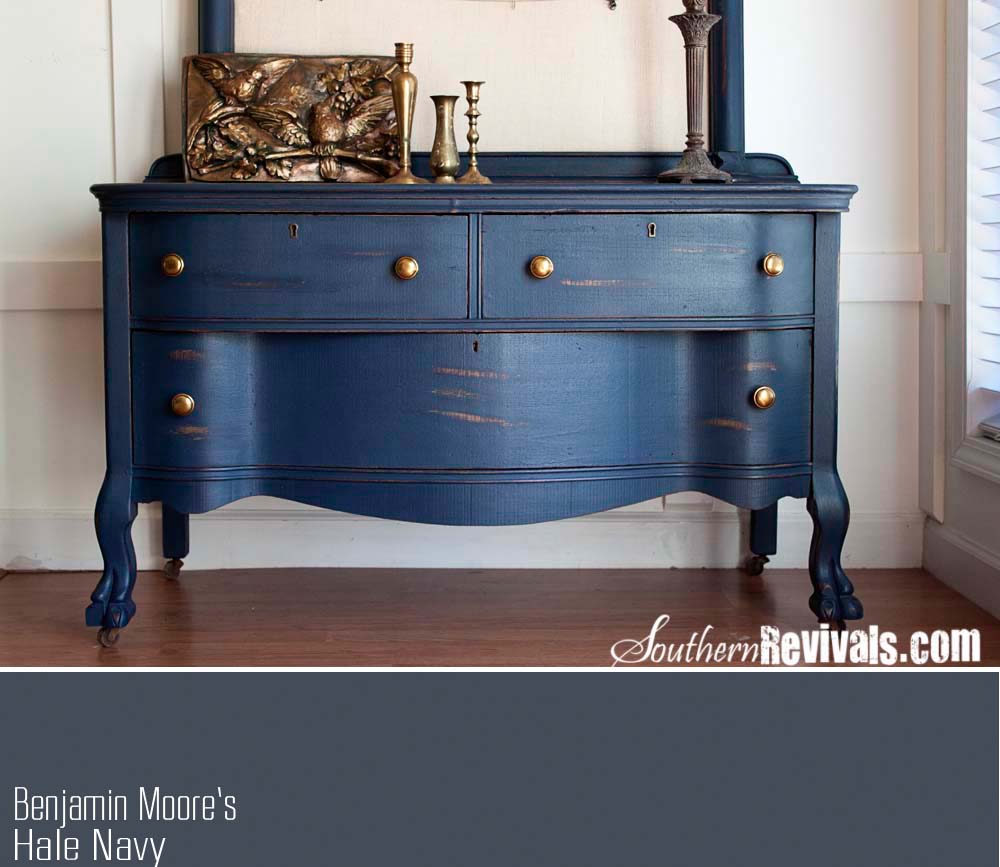
I immediately took the can up to the paint store and the man there helped to determine the color, Benjamin Moore Hale Navy.
You guys, it’s like the world has been lifted from my shoulders. Seriously. The pressure of YEARS worth of, ‘What color is it?’. It is a huge sigh of relief to finally be able to tell you something other that, I’m sorry I don’t know. Because now, I totally do!
What I did then:
I used Benjamin Moore Regal CLASSIC in Matte. Two things are very important here, the CLASSIC and the Matte. The matte because when you’re painting furniture, unless you are wanting something super glossy – and that’s a whole other post – something without a sheen is easier to work with and has better adhesion. Plus, you can always add a “sheen” in the finishing stage. The Classic because they have a new Regal Select formulation, which I tried recently and I did not like. It wasn’t until I came across this old can that I realized why – I had used Regal CLASSIC back then. The man at our local BM store said he’s had several people say they prefer the Classic to the Select. So keep that in mind. I wouldn’t use the Select again, at least not for painting furniture. Which brings me to my next point.What I would do now:
If you are dead-set on this exact color there is probably nothing I can say here that will sway you but if I had to do this over again, I would likely use a chalk-based or specialized furniture paint. This is especially important for the beginner. You know that no-sanding, no priming incentive that you get with a chalk-based paint? It doesn’t necessarily exist with a latex paint. You may have more prep work depending on the surface you are painting with a latex paint. However, the term “latex” applies to most commercial paints even though they are not created equally. A paint like this one from Benjamin Moore is a 100% acrylic “latex” paint meaning that it costs more because acrylic resins are more expensive, but it also means:
1) Better stain protection (washability)
2) Better water resistance
3) Better adhesion
4) Better blocking (of bleed through or stain)
5) Resists cracking and blistering better
6) Resistance to alkali cleaners (a property that chalk-based paints cannot boast)
So the point is, if you decide you’d like to use a commercial paint instead of one designed specifically for furniture painting, I recommend Benjamin Moore’s Regal Classic in a Matte Finish.
A note of caution on the color:
Anytime I am deciding on a paint color, I never do so based solely on a picture I’ve seen online – or anywhere, for that matter. Keep in mind, the color you are seeing on your monitor may not be the true color. I would hate for you to go out and get yourself a quart only to bring it home and be disappointed. So keep this in mind.
How I finish my pieces:
I always apply a “finish” to all of my pieces. I typically use a wax. Hard or soft wax, it’s up to you. However, I usually try to use something with the lowest VOC content. I only use poly when absolutely necessary and usually only a table top. {More on this another time}
Where do we go from here?
Like I said, I think I finally have this blogging thing down though it is still not my second nature. My strength is in the doing of the project. The blogging and social media part of it is still something I have to work on. I am, however, doing a much better job of sharing info on current posts. My plan is to go back and do follow-up posts on some of my most popular posts from the past with additional information, for example, The Full Room Revival and the Pottery Barn Style Dresser Revival.
In the meantime, please enjoy this very unprofessional video of me showing you how I removed the veneer from Uncle Joe’s dresser and then rejoice in the fact hope that my upcoming videos, including my How-to Achieve a Restoration Hardware Finish video, will be of better quality. Hey. We can’t all be good at everything now, can we?









I think you a jewel just as you are! You are in the learning curve and doing a damn fine job.. Keep up the good work. Having said that, I really, really enjoyed and benefited from this post. You explained a lot of questions I had. Thanks so much for the comparisons. You are pinned!
Well I can’t tell you how much I appreciate you kind words! I’m glad the post was helpful. Thanks so much for your support!
love the dresser redo, i would love to feature it, if that would be ok please let me know,
lauren
I’d be honored Lauren! Thank you!
I have been back to your website countless times to see if you ever answered the color question from other readers. I am just getting ready to paint a large piece of furniture and really really really wanted this color. It’s simply gorgeous. Much to my excitement I found this post today!!!! Thank you thank you thank you!!! You have made my day…cue bad dancing….
🙂 ~xo
Well I’m just sorry you had to wait so long but glad you got it just in time! Thank you! 😉
So, did you remove the veneer from the sides and legs too? I have a dresser with damaged veneer on top….i would love to redo it like this but, this is my first project with veneer and while i saw your video, i couldnt tell if you did that to the entire dresser…i cant see it coming off so easily on the curved legs…..
Thanks for the help…i love what you did! Its beautiful
No to the removing of veneer on the legs. I don’t think it had veneer but honestly I can’t remember. I only remove the veneer if I have to, not a fun job! LOL Thanks so much and good luck on your project. Please let me know if I can be of any further help!
I love, love, love the cabinet pulls you choose….especially on this piece and the black and gold dresser for your sister in law many years ago….I am obsessed with those drawer pulls, and cannot find them ANYWHERE! Can you possibly share where you ordered them from, or the manufacturer..so I can locate them? Thank you for all the inspiration!
I got them from a site called CoolKnobsandPulls.com I have no idea whether they still have them. Thank you!
Just popping in to say thank you for sharing this color, I’m thrilled you found it and can’t wait to use it on my own vintage piece 🙂
I have never painted a piece of furniture before. But now I have a 9 foot island I want to paint some shade of blue with some black on the edges to make it look old. I need to prime it first. Should I tint the prmmer black and than paint it blue and sand some of it off? Or prime it in white, paint it blue and than use a dark stain that I can rub off? Either way I will need to seal it. Can you help? I’m stressing out over the project.
Katherine
Hi Katherine,
That sounds like it’s going to be beautiful. I wouldn’t say you needed to prime it first unless it’s extremely glossy or a laminate surface (i.e. not solid wood). In that case, you would need to prime it. Either way, I would suggest painting it blue first and then using a black glaze that you wipe away in some areas and leave in others to create an aged look. And yes, after all that’s done, you’ll definitely want to seal it. Choose a water-based poly (that way it won’t yellow over time) in any sheen you like. That’s all there is to it! Good luck!
I painted my island with two coats of primmer and now want to add some black paint on the edges before painting it blue. I used a latex matte finish paint, ( for the blue). If I use a wax puck on top of the black before I paint it blue will I beable to sand over the black areas and have that color show through?
Someone told me that a clear wax as my last step is not hard enough in a high traffic area., is that true?
Thank You,
Katherine
Hi Katherine,
Using a wax puck over your black paint will keep your blue paint from adhering in those areas and allow your black paint to show through. You have to be strategic to get the look you want. And since this is a resist technique, once you put the wax on and start painting over it there really is no going back. Totally doable though, just precise. I think I already mentioned it but a black glaze is also an option. A wax seal can be used but should not be used to seal a countertop. You didn’t mention whether you painted the top or not but wax and water don’t’ mix well and you could be left with rings that will need buffing out if you use it on a countertop. Heat is also another factor to consider. Wax can actually seal harder than people think but a wax seal will not be as durable as a poly seal so you’ll want to consider how much traffic your kitchen might experience to determine the best seal for your project. Hope this helps!