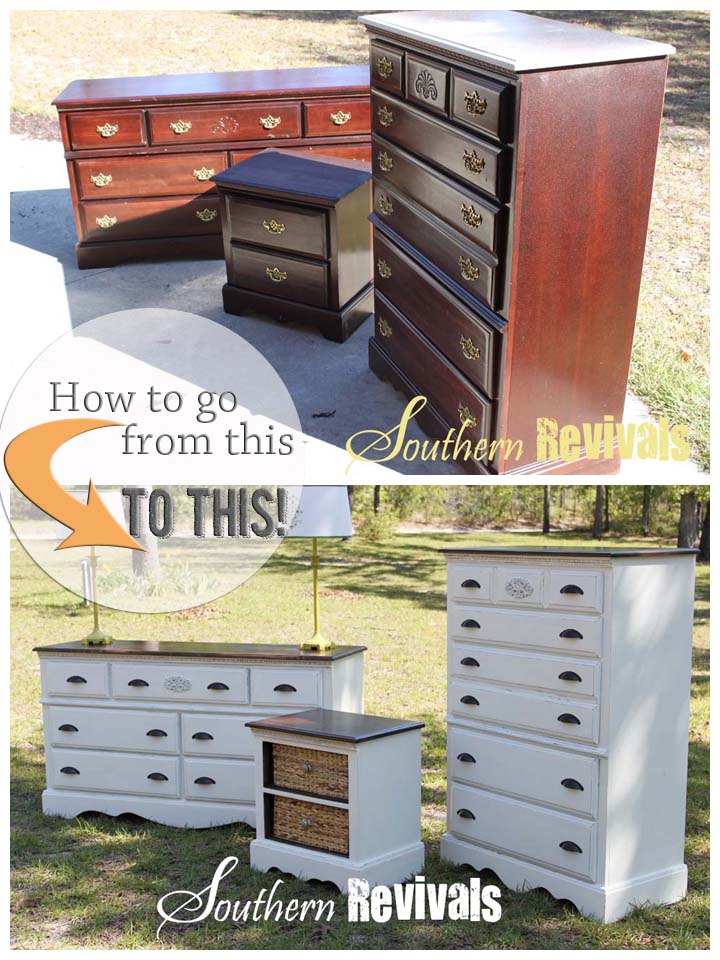
 Happy 2nd Birthday, Southern Revivals! It was two years ago this month that I shared my very first furniture makeover with you on this, my blog, that I never intended to start. I talk about how it all got started in this post, The Truth About Southern Revivals. Little did I know where all of this would go from there.
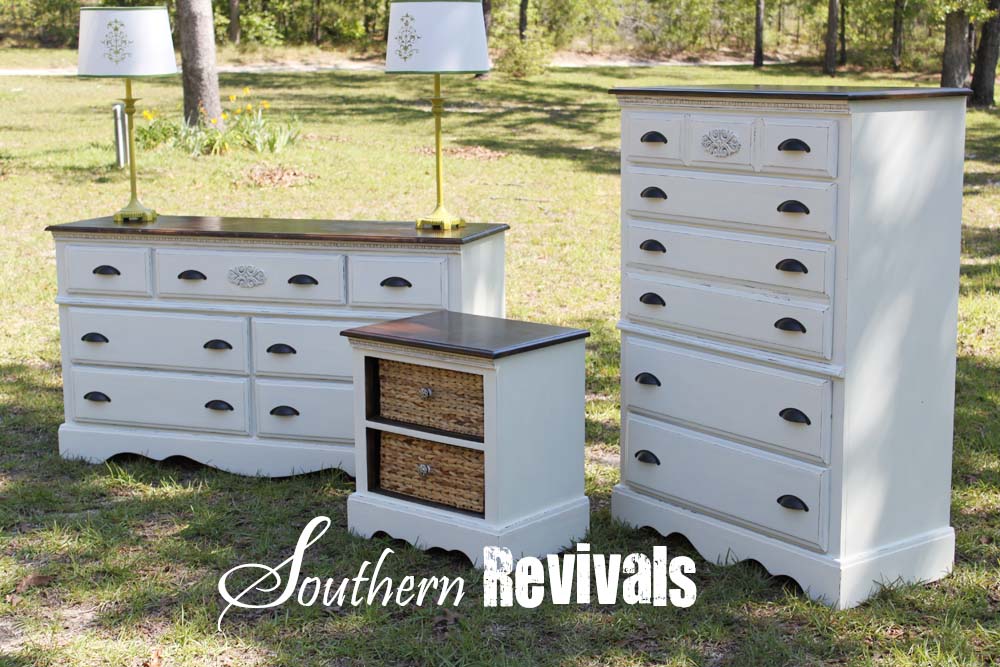
The original Full Room Revival post is to date one of the most popular posts here on my blog. I’ve received many, many comments and emails wondering just how I did it. A couple of weeks ago I did a recap for another of my most popular posts, Uncle Joe’s Dresser. Today I’m revisiting the full room revival and answering all of your questions.
To Sand or Not to Sand?
One of the most common questions is, did I sand it first. The answer is – yes, lightly. Anytime a piece has particularly glossy I always sand it lightly using a 220 grit sandpaper just to be on the safe side. It gives the paint something to stick to. It isn’t always necessary but it’s better to be safe than sorry.
Primer?
No. I very rarely use primer, only when I am afraid the piece’s previous finish might bleed through the paint. This can sometimes happen with certain pieces.
What Color is It?
I chose a mistinted quart from Walmart. It was a flat finish in the Better Homes and Gardens brand. I wound up having to back and get another quart. The color match identified this color as: Bavarian Cream.
How Much Paint Did It Take?
I used just under 2 quarts for all three pieces.
Distressing:
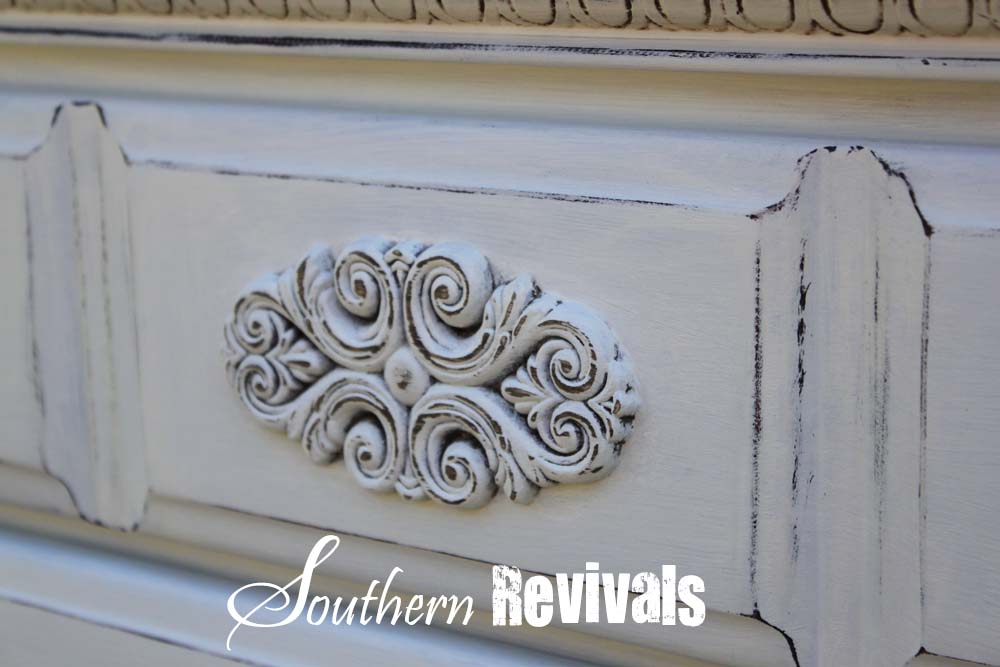
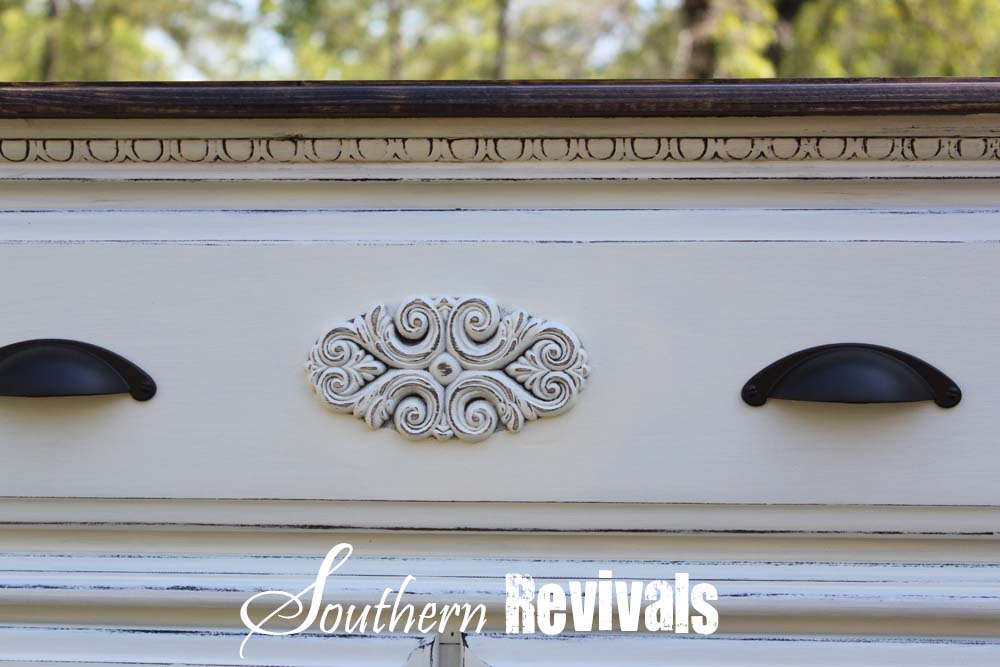
Again, I used a 220 grit sandpaper to lightly distress the edges. I like to distress in areas that would get worn over time to give my pieces and authentically aged look.
How to Camouflage the Dated Design:
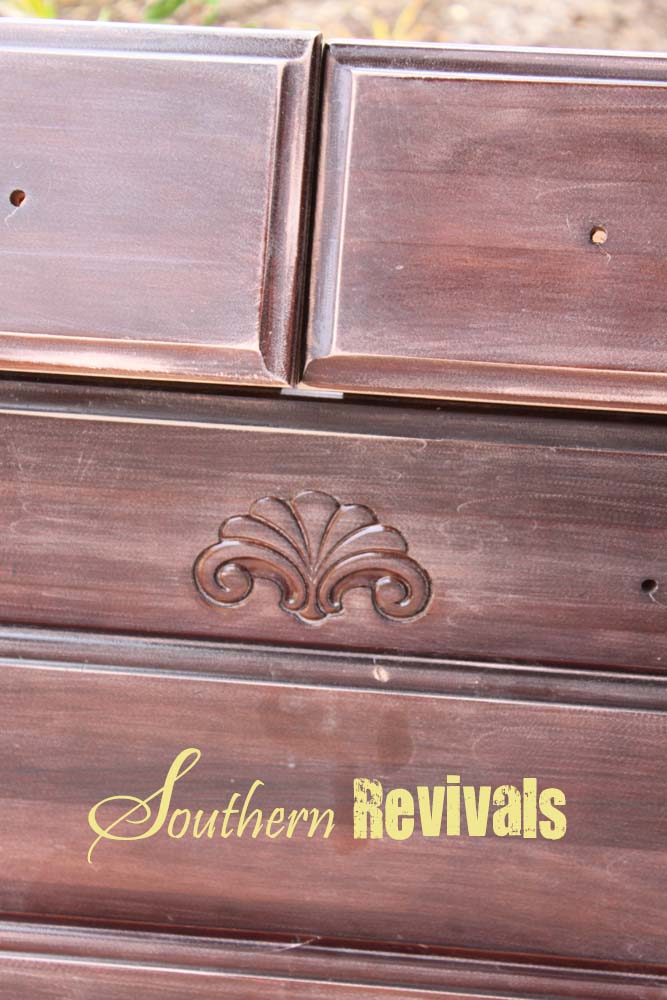
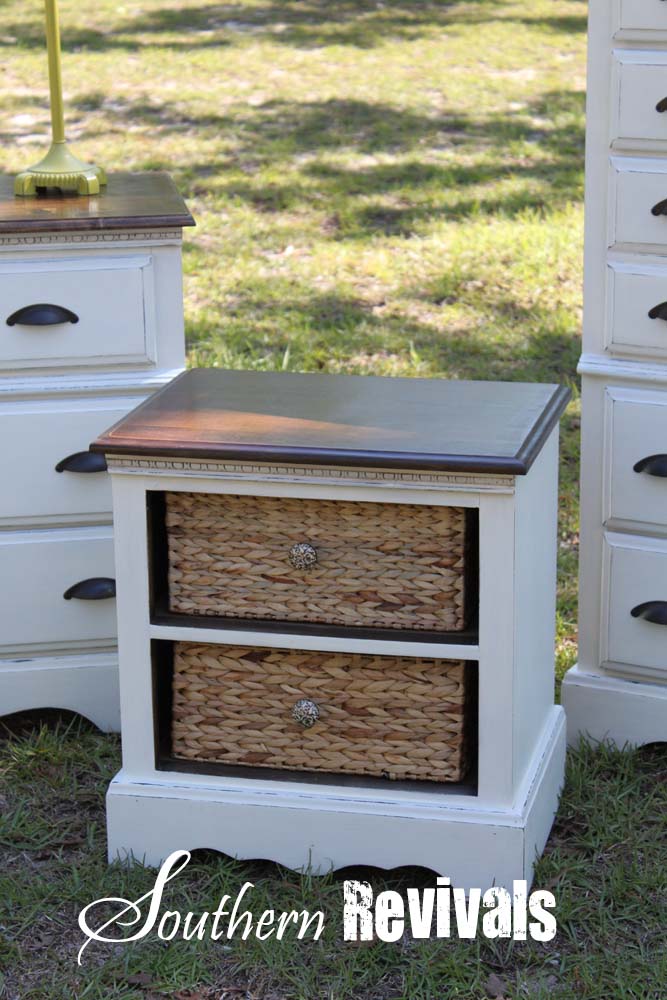
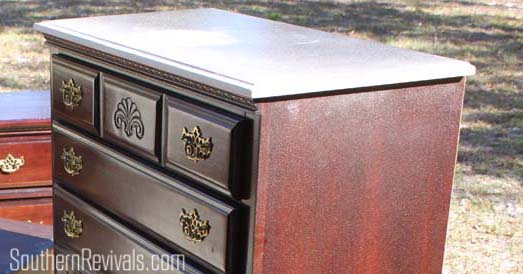
The biggest issue my Sister-in-Law had with this furniture was that it had a dated look. Sometimes paint just isn’t enough. To address her concerns, I filled in the carved shell designs with wood filler and then covered them with wood appliques.
How I Added the Shelves for the Baskets:
This is a tricky question. Since every piece of furniture is different I have had to do it differently every time I’ve wanted to replace drawers with baskets. It always starts with removing the drawer tracks. On some pieces, once the tracking is removed, you are left with a thin shelf fine for placing a basket on so long as the basket doesn’t hold anything too heavy. Other times, like in this case, I had to add braces inside the cabinet and cut thin pieces of plywood for the shelves.
Where I Got the Pulls & the Baskets:
The baskets are made from water hyacinth. They are from Hobby Lobby.
The pulls are called cup pulls. I got them from Cool Knobs and Pulls.com
How I Sealed the Pieces:
I used Minwax Finishing Paste in Special Dark.
Restaining the Tops:
Yes. I definitely changed the stain color on top. Part of getting rid of the dated look included getting rid of the red oak colored stain. I was lucky enough to be able to sand down through the very thin veneer on the tops of the chest of drawers and nightstand. I wasn’t so lucky with the dresser and I sanded down too far and got past the veneer to the pressed board underneath. There is no staining that! So the top had to be completely replaced. That can be very costly so it’s obviously best to avoid it. This can be tricky since in order to restain you must remove all of the previous finish completely.
Here’s a tip: Sometimes, if you look carefully at the side of the tops on a piece of furniture you can see that telltale line where the veneer sits on top of the pressed board and how thin or thick it is. If the piece is solid or if it is wrapped with veneer tape, you won’t see this. Veneer tape is used to wrap around flat surfaces so if the edges are beveled (like these pieces were) you can be sure veneer tape wasn’t used.
Stain color: I used one of my favorite stain colors – Dark Walnut
What I Would Do Differently:
If I had it to do over again I would most likely use a chalk based paint or my favorite latex brand that I mention here. I would use a soft wax as opposed to the finishing paste as a sealer. The Minwax Finishing Paste is a great sealer and stand up to wear and tear for sure but being a hard wax, it will kill your hands. You could always use a buffer though.
These days, because I do this so often it would be reckless of me not to, I pay very close attention to things like VOCs. I choose paints and sealers with this in mind. Soft waxes are not only easier on your hands but they often times contain less, if any, VOCs.
I hope you’ve enjoyed today’s flashback! If I’ve missed something or if you still have questions, please feel free to leave them in the comments.


Happy 2nd Blog Birthday!
I think I got a dining-room set that matched your before that I turned into a dining island. 😉 The same before design is on the hutch and chairs… I haven’t painted it yet and glad about that because I’ll use your advice. Thank you!
I love how you transformed your set with the colors and hardware you chose. The basket drawers are stunning! I’ll be sharing this if you don’t mind. Fabulous work!
I hope you have a great “birthday” and a wonderful week ~
Robin
Thanks so much Robin!
Love it! Have learned so much…..would not have looked twice at the “before” furniture as I wouldn’t have thought of filling in the shell and pulling something over it or replacing drawers with baskets. Thanks for the inspiration and techniques.
That’s great Lou! Thanks for letting me know. I’m glad you got some good stuff from the post!
You mentioned a soft wax for sealing. Which is your favorite to use?
Any soft wax is great! I like using Miss Mustard Seed for the durability and no VOCs. Annie Sloan soft waxes are also a good choice but you have to use the clear in conjunction with the antiquing waxes because they may make your project too dark otherwise. For that reason I like the Maison Blanche waxes because you don’t have to use two waxes in order use the antiquing wax.
Where did you get the wood appliques? And how did you secure them? I have similar pieces and on one side of both the nightstand and tall dresser, the side corner applique is missing. Love your blog btw!
I got them at Lowe’s and secured with wood glue. Thank you!!
I really want to redo some of my ok furniture, but I have never done it before. Any tips? Also you mentioned stain…do you stain it first and then paint or just use the stain for antiquing. Beautiful job by the way!
Whether you stain or paint first is really up to you. Just be sure not to get any paint on the areas you’ve prepped for staining. My two best tips are: make sure you strip/sand down to bare wood any area you will be staining and be sure to thoroughly clean the pieces you’re painting with white vinegar, odorless solvent or TSP to remove any build-up that may affect your paint’s ability to adhere. Be sure to wipe down again with a damp cloth to remove any of these solvents left behind. Also, and this is absolutely necessary but easiest, I’d use a paint specifically designed for painting furniture.
I’m slightly confused. I know you sanded down the piece to knock off the gloss, then you painted,
But when and where does the stain come in? Only on the appliques or did you stain the entire piece. When you distressed did you just scuff the paint so the previous stain underneath would show through or did you touch those areas up with a stain?
And the waxing-was that the entire piece? Was it just as a protective coating for the painted surface? Sorry for sooo many questions 🙂
Hi Ellie,
You are correct. I sanded the entire piece lightly to knock off gloss prior to painting but for the tops, since they were done in a dated red cherry stain, I sanded those down to bare wood. Then I restained in a dark walnut. As for the distressing, yes, after I painted I simply sanded lightly to knock off some of the paint. The waxing is done, over the paint only – I polyed the tops – as a protective coating. And since I used a dark color wax it also adds to the distressed effect. Hope this helps! 😉
Hi there! LOVE this post…I have furniture that is very similar that I was wanting to get rid of because I just couldn’t picture how to refinish it. I LOVE these pieces. Do you have a specific chalk paint that you recommend? Do you use a clear or colored wax (is that even a thing?)?
Definitely bookmarked this page for future reference!
Hi Michelle,
Colored was is definitely at thing! For this, I used a clear wax. The colored waxes offer you the ability to give it an antique look over lighter colors or more depth to darker colors. My favorite paints are Maison Blanche Vintage Furniture Paint, Fusion Mineral Paint and Americiana Decor Chalky Finish Paint. Each of these is a complete line meaning they have paints and finishes and everything in between.
Hey Jamie.. I have a piece of furniture which i think comes from the same collection as the pieces you did. I am attempting to turn it into a piece of gold but I have concluded that I cannot change the hardware without tearing the draws apart. It is a well made dresser and there is a wood liner the drawers which cover the hardware from the inside. I am afraid to try and figure it out in case I end up destroying the insides of the drawer. Since my piece is very similar, all except the shell engraving.., did you encounter the same issue and how did you solve it seeing as how you did manage to change out the hardware. I have in laws coming in a little over 15 days and would like to get it done as I am intending to use it in my dining room as a buffet. I would appreciate any help you can give me.
I just discovered your blog and am very excited to prowl through it to see what treasures I can find. I can tell already from the little I have seen I am not going to be able to tear myself away from my PC anytime soon. Thank you in advance.. Jamie M.
Incredibly sweet Jamie! Thank you! I am so sorry for the delay in my reply. I know it sounds kind of crazy but until you mentioned the insides of these drawers I hadn’t even remembered that and, to be honest, I am not even sure now. But it seems like I do remember running into this even if it wasn’t with these pieces. IF I remember correct that is at least one screw on the inside of the drawer that will release that section and give you access to the hardware behind that panel. I know that’s probably not incredibly helpful since I don’t remember clearly! But I do KNOW that I’ve encountered a similar situation and there is definitely a way to access the hardware, either from the back or the front. Anyway, good luck with your redo and be sure to share pics when you are done!
This is a great revival of the bedroom furniture. I own the chest of drawers and bedside table. Would you happen to know how I could find the dresser? Did the set have a name or maker on it?
Thank you,
Amy Jo Bellis
Thank you, Amy Jo! I’m sorry I don’t remember the maker. I do remember my SIL saying she bought it as a set a furniture store. I’m not sure where you could find the matching dresser at this point but if you’re going to be painting finding something in a similar style and then painting them the same color should unify them.