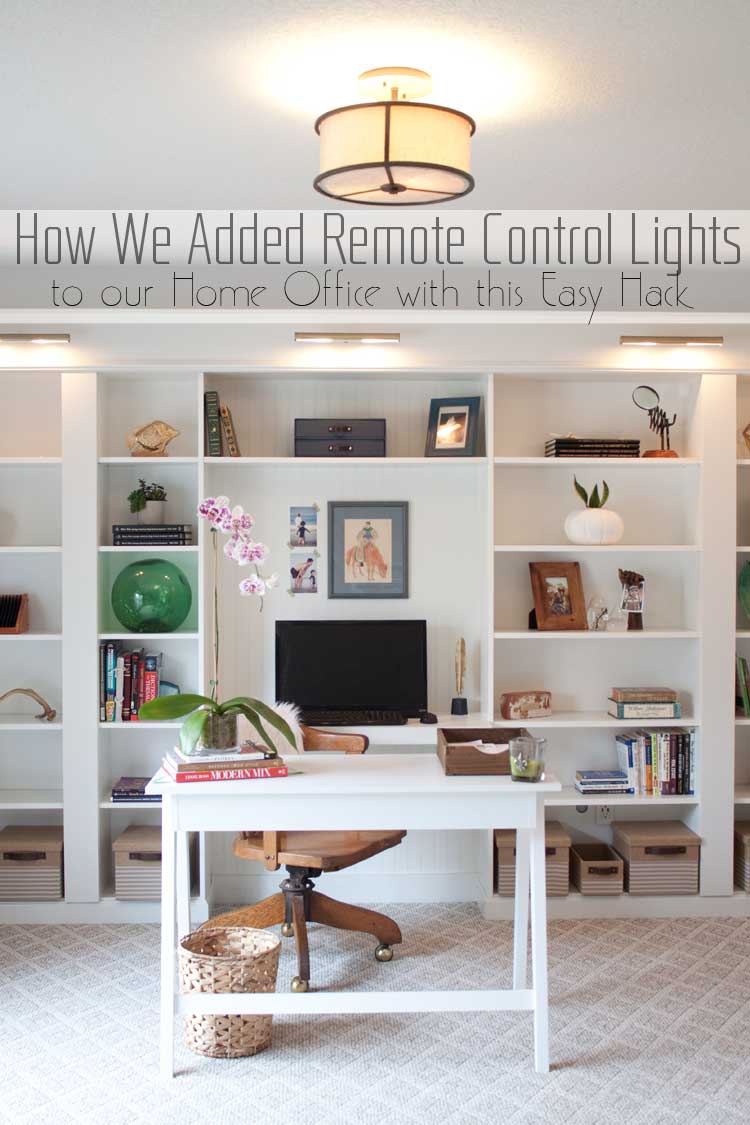
When we were planning our IKEA Hack Billy Bookcase Office Makeover we knew we wanted to have our bookshelves lighted. What we didn’t know was how. This is an easy, inexpensive hack on how we added remote control lights. No extra wiring necessary!
*For your convenience this post contains my Amazon affiliate links which means I get a small commission of sales at no additional cost to you. For more information please see my full disclosure policy.
Outlets and outlet covers graciously provided by Leviton.
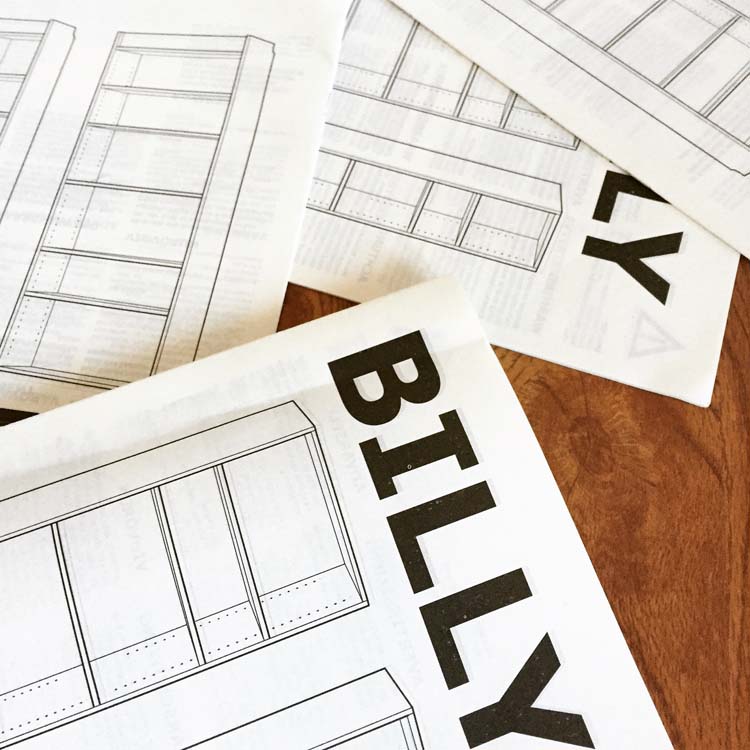
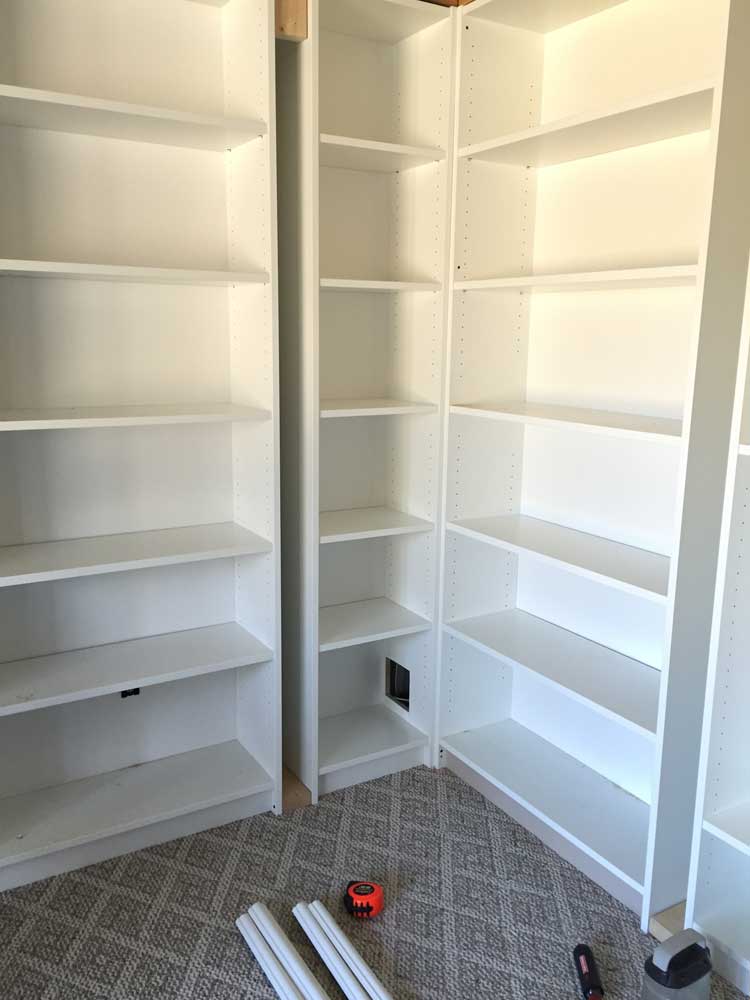
Somewhere between the planning stages and the putting together of the IKEA Billy Bookshelves we realized that since there wasn’t any crawl space or attic access above this room that there was no way we could run a new switch for our bookshelf lights.
But really, if you don’t have to, why would you want to anyway? Whether you’re a DIYer or you are the hire-it-out type at the end of the day you still want to save time and money. So even if you have the crawl space or attic above your room you don’t necessarily have to add a new switch just to have lighted bookcases.
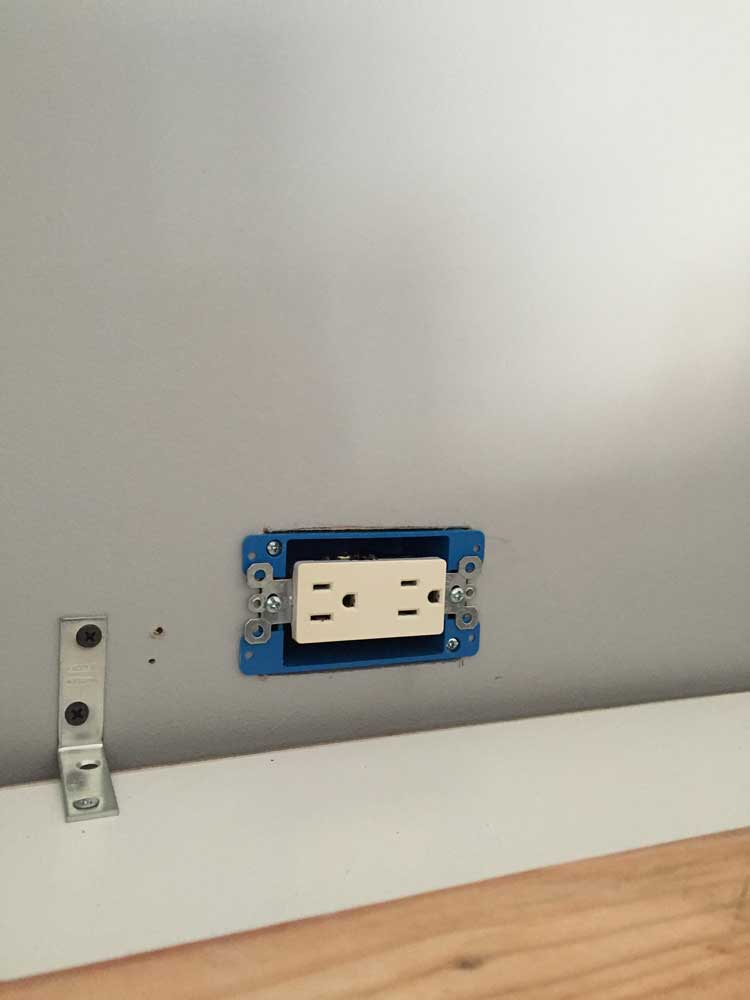
What we did have to do is extend our outlets up to the top of our walls. You can see that process here: Office Makeover Part 2 | Building in Billy IKEA Hack, if you missed it. It was as simple as tying into an already existing outlet at the bottom of the wall and cloning it at the top of the wall, just above our bookshelves. If you aren’t comfortable doing this yourself it’s a pretty simple and inexpensive thing to hire-out and you can handle it yourself from here, pinky promise!
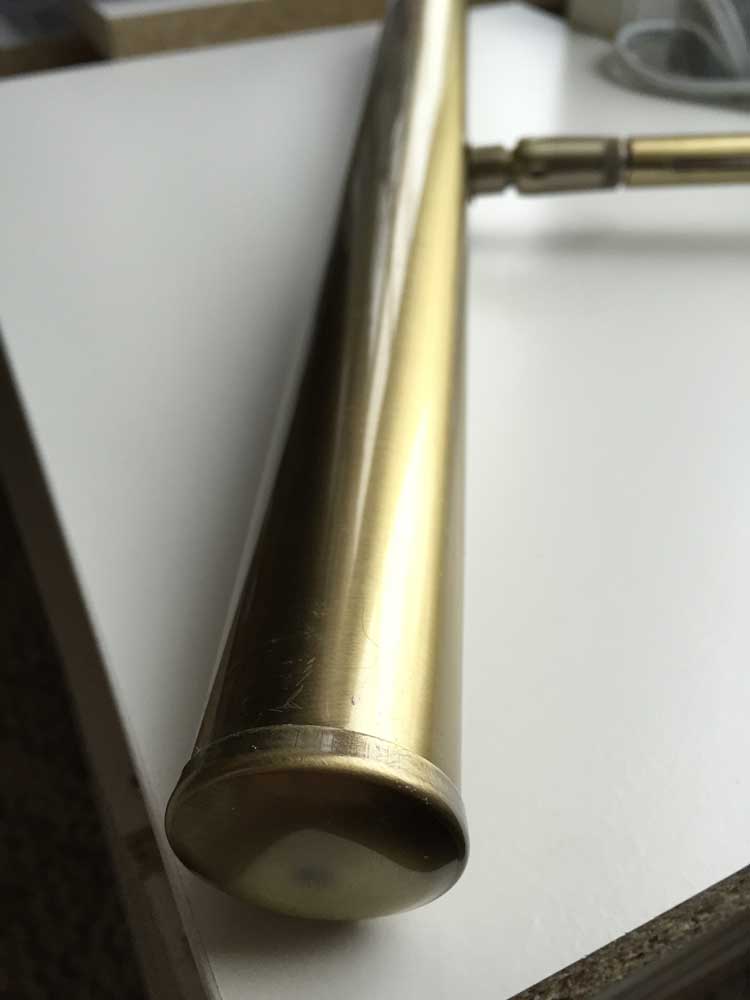
The first thing I did was track down some affordable library lighting. If you’ve never tried doing this and have a few days to waste, you should try it some time. I had no idea! Apparently the word library implies that one has lots of extra money to burn and they charge accordingly. If you, however, are like me and are allergic to paying a luxury price just because, you can snag these gorgeous brass (plug-in, because that’s essential to our easy hack!) lights from Amazon for just a little over $30 each. Bulbs included!
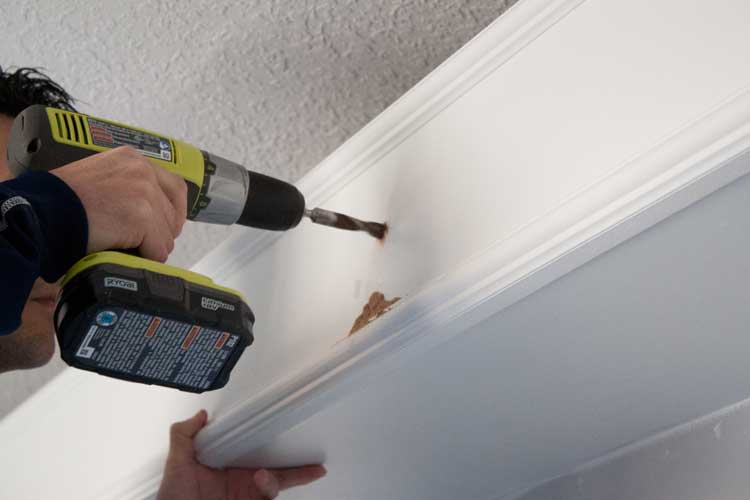
At this point we’ve already added the outlets above our bookshelves, installed bookshelves, molding and painted the bookshelves. All that’s left is installing the light. We drilled a hole where we wanted each light (centered). The hole size will depend on the diameter of your light fixture.

We used my Dremel multi-tool to create a little notch in the hole since the light fixture isn’t perfectly rounded. This can be done with a file or utility knife as well but may not even be necessary for you, depending upon the light fixture you choose. We just didn’t want to risk wallowing out the hole too much and making the hole too big to get a tight fit for our fixtures.
If you purchase the same fixtures as I have they will come with all of the components you’ll need in order to install them. Instructions are included.

This allows you to install the fixture by threading the wires through your hole before adding the plug and switch. Genius!
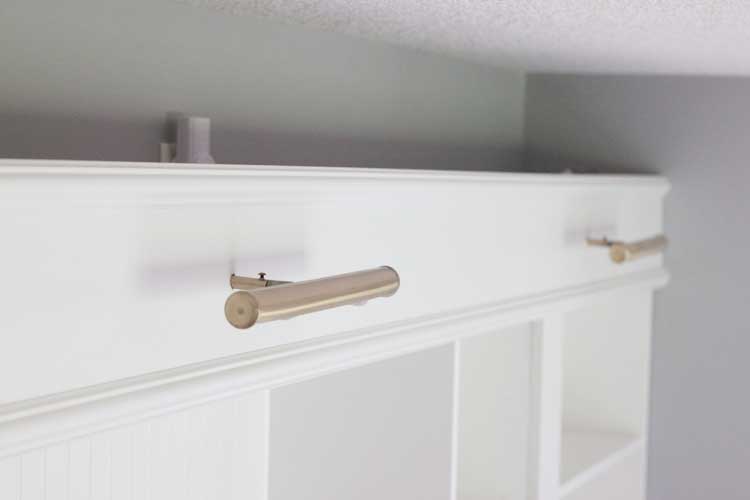
And they are so gorgeous you’ll never miss that high price tag. We’ve been using ours for well over a year now and I haven’t so much as had to change a light bulb. But now that you’ve got outlets above your bookshelves and your plug-in lights installed, you’ll want to make them remote control so you don’t have to climb a ladder every time just to turn them on.
How We Added Remote Control Lights:
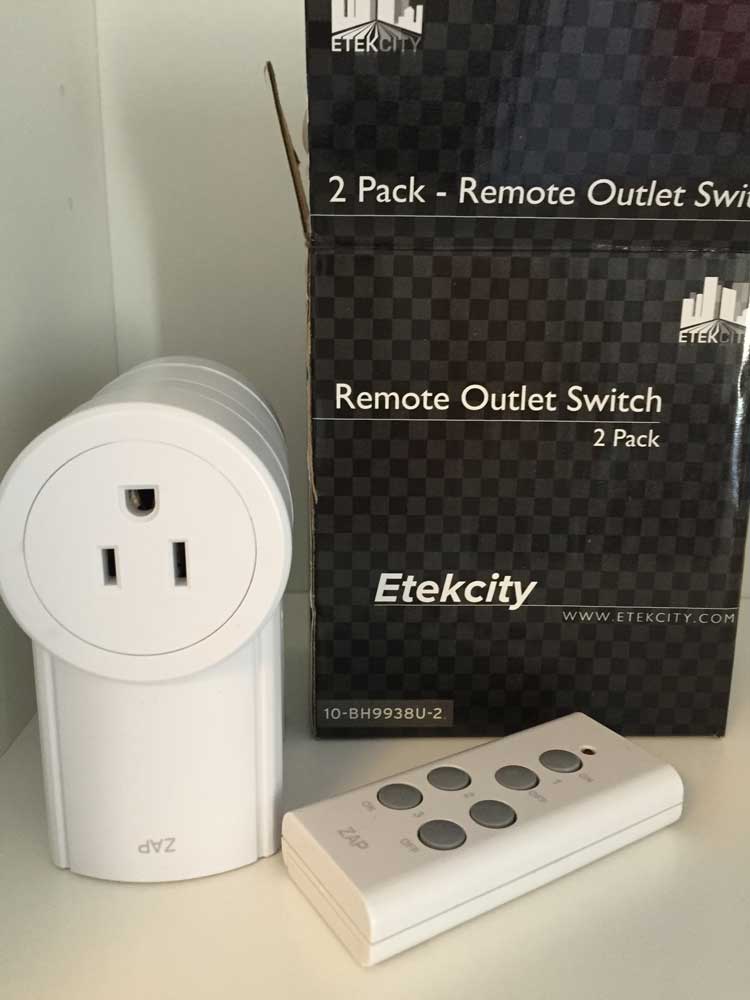
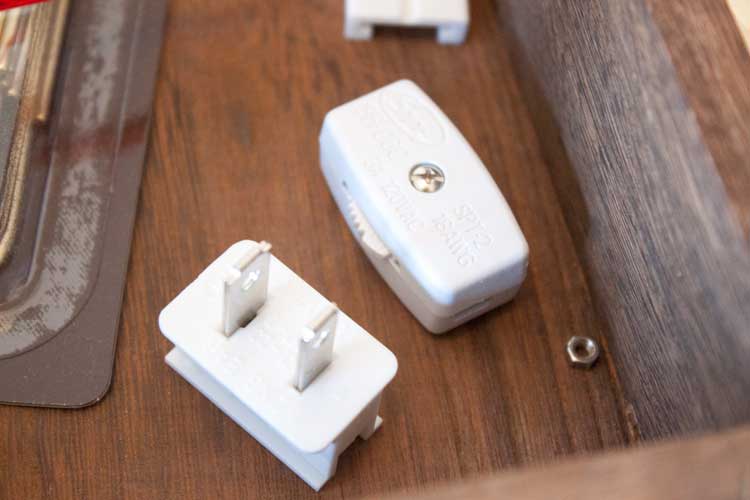
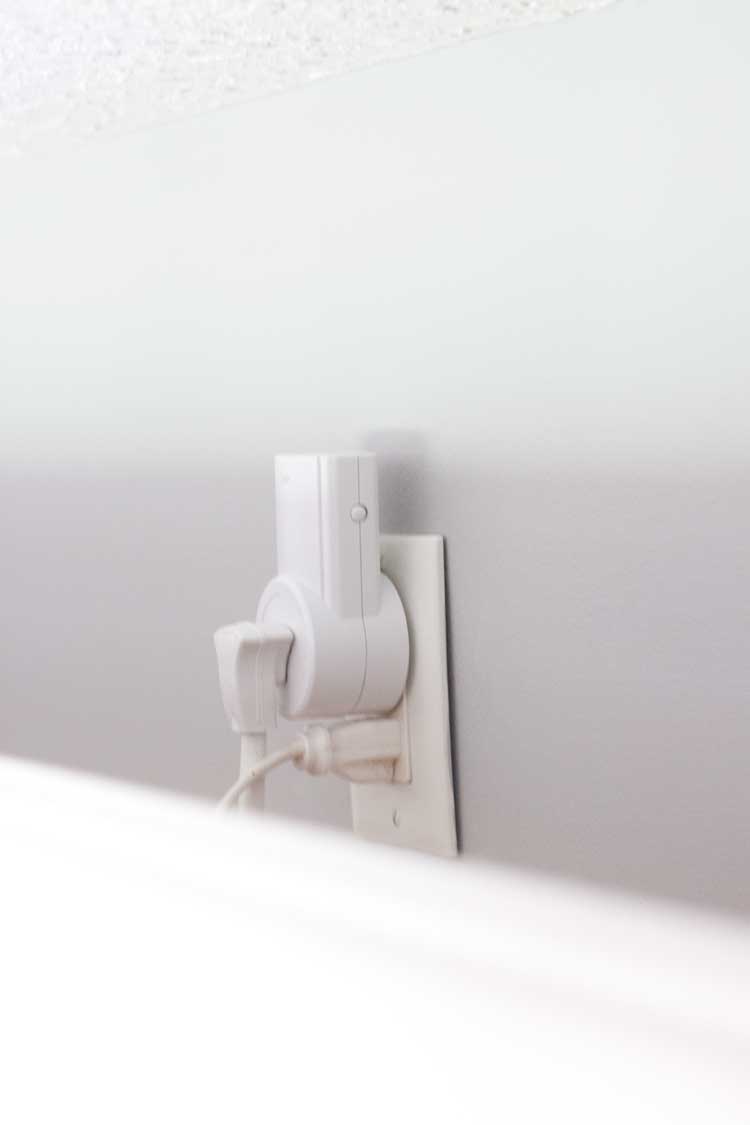
That’s where this super awesome contraption comes in! Anything you plug into these outlets (which plugs directly into an existing outlet) becomes remote control. We only needed two but you can get several outlets and they will all operate on one remote.
We used two surge protectors for each set of 3 lights. Then we plugged each of the surge protectors into each of our remote control outlets.
As with any other light fixture in our home we do not leave these lights on unattended or while we aren’t home.
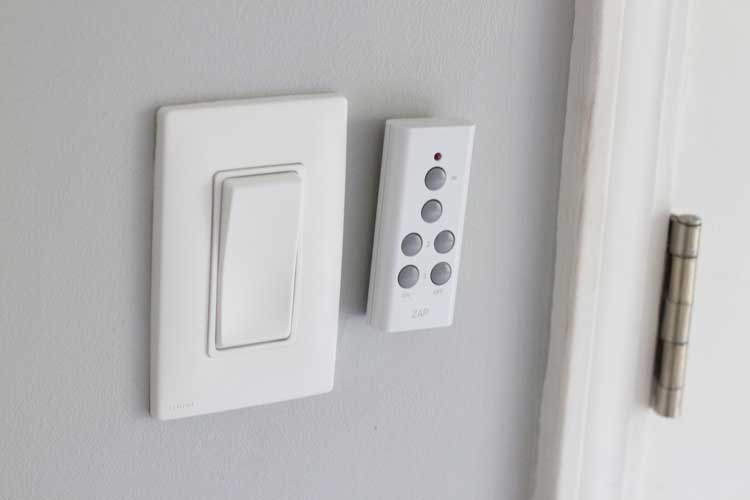
Then I simply attached the remote control to the wall next to the light switch using the velcro 3M picture mounting strips. That way the remote is also portable but can be easily placed back on the wall when we’re done. Especially since they don’t make a ‘Find My Remote’ app yet.
While we were at it we also changed out all of our switches, outlets and covers. Why do they go all yellow like that?? It’s gross. And it definitely stands out especially if you’ve just given a room a makeover. It’s kind of like getting a makeover on your face but forgetting to whiten your teeth.

I love these Leviton Renu outlets with their snap on covers. And they really are the teeth whitening strips to your makeover.
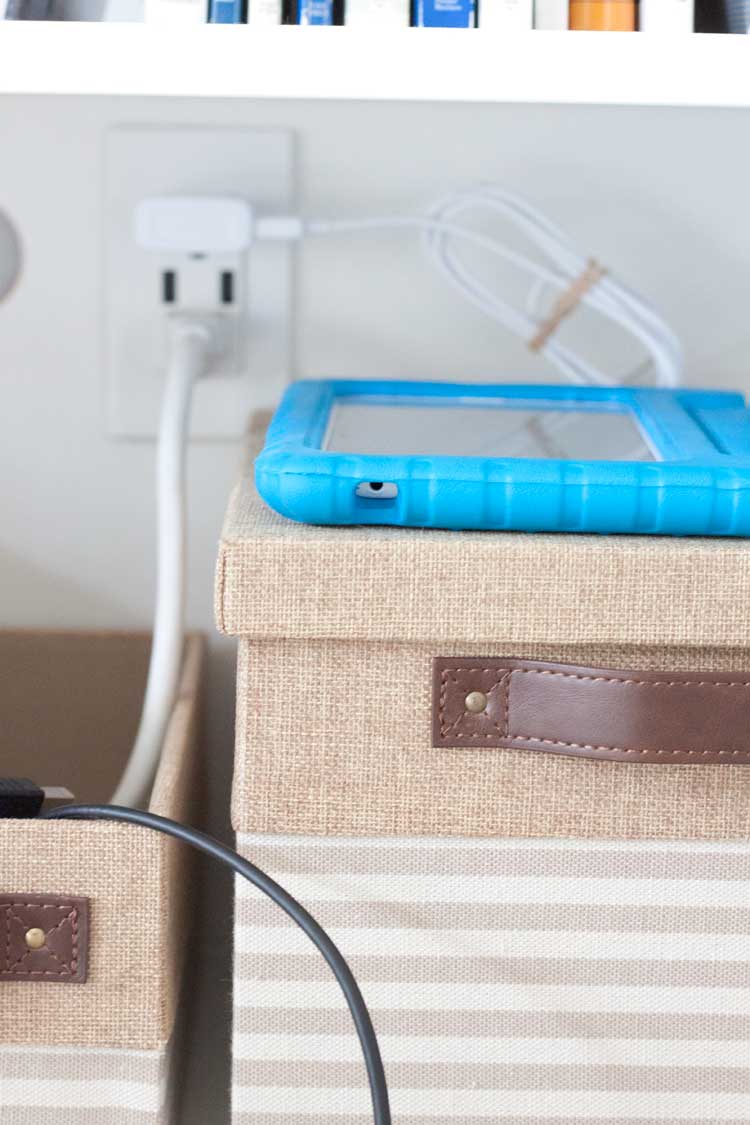
And I especially love this Leviton USB receptacle combo for charging all our devices right here in our office. When we’re done we just store the cords right underneath in these boxes. So much easier to keep up with.
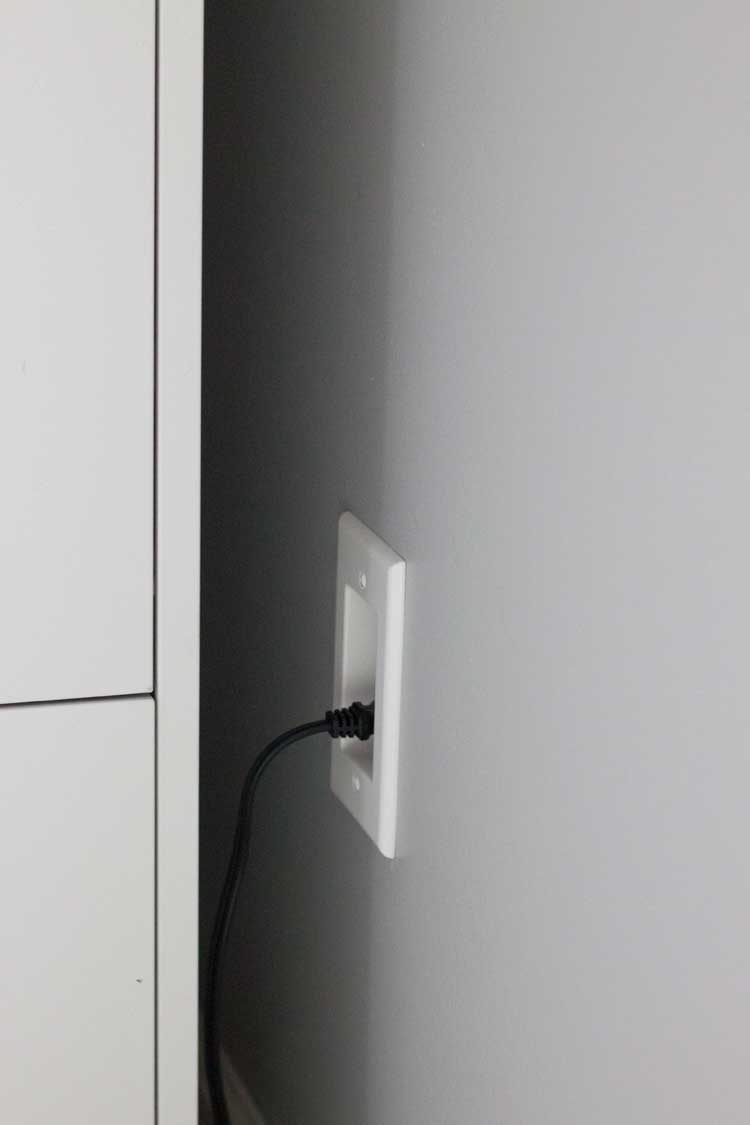
When I scored that $20 file cabinet (that got a makeover) I decided to go with the Leviton recessed outlet so I wouldn’t have to deal with a pinched cord when we pushed the cabinet back in place. I now have all of these recessed outlets behind furniture that I want to be able to push all the way back to the wall without that gap behind them.

Isn’t this a super easy way of getting a super fancy (remote control) feature? And bonus points because it’s a pretty inexpensive solution, too. Where will you put your remote control outlets?
Other Posts in this Series:
-
IKEA Hack Office Makeover – The Reveal
-
Part 1 Building in Billy
-
Part 2 Building in Billy
-
Part 3 Remote Control Lights & New Outlets
-
Part 4 Shop the Look – COMING SOON
-
Giant Framed Postcard – COMING SOON
-
Affordable Library Lighting
-
Office Ceiling Light Fixture
-
$20 File Cabinet Makeover
-
Turning a Photo in a Giant Watercolor Wallprint


This is amazing! I love that you were able to create amazing lighting in here without hiring out! And without having to wire it into the house. We are moving in a few months into our new home and I’m going to be doing something similar with our new home office and I’m thrilled I found this option! Thanks for sharing.
Hi Lynda! Thank you so much! I hope once you get into your new place you’ll be sharing your home office once it’s complete. I’d love to see it. Thanks again!
Where is part 4 with the cost break down?
Hi Jeff, I never actually put the post together. There didn’t seem to be much interest and at that point I had other projects ongoing. I don’t know if it helps but we spent around $2k and that includes everything, even decor.
Jamie,
Looking at making our garage in to my new office space and loving this look, as I need bookshelves galore. I love the flooring you chose, among EVERY.thing else. Where did you find this and what was the cost? Thanks!
Hi Sandy,
Thanks so much! The carpet is from Lowe’s. We’ve had it for several years so I don’t remember the cost. Since we were changing the flooring in several rooms throughout the house, I went with something that I liked but that was also really cost effective. I don’t know if they still carry this or not but I do remember seeing it several years after we had it installed. Hope that helps!