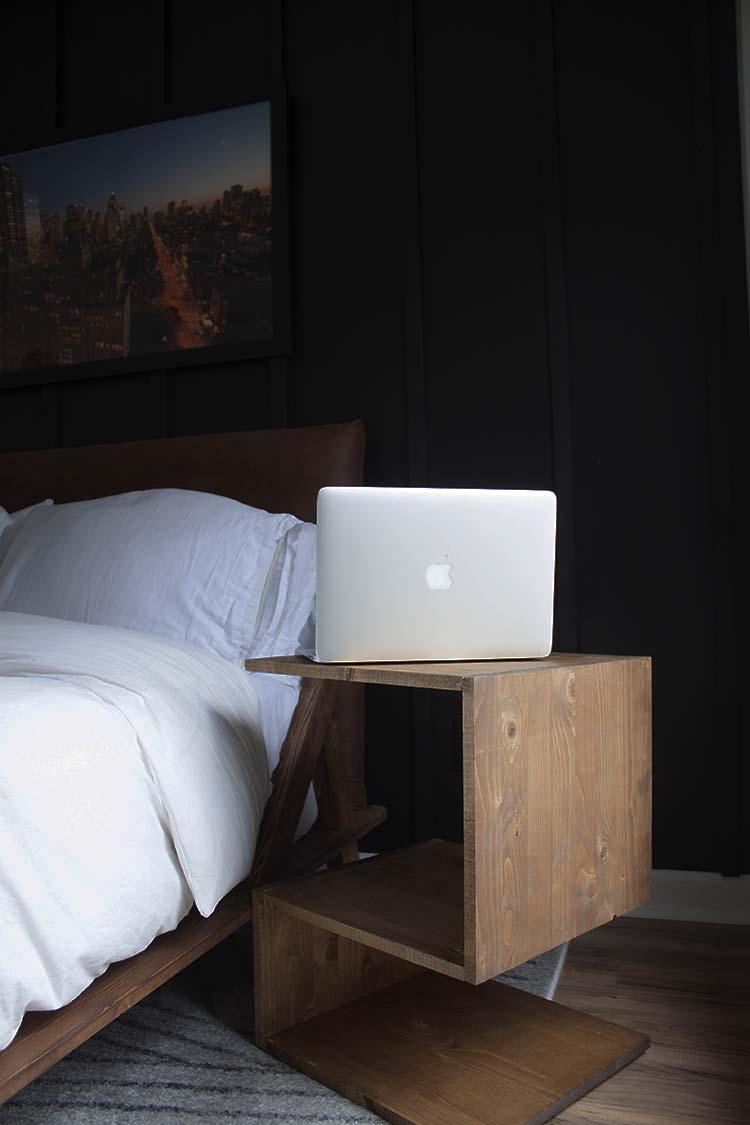
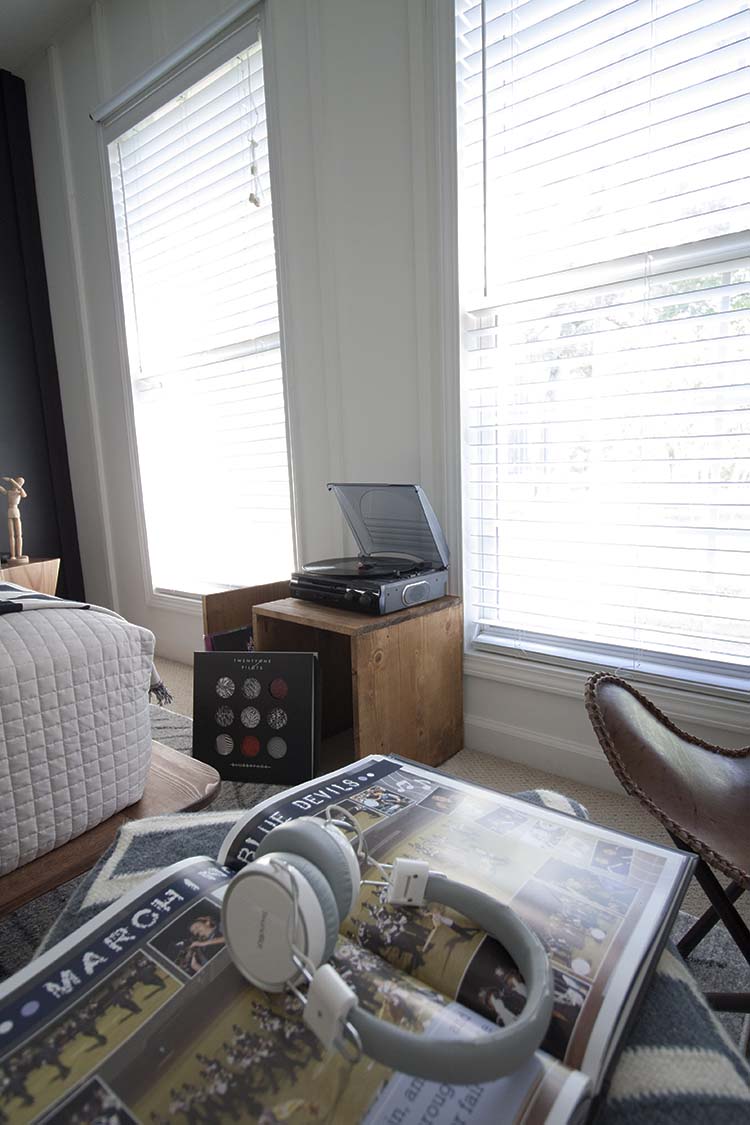
Last year when planning my teen’s room makeover, I knew we’d need a storage solution for books, albums, and his new Bluetooth turntable. He found his own option, a Bentwood side table. Which I was totally down with, design-wise, but have you any idea how much those things cost? Hence this modern DIY side table and what it lacks in curves it more than makes up for in functionality.
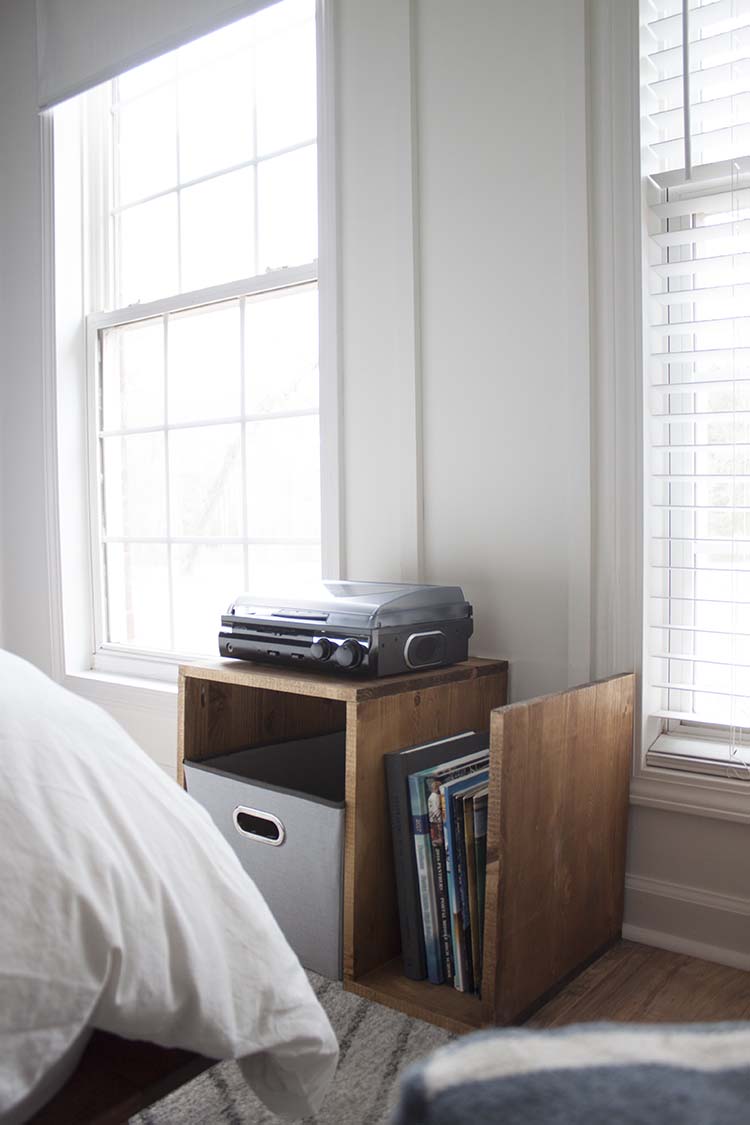
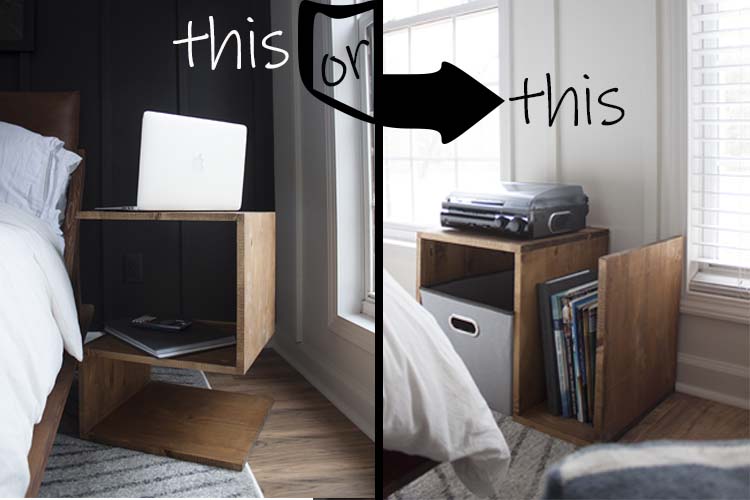
Because not only can he use it as a side table desk, he can also use it for his turntable and to store his albums and books.
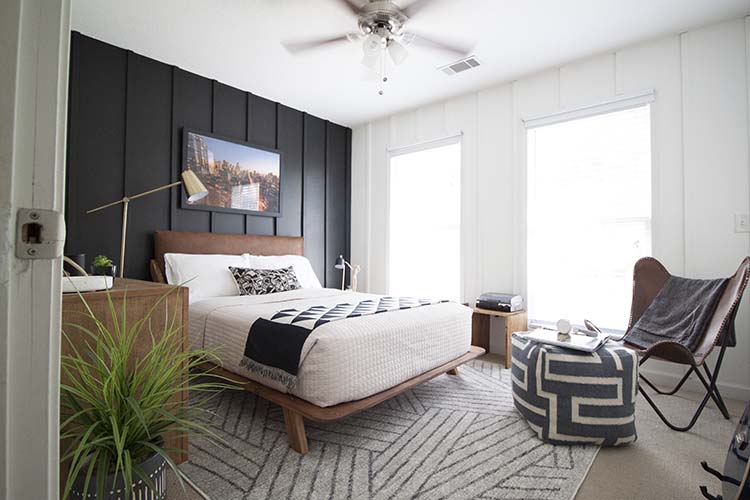
It’s still plenty modern, which is fitting with his new room design, and it was a tenth of the cost to make.
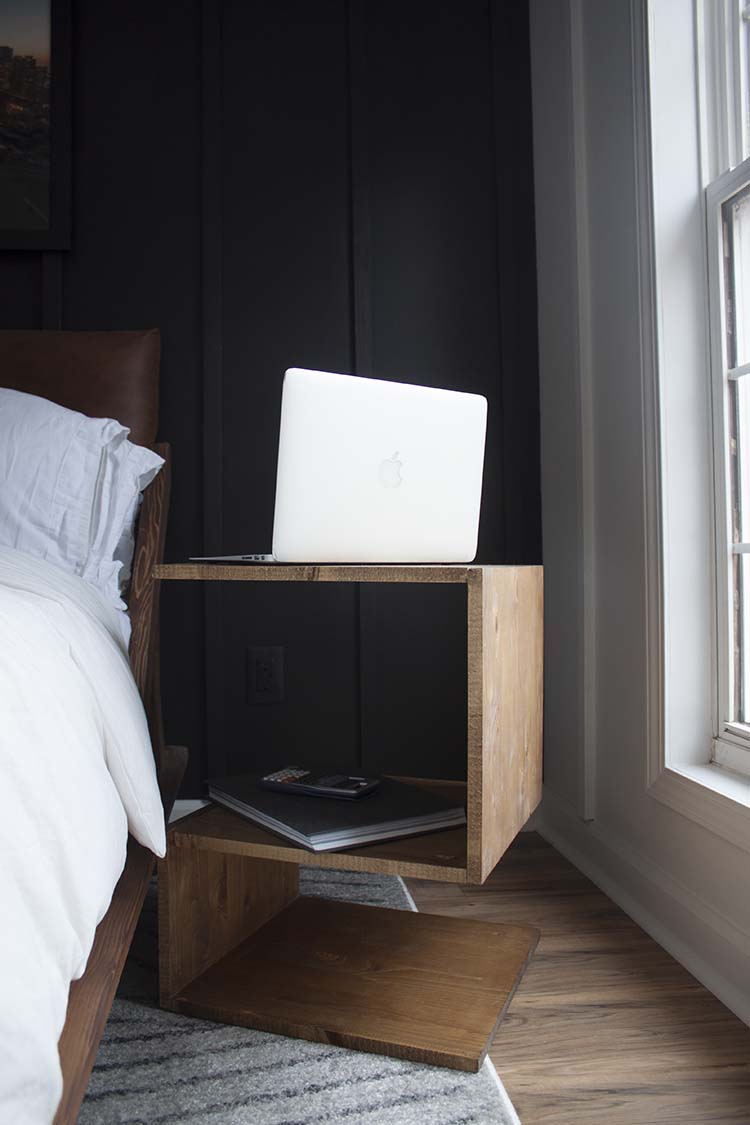
I still need to put on a finish coat, but first I’ve decided I’d rather his be slightly less deep – so it fits nicely between the rug and the wall. Right now it sits a little on the rug causing it to wobble. So, I’ll either shave this one down a bit or, since they’re so inexpensive to make, I might just make another one.
Here’s how to make your own!
DIY Side Table
You will need:
- 1 x 16 x 6′ shelving board
- Kreg jig
- Pocket hole screws (4)
- 1 1/2″ Wood screws (4)
- Drill + bits
- Wood glue
- Pocket hole plugs
- Sander
- Stain
Cuts:
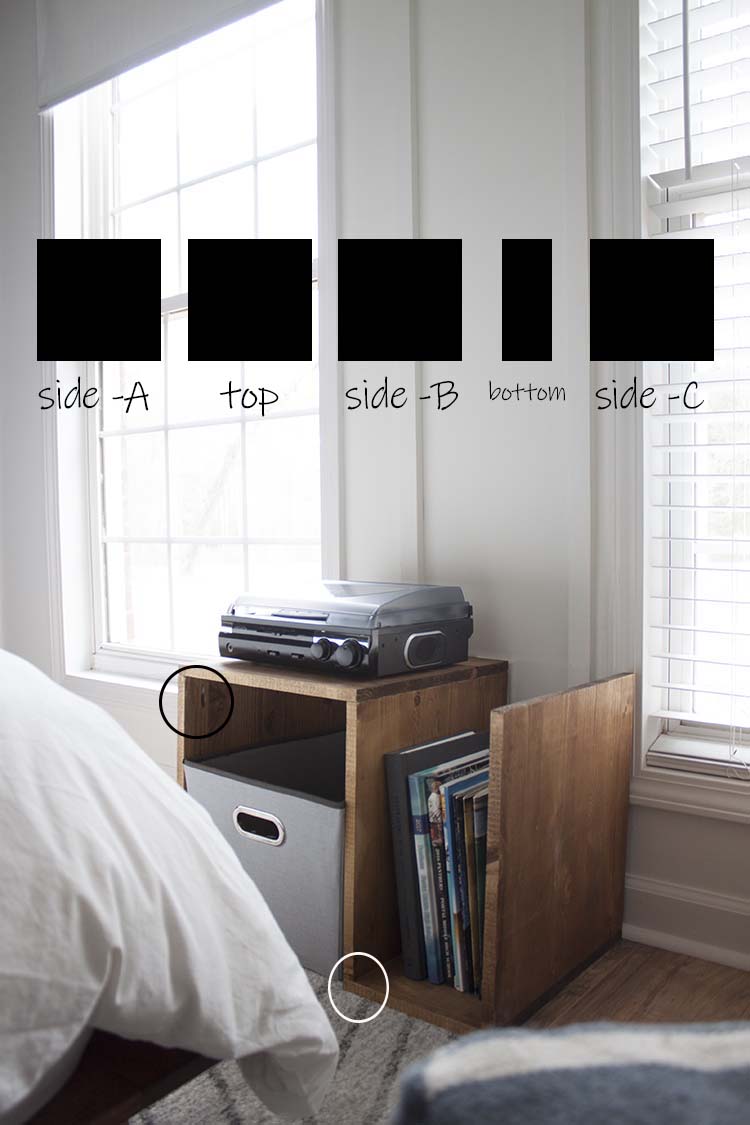
- Side A – 16″
- Top – 14″
- Side B – 15 1/4″
- Bottom – 9 1/4″
- Side C – 16″
- After cutting and sanding your sections, you’ll attach the Top section of your table to Sides A & B using pocket holes. Drill your pocket holes from the inside tops of Sides A & B to help keep them hidden. Attach the Top section to Sides A & B with pocket hole screws and wood glue. Use pocket hole plugs to further disguise your pocket holes, if desired.
- Flip your table over and attach the Bottom section to Side B from underneath using two wood screws and wood glue to attach. Then attach Side C to the Bottom section from the bottom as well. Use two more wood screws and wood glue to attach. It is always a good idea to pre-drill holes to prevent splitting.
- Allow for glue to dry before staining. Sand any areas where glue has oozed out before staining to prevent stain resistance.
NOTE: In the above pic you can see the placement of the Kreg jig pocket holes in the black circle. The white circle illustrates that Side B and Side C are sitting on top of the Bottom section and are attached from underneath.
This was truly one of the easiest projects we’ve ever made! And one of the least expensive, too. And the best part is, it’s a really functional DIY.
This project was brought to you as part of the At Home DIY Bloggers monthly challenge – a series of home how-to project challenges for DIY bloggers with a new theme each month. Please check out my fellow DIY bloggers’ amazing projects below:


I just love this! The versatile ingenuity is amazing. Such an easy build with so much style. Thanks for sharing and inspiring.
Thank you, Meegan!
This is really cool, and I love that it’s multi purpose!
Thanks so much, Cindy!
What an amazing build, Jamie!! I love that this side table has two options!! Thank you so much for sharing this fantastic DIY tutorial!
Thank you, Megan! And thanks so much for the opportunity to participate!
What a fun project. You son must be so happy with it. Thanks for the detailed instructions!
Thanks so much, Marianne! It’s nice to do something easy and functional for a change! 😉
I’m totally diggin’ the side table! It’s just awesome!!!
Thank you, Christine!
Ohhhh, this is smart. I love that it can go both ways. What a simple build.
Thank you, Jacque! 😉
Awesome job Jamie. I love this idea!
Thanks, Brittany!
The design is so modern and beautiful. Love what you did with the table!
Thanks so much, Anam!
What a fabulous table! But I may have heart eyes over that chicken coop that popped up when I opened the page lol.. and I’m over here checking out what live chicks I can find at TS. LOL!
Careful! Chicks are like chips, you can never have enough! 😉 Thank you, Danielle!
This is so cool! I love the modern look, and I especially love how easy it was to put together. Those are the best kind of projects. Great job!
Thanks so much, Amy!
Love this idea! What a versatile table, thanks for sharing the plans!
Absolutely, Christine! Thank you!
I love this clever design. Great job on this!
Thanks, Stephanie!
Love that you can use this turned either direction- functionality yes! Awesome. Beautiful piece.
Thanks so much, Christine!