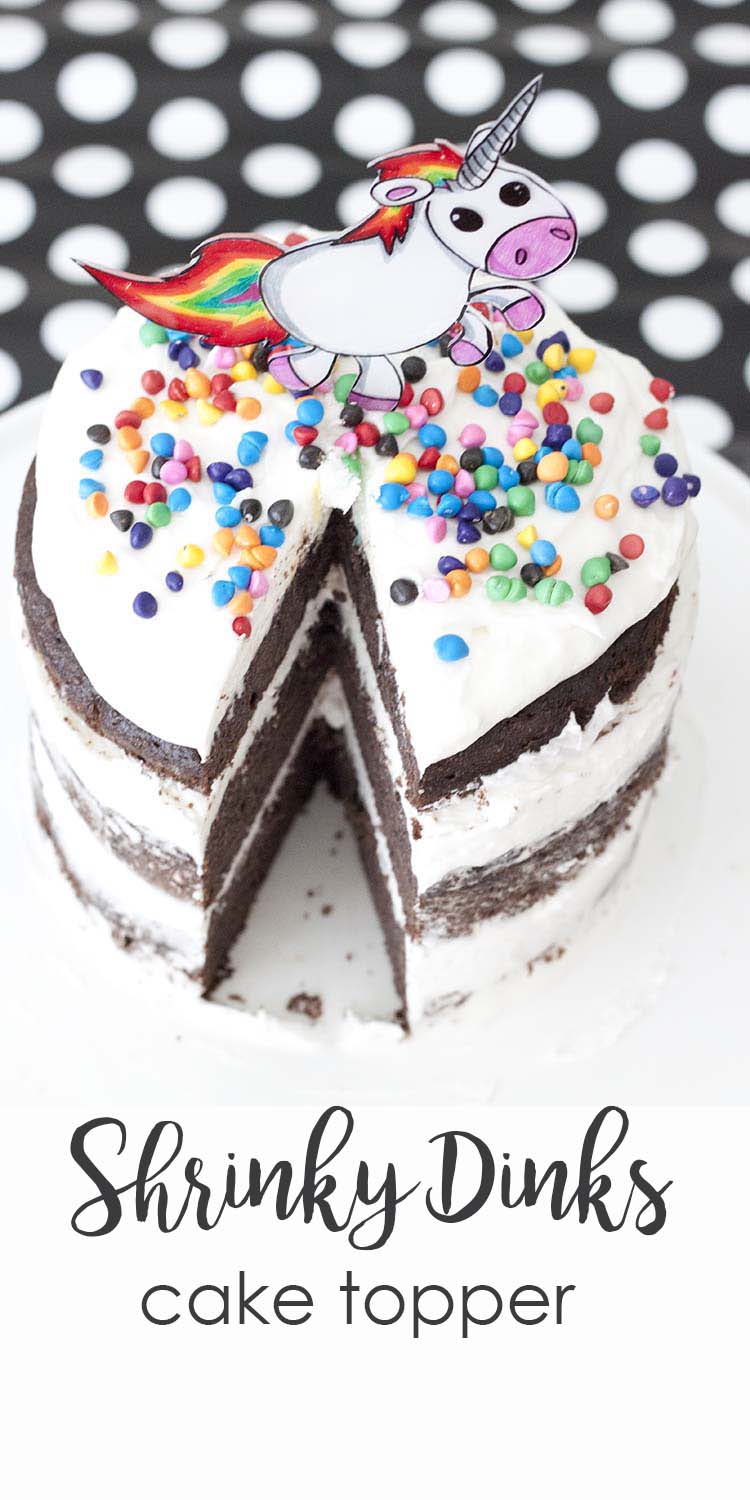
If you’re a child of the 80s you’ve likely heard of Shrinky Dinks before and they likely ranked right up there with your Easy-Bake Oven and your Caboodle. But Shrinky Dinks are back and here’s one great idea for using an old favorite: DIY Shrinky Dinks DIY Cake Topper that is so stinkin’ cute we all need one. On everything!
This post contains affiliate links. Please see my Privacy Policy/Disclosure for more information.
You’ll Need:
- 1 package of Shrinky Dinks Frosted Ruff N’ Ready
- Sharpie permanent markers
- Variety of colored pencils
- Color printer and printed image of choice
- Scissors
- Oven
- Cookie tray
- Parchment paper
How to Make a Shrinky Dinks Cake Topper:
This year I wanted a special cake topper for my soon-to-be six year old’s birthday. Everything I saw at the store was either way too big for the cake, overly complex or just plain junky looking. After an exhaustive search for the perfect cake topper, I decided it would just be easier to make my own. I made him Han Solo, Chewy, Kylo Ren and a Stormtrooper cake toppers for his Star Wars birthday party. I made this unicorn for myself!
And it was easy! Create any image you want in just minutes, bake and you’ve got a completely customizable, one-of-a-kind cake topper.
Draw Your Image:
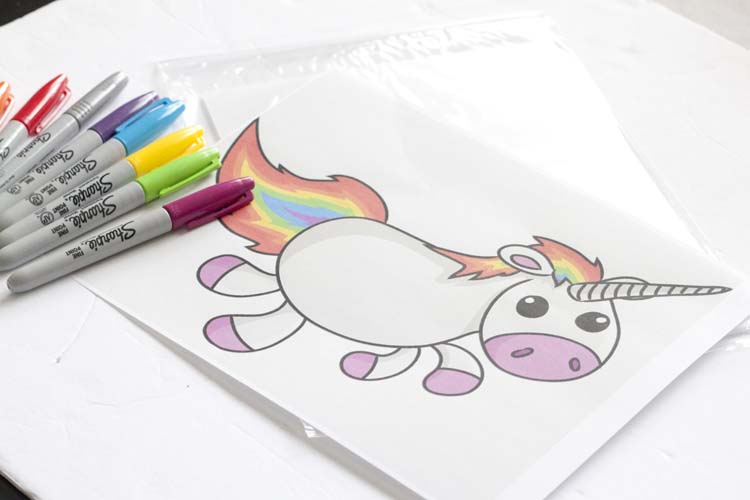
You’ll start by choosing your image. Print it out using a color printer onto plain printer paper. Of course, you could also choose to freehand your design if you’re so inclined. You’ll want your design to take up as much of the Shrinky Dinks sheet as possible because your design will shrink to approximately 1/3 of its original size. So keep this in mind when printing or drawing out your design.
Take care to leave some extra room at the bottom of your design to create a pick for sticking into the cake.
Shrinky Dinks come in kits and in creative sheets. The creative sheets are great because they give you complete creative freedom.
I used the Shrinky Dinks Frosted Ruff N’ Ready because I’m going for a dimensional effect by coloring on the front and back of the sheet. But these creative sheets come in a variety of finishes including clear, bright white, and inkjet printable.
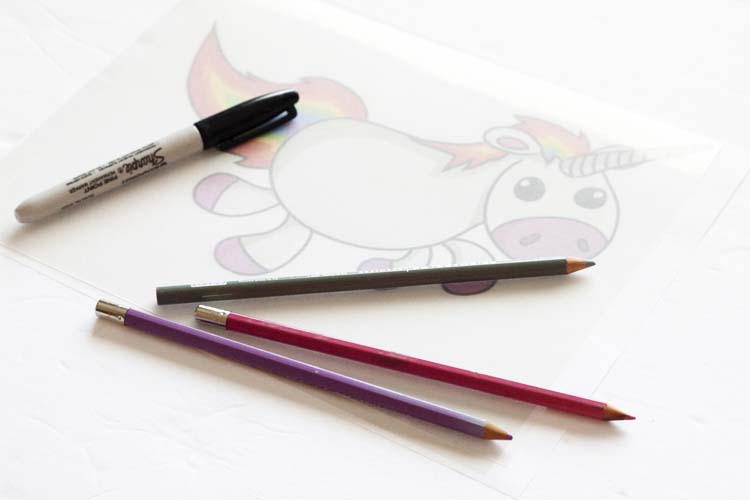
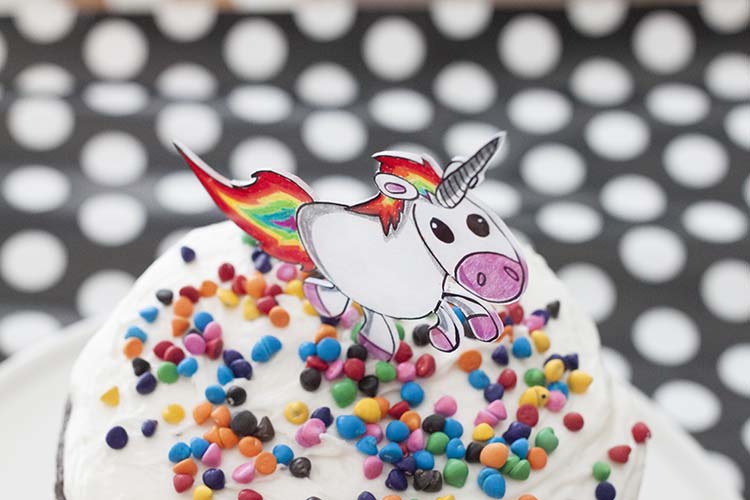
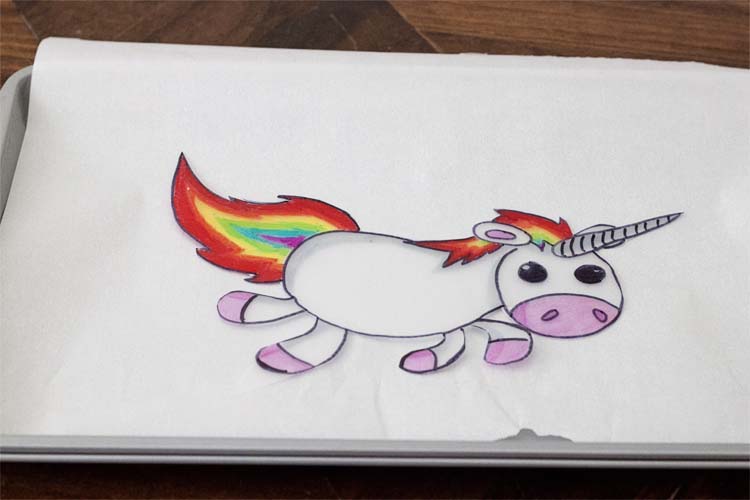
I chose the frosted sheets because once they’re baked anything I didn’t color becomes an opaque white. I started by placing my design underneath the Shrinky Dinks sheet and tracing the outline and eyes of the unicorn in black onto the smooth surface of the sheet. Then, I colored the rainbow mane and tail in fine point Sharpie markers onto the smooth surface.
Once the outline was complete, I flipped the Shrinky Dinks sheet over and shaded in the rest of the design (feet, ears, shadows, and nose) with colored pencils onto the “ruff” side of the sheet. And after that, the design was ready to cut out.
Use sharp craft or paper scissors to cut around the outline of your design. This will make it easier to cut around the tight corners of your image. Be sure to leave a section of the sheet attached to the image to create a pick for inserting into the cake. For this image, I left a section under one of the unicorn’s back feet.
Bake Your Cake Topper
Preheat oven to 300 degrees.
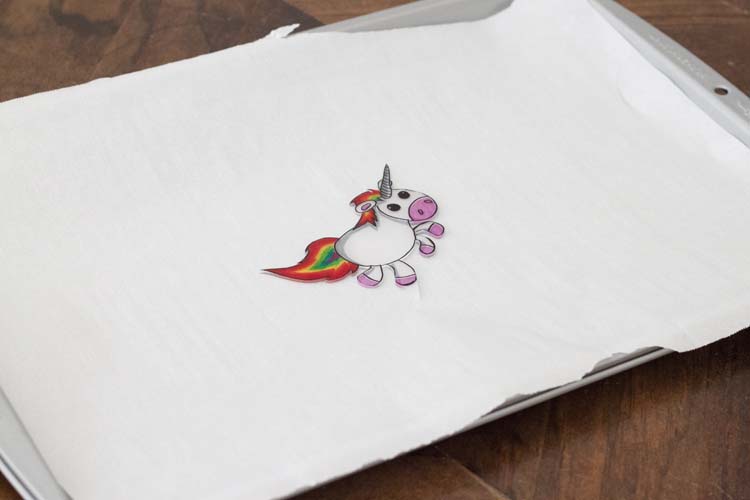
Place your design on a cookie sheet lined with parchment paper.
Place in oven for approximately 1 – 3 minutes. Watch as your design begins to shrink. A conventional oven works for this but a toaster oven is ideal for keeping an eye on your topper as it bakes.
As your cake topper shrinks it may lift around the edges or bubble. Once the image lies flat again it is done shrinking and ready to remove from the oven.
Remove from oven and allow to cool approximately 15 seconds.
*For best results always follow package instructions.
Troubleshooting Tips:
If you have an image that has thin sections these may curl up as your design begins to shrink. If these sections don’t lie back down flat on their own you can carefully give them a little help with the end of a toothpick. Allow the design to continue baking until it rests flat. Try to avoid super thin sections in your image as these may curl up and bond with one another.
You can also place another section of parchment paper over your image after you remove it from the oven and place a heavy object on it to keep it flat while cooling.
If a cooled image isn’t flat it can be returned to the oven and reheated until it lies flat.
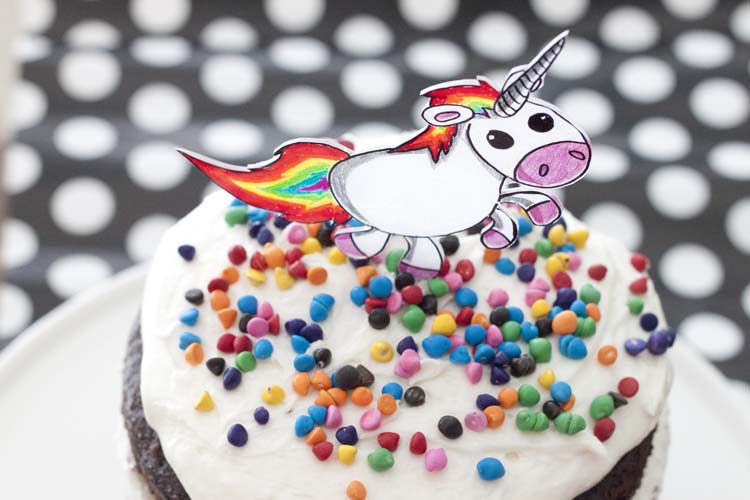
Depending on the complexity of your design, you can accomplish a one-of-a-kind cake topper in about 10 minutes, start to finish. Not bad for a totally custom cake topper.
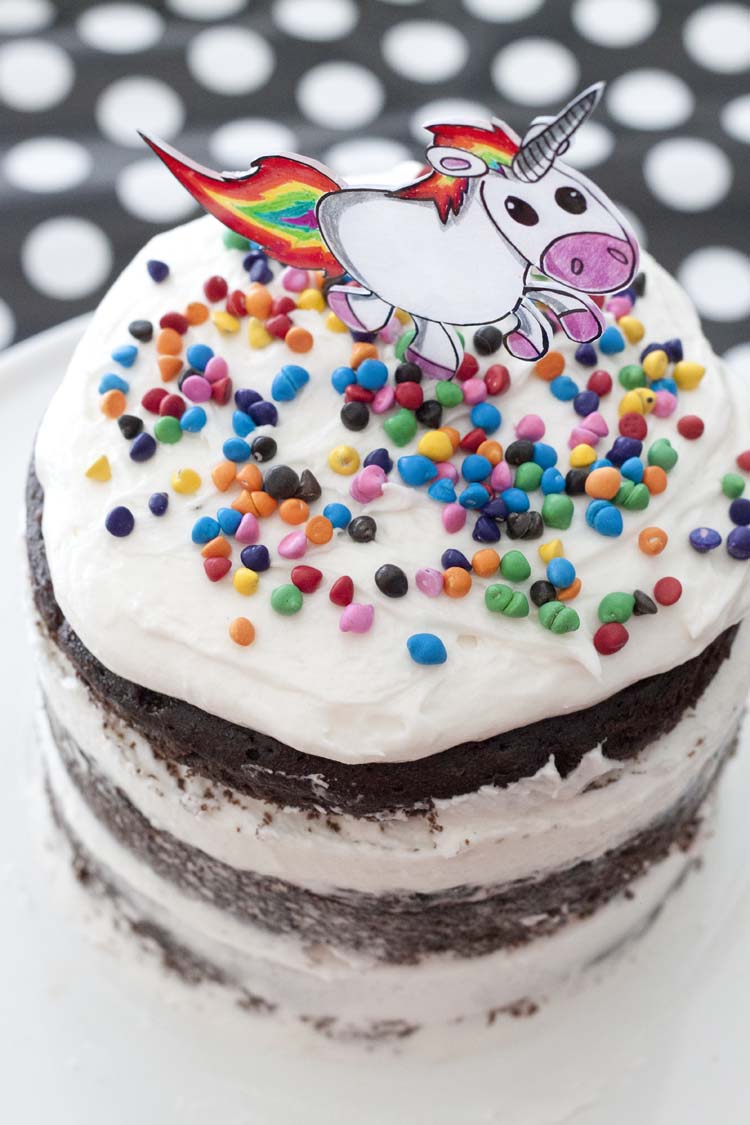
The cake pictured here is 6″. If your cake is bigger, consider a grouping of cake toppers to cover more area. For example, a unicorn could always use a rainbow and that icing is practically begging to become clouds!
So…what cake topper will you make??


The topping for the cake looks amazingly colourful. Thank you so much for the tutorial, Jamie 🙂 Would try this for my son’s bday next month!
Thank you, Vritika! I hope your little one has a wonderful birthday.