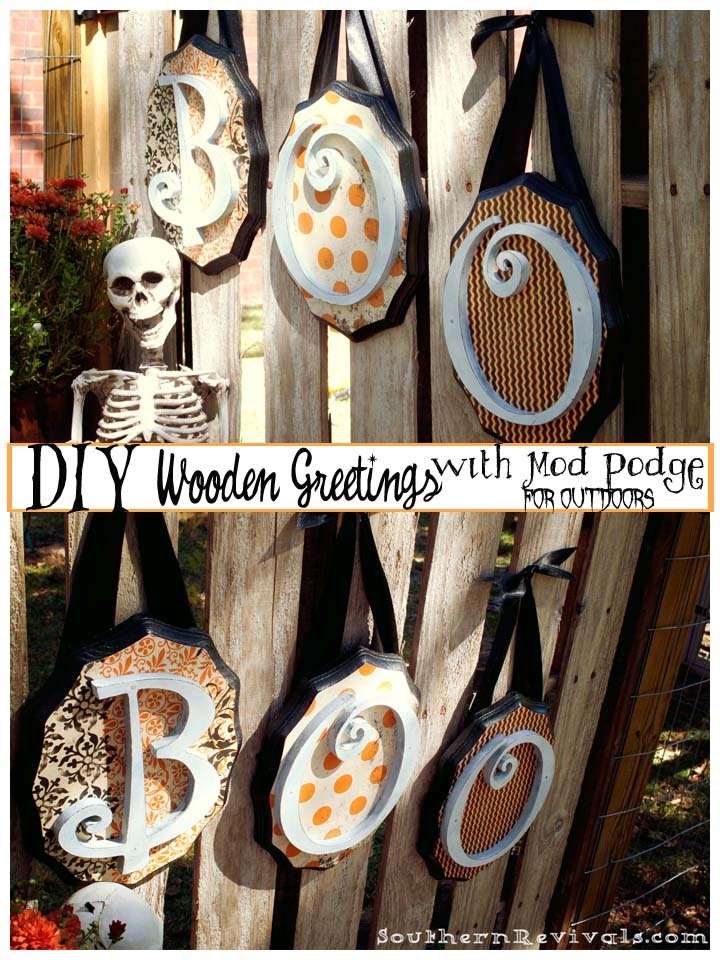
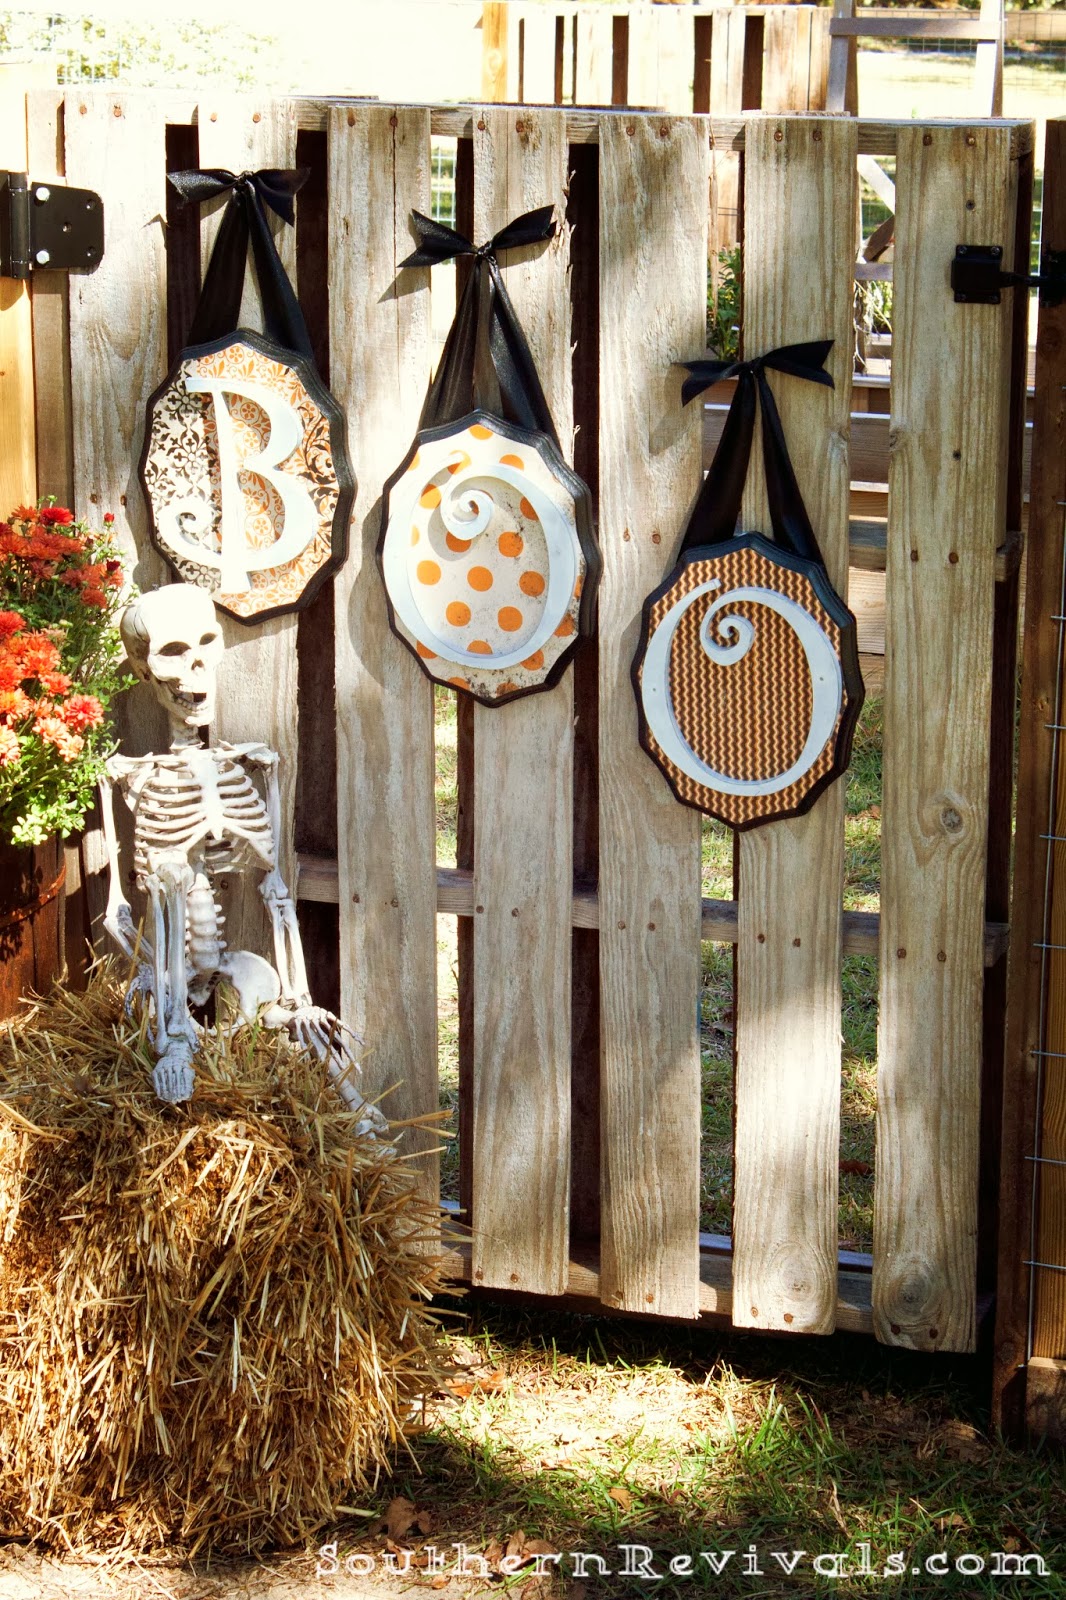
It’s time to get your spook on! And while decorating on the inside of your home is a given, let’s not forget about the outside. Create these fun BOO plaques with the help Mod Podge and their Outdoor formula that lets you decoupage for the outdoors. Perfect for an extra spooky greeting for those little boils and ghouls who’ll be gracing your doorsteps in just a few weeks.
Use Mod Podge’s Outdoor formula to create greeting plaques like these, an extra special wreath for your door, to seal up some marvelous pumpkins and even some fun yard signs. The possibilities are endless. Here’s a tutorial for just one of the ways I’m using my Outdoor Mod Podge to get my spook on!

What you’ll need:
Wooden plaques of your choice
Wooden letters of your choice
Craft paint
Paint brushes
Mod Podge Outdoor Formula (if using outdoors)
Scrapbooking paper
Small Nails
Hammer
Ribbon or Sawtooth Hanger
Optional:
Dremel or Drill and drill bit to pre-drill holes (in letters)

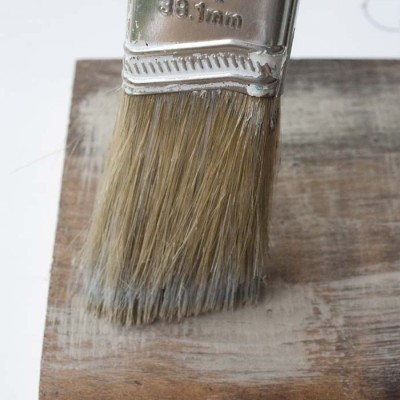
Paint two coats of craft paint (or paint of your choice) onto your plaque and letters and allow to dry.

For this look, I painted the plaques in black and I also painted the first coat on the letters in black. Then I went over the letters with white to give it some spooky contrast.
Once the letters have dried, cover them in several thin coats of Mod Podge Outdoor formula allowing each coat to dry 15-20 mins before reapplying.
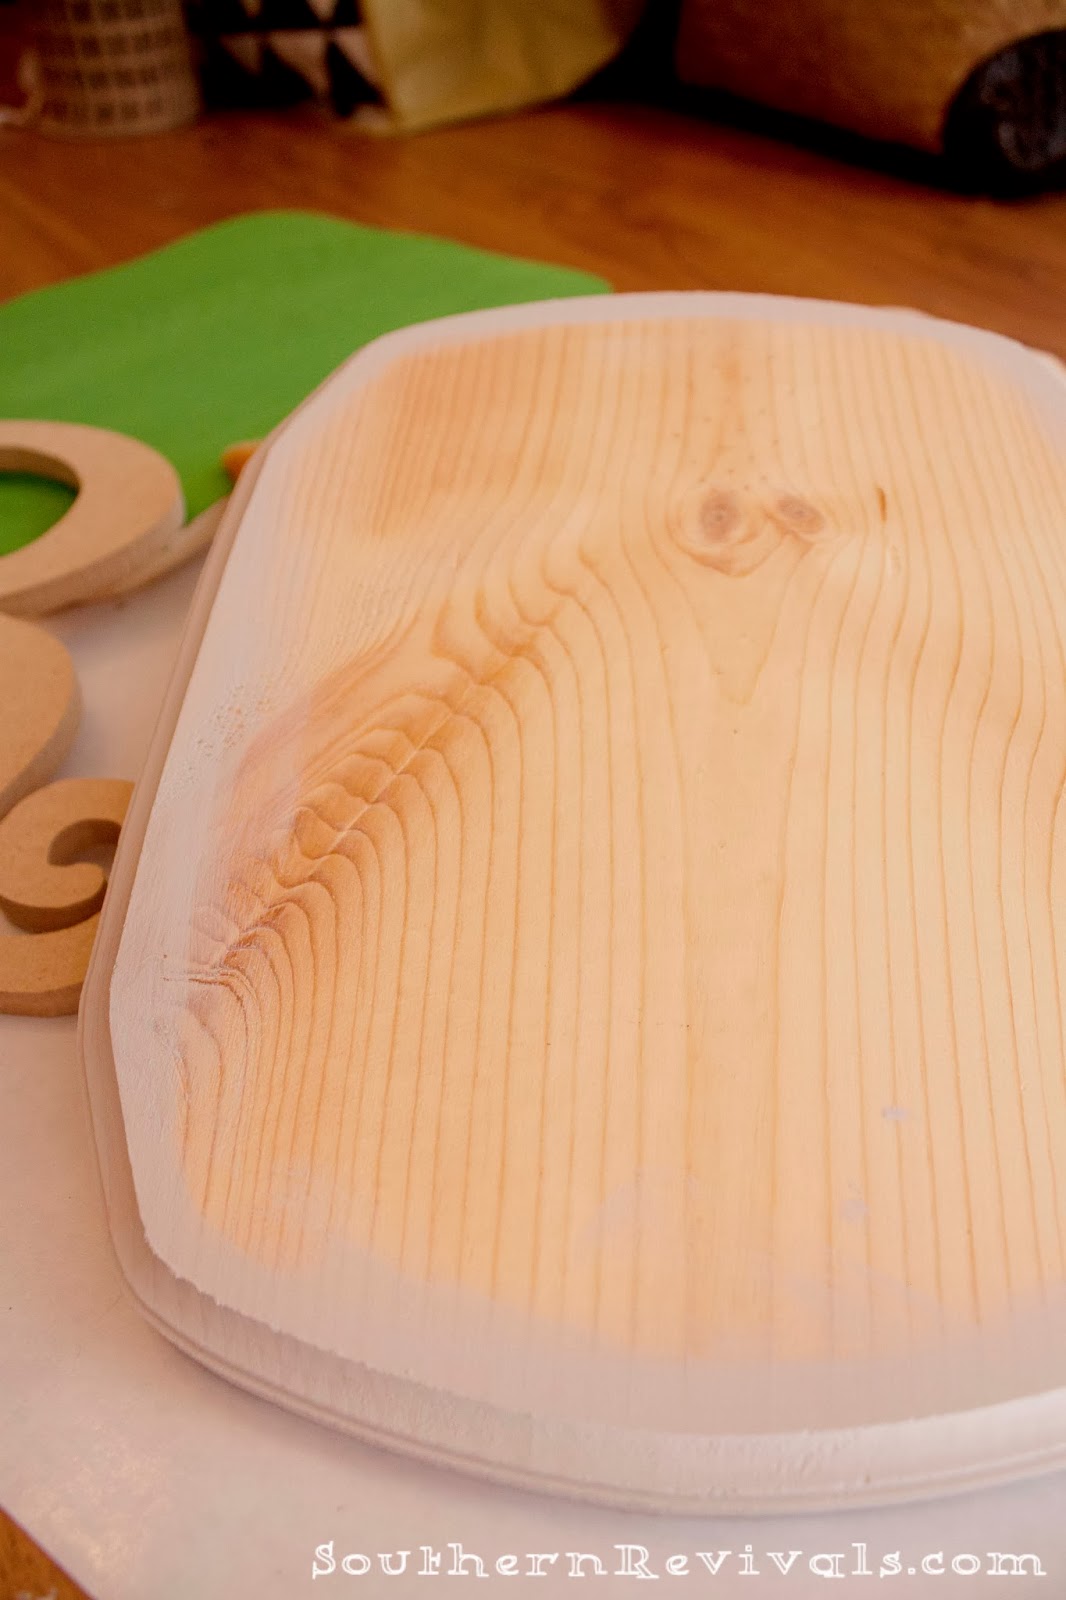
For the plaques, I like to bring a bit of paint up to the edges on the front so it will overlap where the paper may not cover.
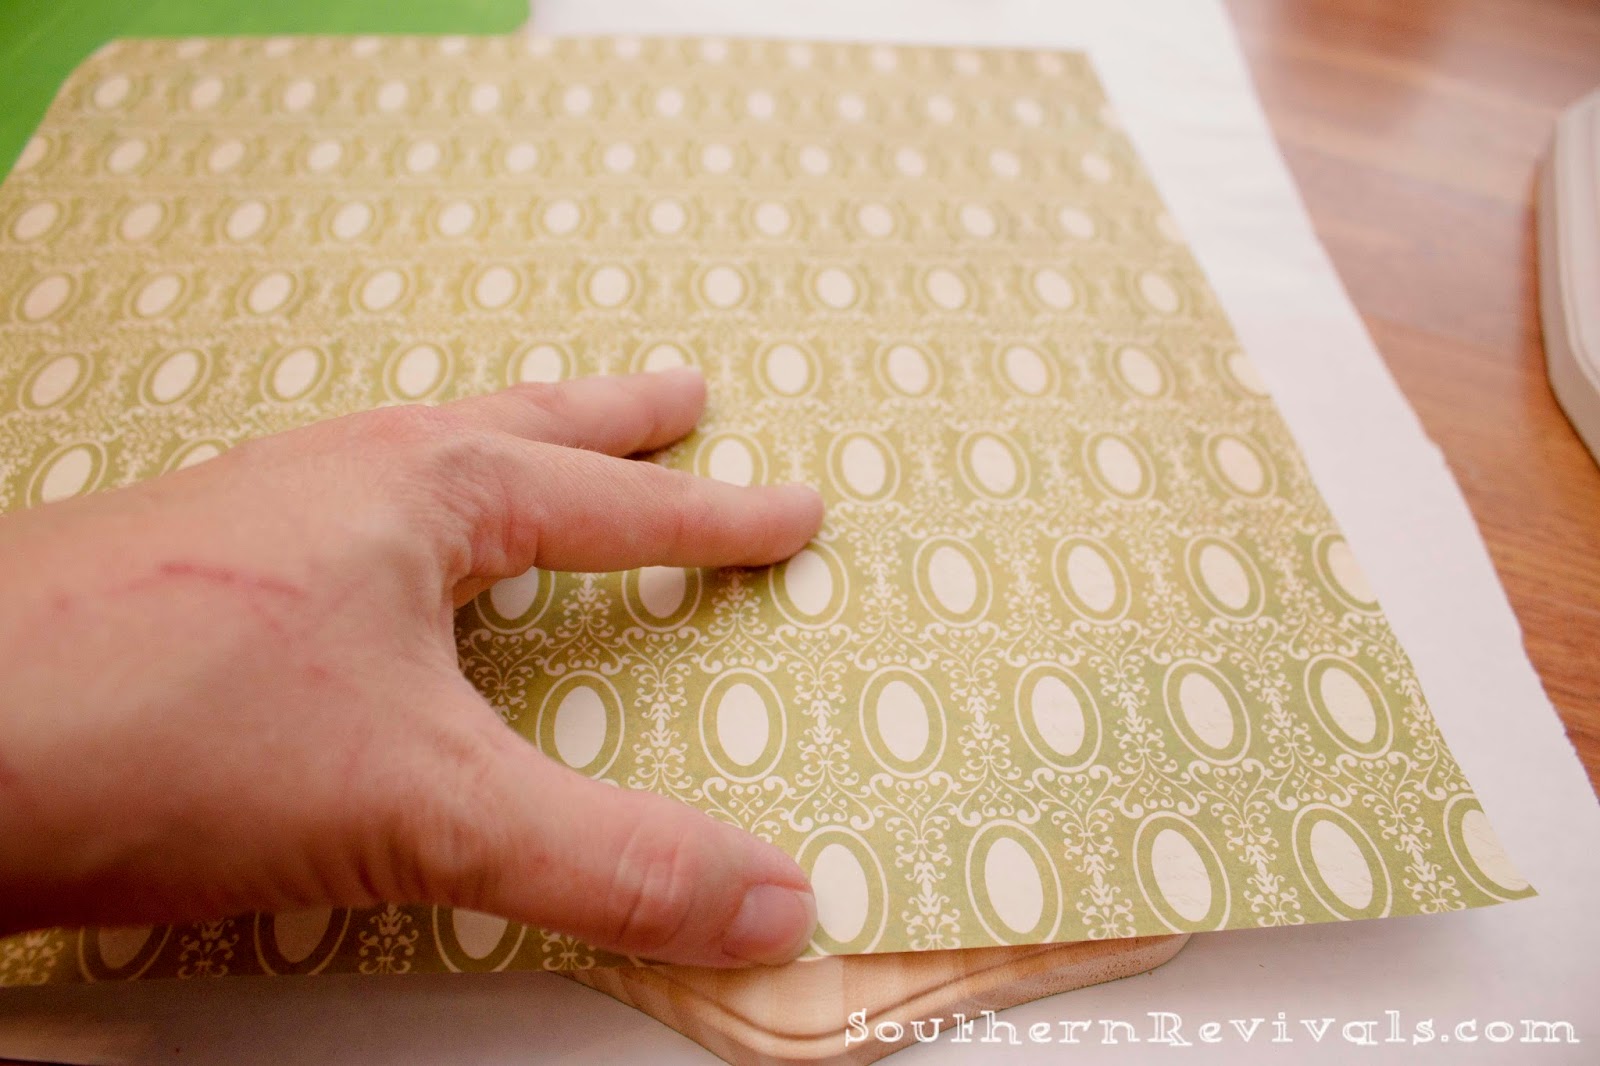
Take a scrapbooking page of your choice and lay over the edges of your plaque. Begin to burnish the paper around the edges of your plaque, careful not to allow the paper to shift.
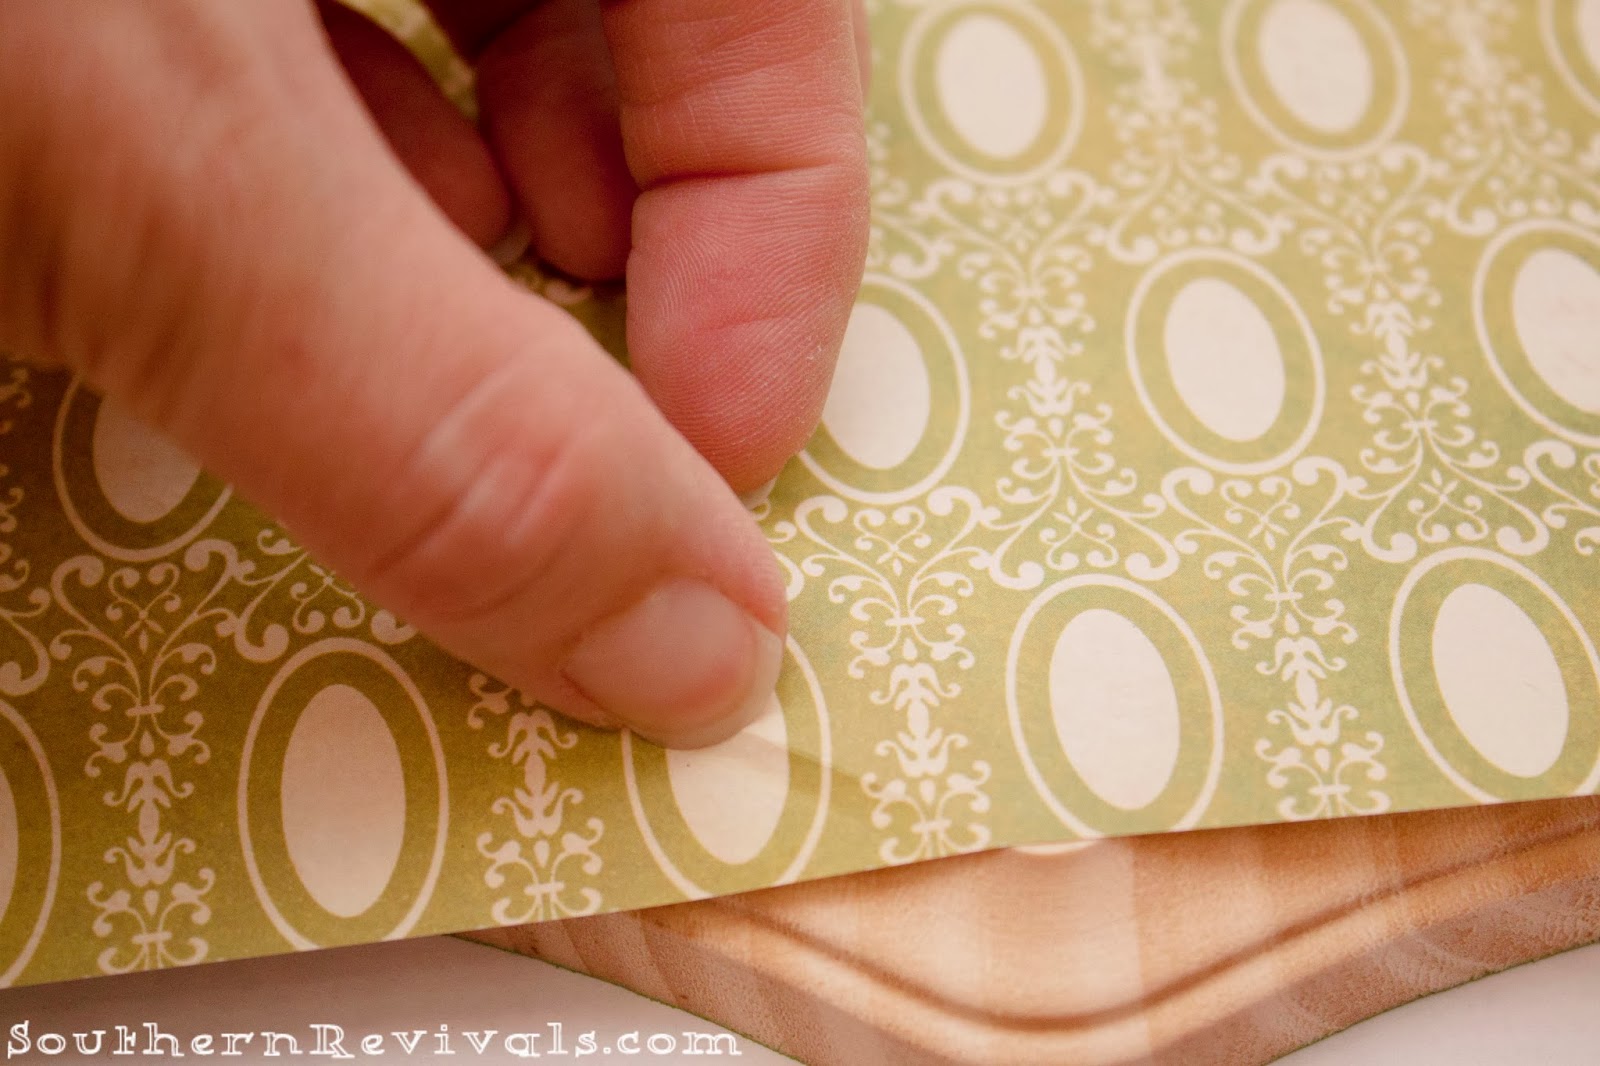
Do this all the way around your plaque until you’ve created a solid cut line. Then trim your paper along this line.

Brush on a thin layer of Mod Podge Outdoor formula on your plaque and gently lay the paper over it. One coat will do it for this step. Gently smooth out any bubbles and allow to dry completely.
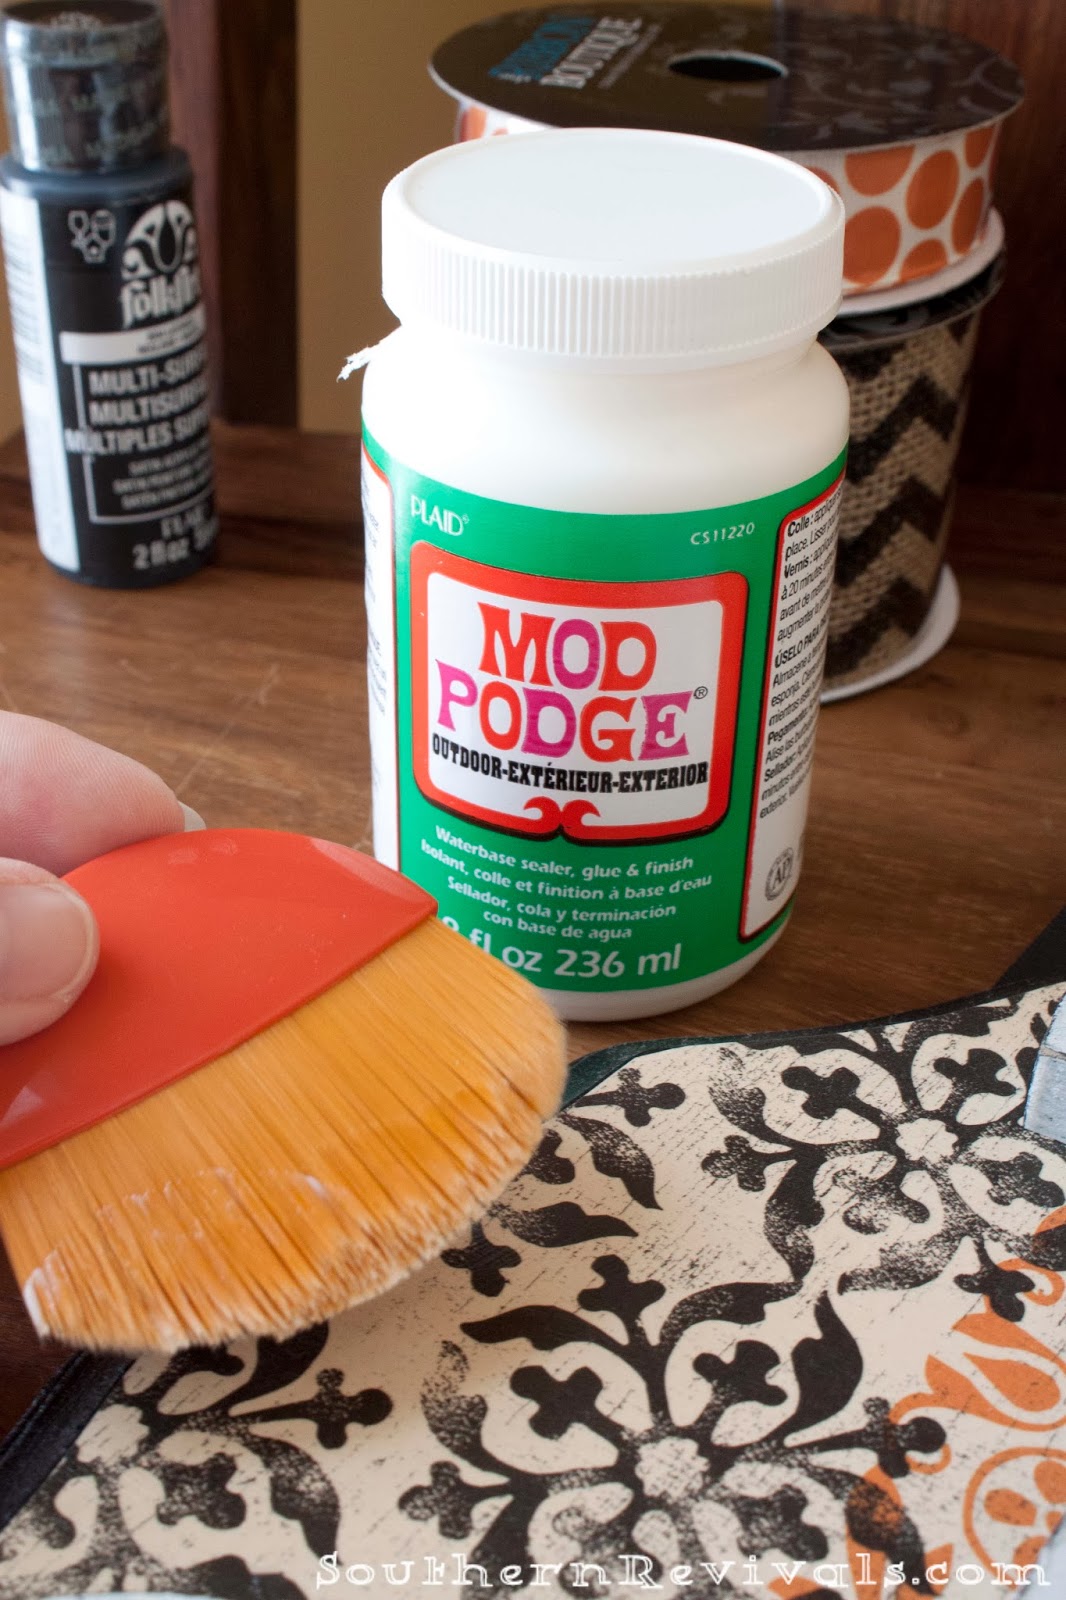
Once your paper covered plaques are completely dry then seal the top of the paper and plaque with Mod Podge Outdoor formula making sure to apply several thin coats allowing 15-20 mins dry time between each. Make sure to cover front and back to seal. This will allow your letters to hold up in outdoor conditions.
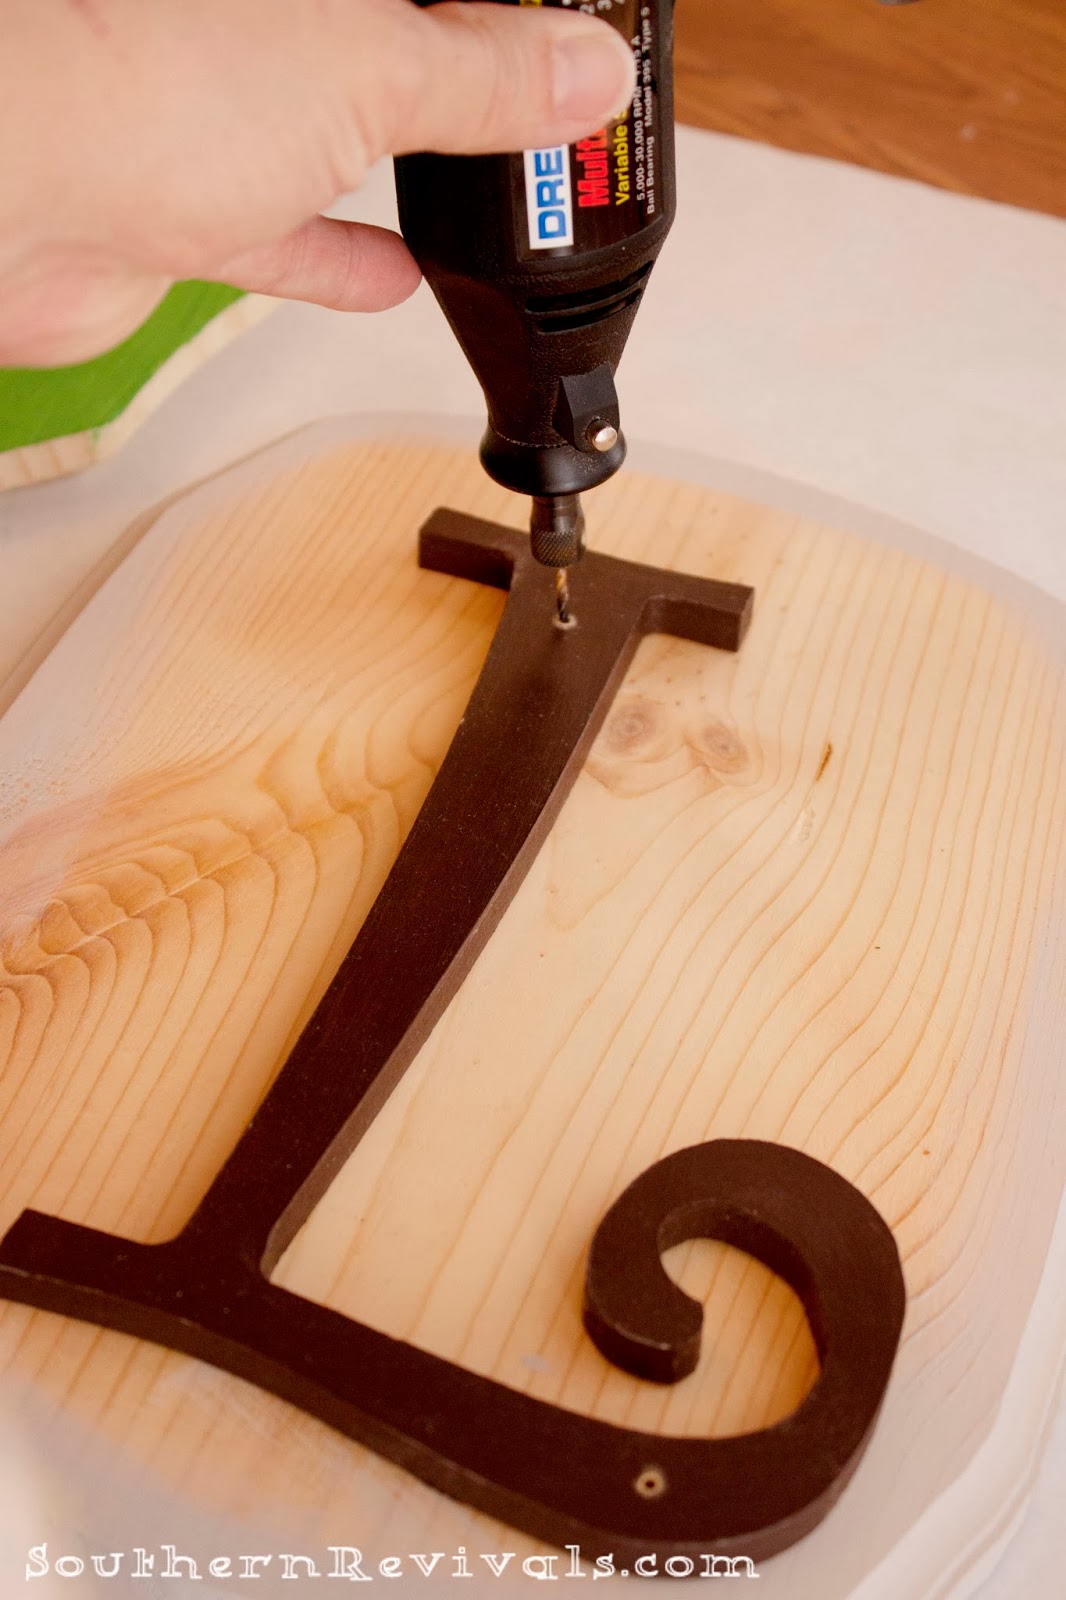
While you’re waiting on your plaques to dry, pre-drill holes in your letters for your nails making sure your drill bit isn’t larger than your nail.

Place the finished letter over the finished plaque (not pictured) taking care the letter is centered and then nail down. This should only be done once both the plaques and letters have thoroughly dried.
Now you’re well on your way to being the most fun house on the block! Enjoy!
Tips & Tricks:
Paint nail head to match letter color.
You may choose to attach ribbon or a sawtooth to the back in order to hang.


I am very bad at crafts, so how do you tack the ribbon to the back of the plaque?
I just use a staple gun!