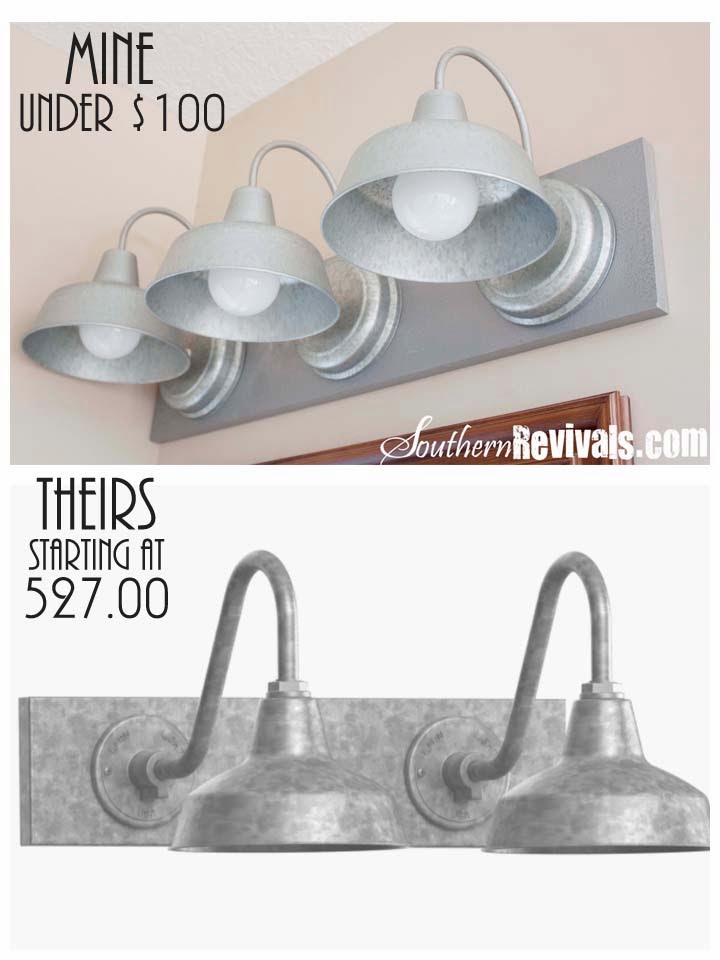
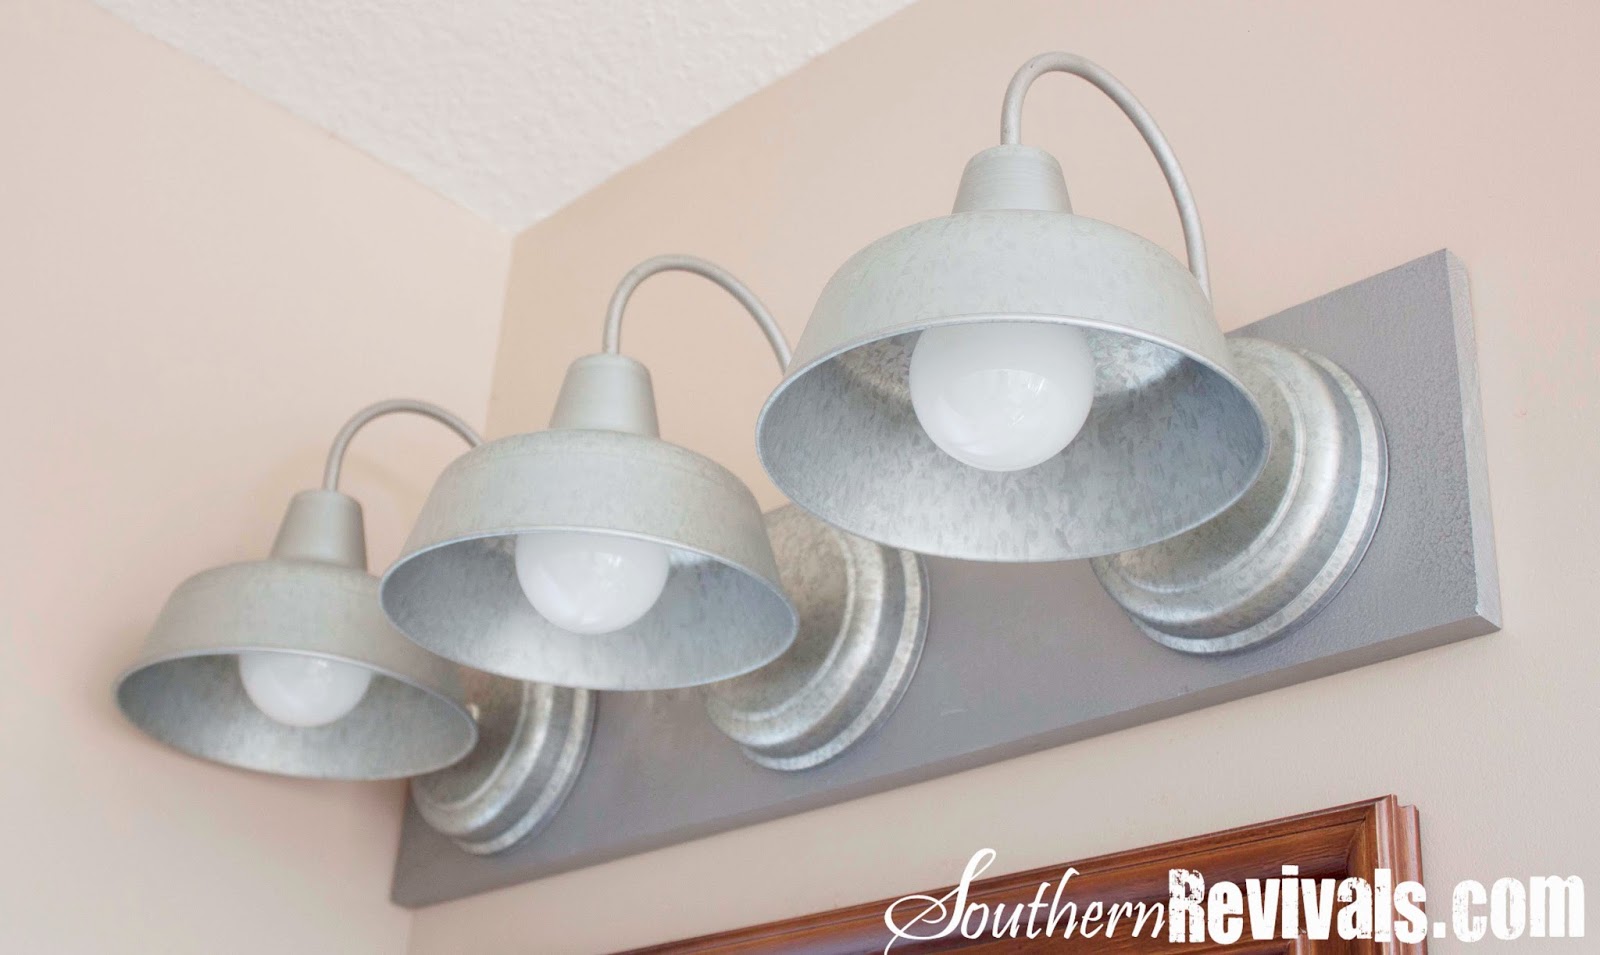
I first discovered these fabulous galvanized light fixtures in Lowes over the summer. We were contemplating a bathroom reno for our boys’ bathroom. When I saw this fixture I knew I had to have it. By the time we got it put up in the bathroom it was well past dark and I knew we had a problem.
Apparently these fixtures are more your decorative outdoor sort and, as such, are more like a nightlight than an actual light. I tried different bulbs for about a week before I gave up and sadly packed it away in its box for the trip back to the store. What it boiled down to was I needed more than one.

I found a fixture online with just 2 lights starting at 527.00! So instead of taking back my sad little light, I went back to Lowe’s and got two more. A 1×8, some small screws, toggle bolts, extra wire and large wire nuts. And a can of Rustoleum Hammered in Silver. All for around $100.

Tools we needed:
Drill, drill bits, router, router bit, box cutter or knife
Cut (or have your hardware store do it!) your board the length you wish your light fixture to be. Sand lightly if necessary. Spray paint your board with Rustoleum’s Hammered Spray Paint in Silver- 2 coats should do it. Lay out your light fixtures on the back of the board. Once you have them evened up, trace their outline so you’ll remember where they’re going.
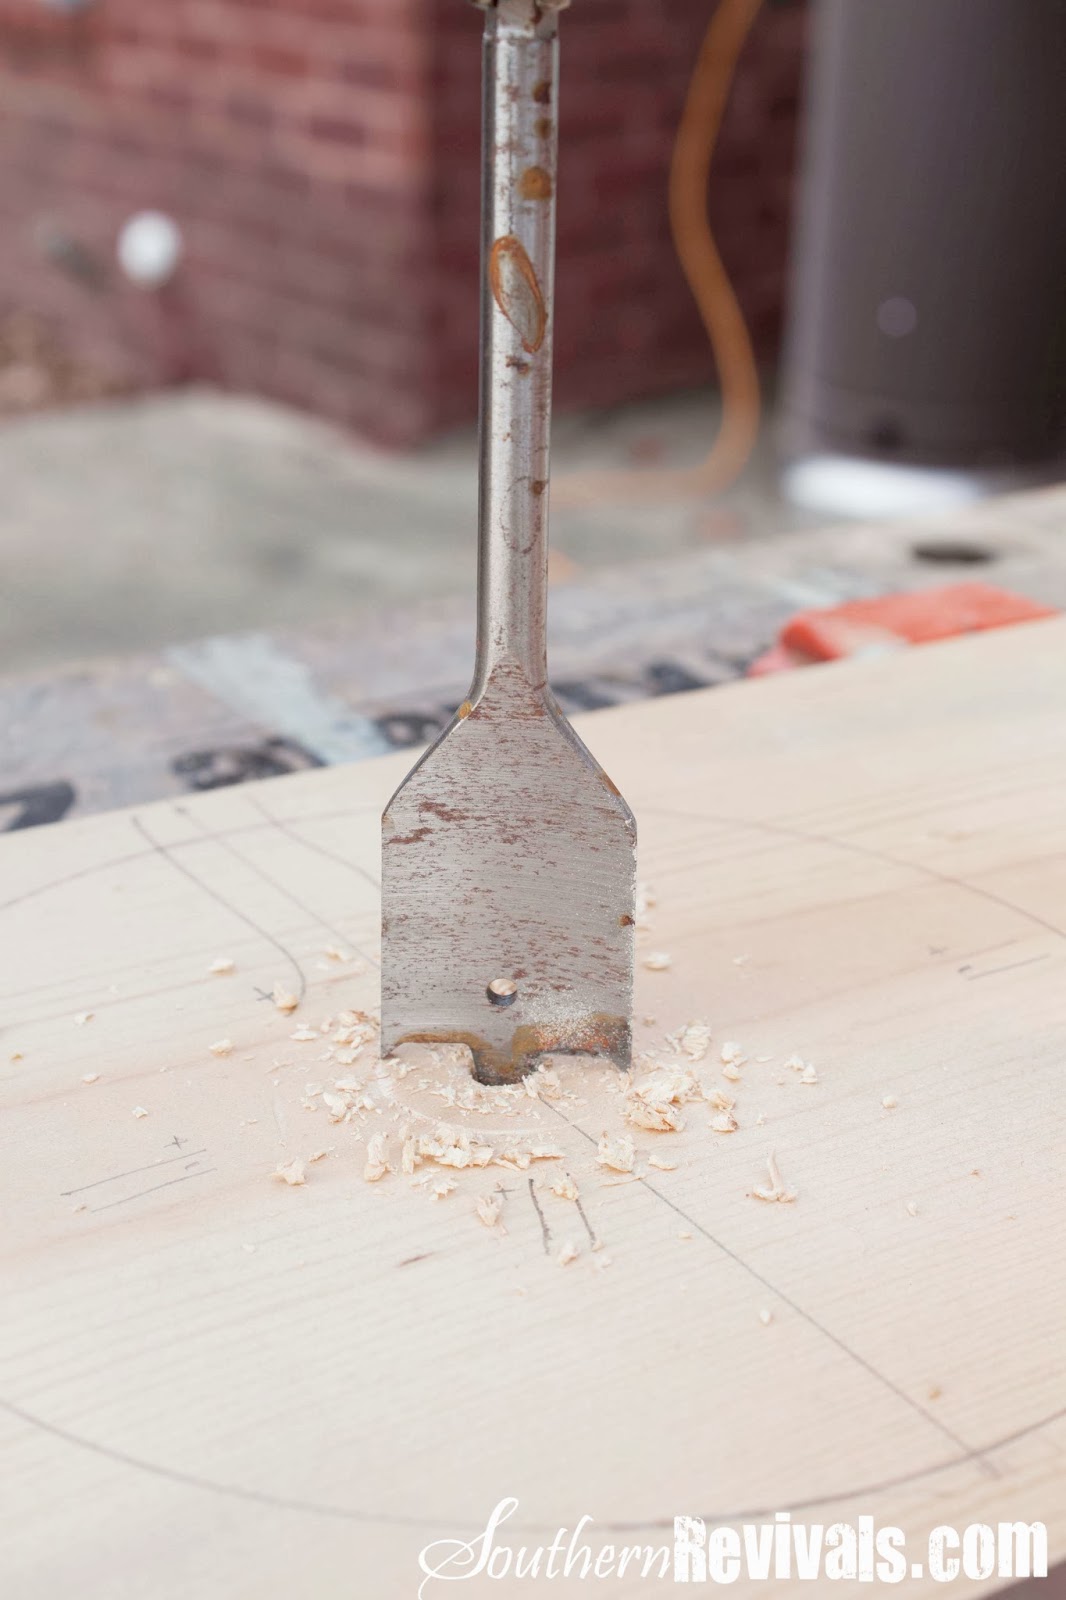
Using a flat wood drill bit or hole saw, drill a 1 1/4″ hole in the center of each circle. The center hole will need to be slightly larger to accommodate all of the wires.

Then, using a router with a 3/4″ straight (or comparable) router bit, router a channel from one hole to the next. This will house your wires in the back of your board so your fixture will have a snug fit to your wall.

Once that’s done check for any nicks and touch up the paint if necessary. If you don’t have, or aren’t comfortable with using, a router you could always build out the back of your board with 1/4″ strips of wood along the back to make extra room for your wires. This would just make your fixture “thicker” but still give you virtually the same look.
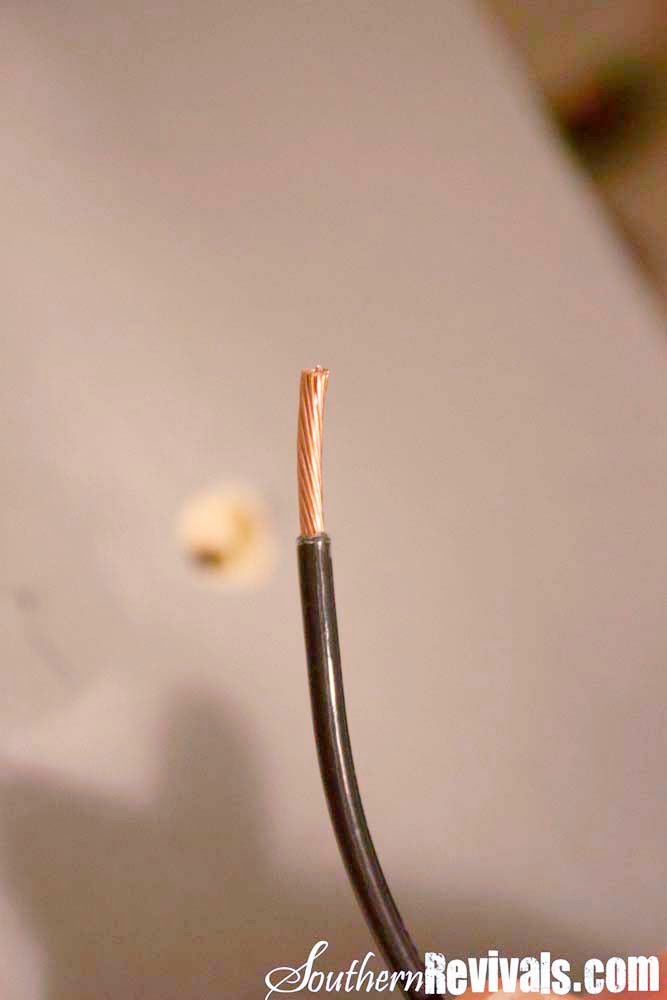
You will need extra wire for the two end lights because the wires they come with won’t be long enough. Don’t let this scare you! While you’re in the store pop that fixture out of the box and have an employee help you find the wire you need. You will need extra lengths of the black wire (or “hot” wire), the white wire (or neutral wire) and a ground wire.
To attach these wires to your fixtures’ wires simply run a box cutter or knife along the coating at each end of the extra wire leaving about a half inch of exposed wire. Match these ends up with the corresponding wires of your fixture twist together and attach with a wire nut. Attach mounting bars across the center of all three holes in the board in preparation for installing the fixtures.
After you’ve connected the two fixtures on both ends to the extra wire, run the wires through the holes in the front of the board along the channel in back. Then run wires up and out through center hole. Now drill holes for your toggle bolts anywhere around your two end fixture holes where they will be covered by the fixture.

Place board onto wall with level on top of board to level out your board. Once the board is level use the toggle bolt to mark the wall by pushing it through the board. Take the board down and drill 3/8″ holes on your toggle bolt marks. As you replace the board onto wall bring wires from inside the wall through center hole and follow instructions for toggle bolt installation found on packaging. Checking that the board stays level as you tighten the toggle bolts.

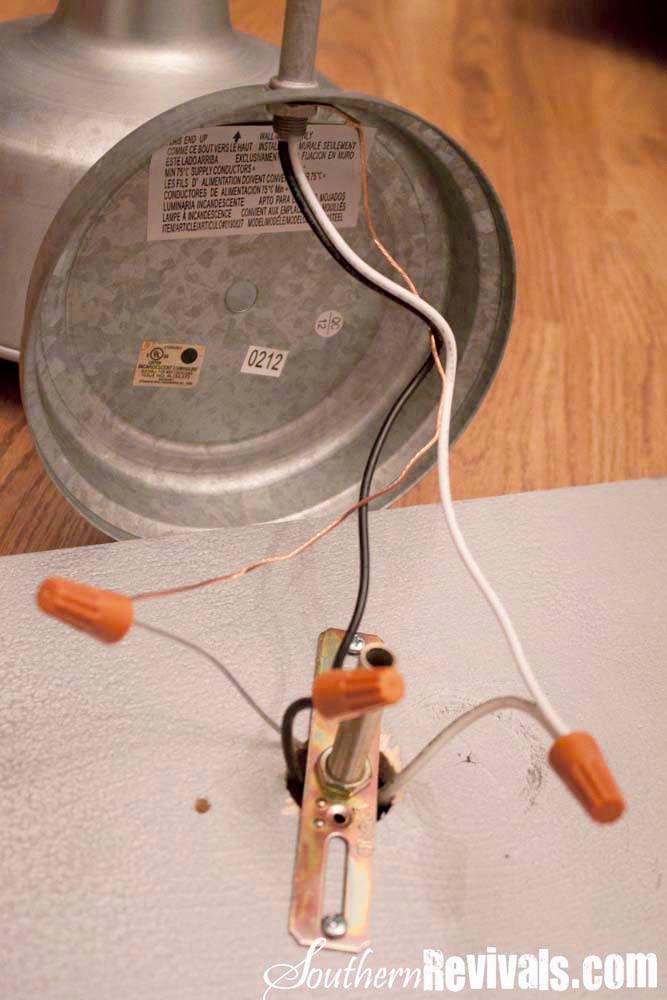
Your final step is to attach the middle light keeping in mind all black wires together and all white wires together. You will need to use your large wire nuts to accommodate the four wire connections. All ground wires attach to metal brackets. Finally, attach lamps to mounting bars.
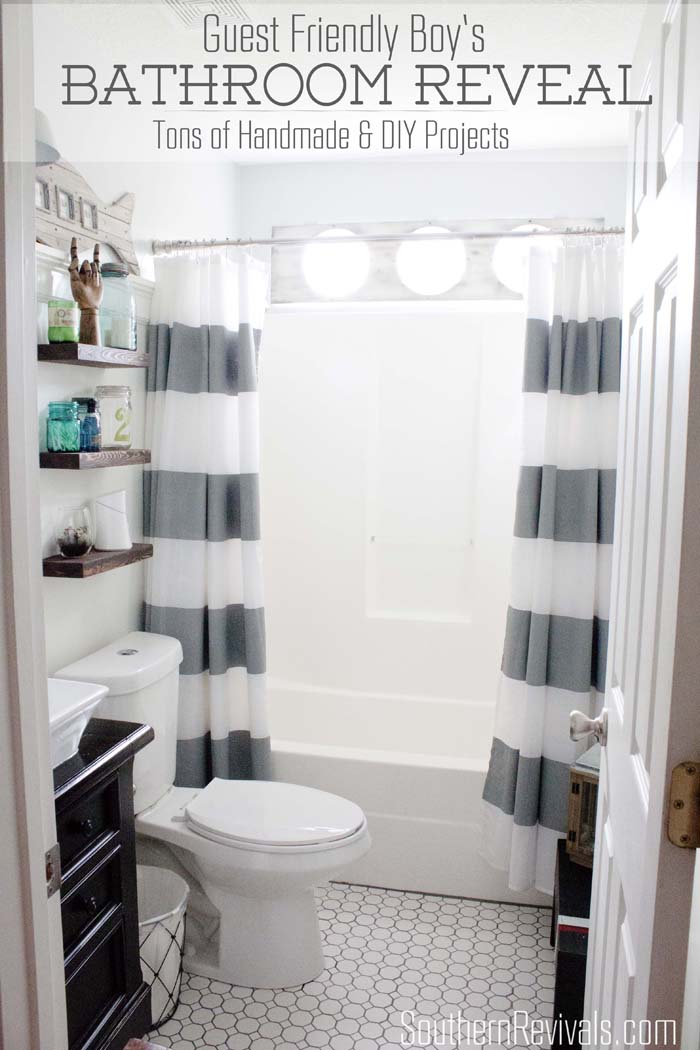
Now that’s a satisfying DIY! We’ve nearly completed they Boys’/Guest Bath. To find additional posts on the DIYs we’ve done and the Befores and Afters, click here: Boys’ Nautical Bathroom Remodel
*PLEASE NOTE: Turn power off at breaker box before starting
I am not a licensed electrician. You are reading and following my advice at your own risk. Please always use safety precautions when performing a DIY project and using building materials or products and always read and follow manufacturer’s directions for the products and tools you use.


Hey Jamie! I’ve been searching around for a good DIY lighting solution for our bathroom, since it needs some functional and aesthetic updates. I know nothing at all about electrical work, so I’m trying to make the lighting change both simple and cheap while still giving the style that I want, since my father-in-law will probably be the one helping me and I don’t want to abuse his patience 🙂
Anyway… a couple of questions: did you have to add anything to the electrical part for this light? It looks like you have the three lights wired into the one wall outlet — is that right? I would like to do a similar light with more (probably 5) smaller clamp lights (like Cassity used here: http://www.remodelaholic.com/2013/10/easy-rustic-wall-shelves/) since I have a longer mirror and would like lights with some style but without them being a major focal point. Any thoughts as to whether this would work or not? Obviously it would be a little bit different because the clamp lights are corded for plugs, and have clamps rather than wall mounts, but I thought I’d ask to see if you saw any major red flags with my vague plan 🙂
Thanks, Jamie! Hope you’re having a great weekend!
Lorene
Hey Lorene!
The biggest thing is to make sure the amount of electricity you are sending through your fixture can be handled by the wiring already in place where you’ll be putting the fixture. Aside from lengthening our wires we did not add anything additional to our fixture. We wired all three (extended) white wires to the white wire coming out of the wall and all three (extended) black wires to the black wire coming out of our wall and the same for our ground wires.Obviously I’m no electrician but what you have to make sure of is that the load your fixture will create can be safely handled by the wiring already in place where your fixture will go. Thankfully my Dad is able to consult me in these types of situations. You may find a brave soul at the hardware store who will be willing to help you. Having a friend who’s an electrician would be best! 😉 Basically, aside from making sure you wire everything correctly and safely, you just need to know, If I splice these five fixtures together into one, will my existing wires be able to handle the load (or amount of electricity) that will generate? I think you’d be fine but even if I were doing this myself I would consult with someone first. Have fun! It sounds like it’s going to look amazing! I want to see pics when it’s done!!
Jamie, you’re the best! Thanks for the reply, and that absolutely makes sense. So far I’ve made friends with someone who has all sorts of power tools, but no electrician yet… I’ll keep socializing and hopefully find someone 🙂 My husband says he thinks that 5 is too many so we might end up with 3 after all. I’ll let you know if/when it happens — I love dreaming of the possibilities but sometimes they take for-ev-er to actually happen, if at all, y’know? Thanks again for consulting!
I am in love with what you did with these! I also love the lights you used. I’ve been looking on lowes for about 45 minutes & I can NOT find these lights anywhere. So you think you would have any information on them? I work at lowes & I know there’s none in stock like these at my local store but if you had a link to buy them online or an item #, really anything so I could get me some as well..,I’d really appreciate it a lot. I love the simplicity of them as well as the curvy-ness of the neck
I can do that! Here they are in two sizes:
10.75″ – http://www.lowes.com/pd_190827-43501-FS130125-20___?productId=50106268&pl=1&Ntt=galvanized+light
13.12″ – http://www.lowes.com/pd_337508-43501-FS130125-30___?productId=50106276&pl=1&Ntt=galvanized+light