


Do you have a love, hate relationship with legos? Because I do. I am tired of stepping on them, worrying the baby will swallow them and seeing them slowly take over every room in my house. But, they’re educational and my child is sure to be a famous engineer as a result of playing with them.
My oldest has his own room. We also have a playroom. Still, somehow, those darn things inevitably wind up migrating to the office, the living room, the KITCHEN. They needed a place to go and they needed it fast. And it had to be pretty, ’cause Momma likes pretty things!
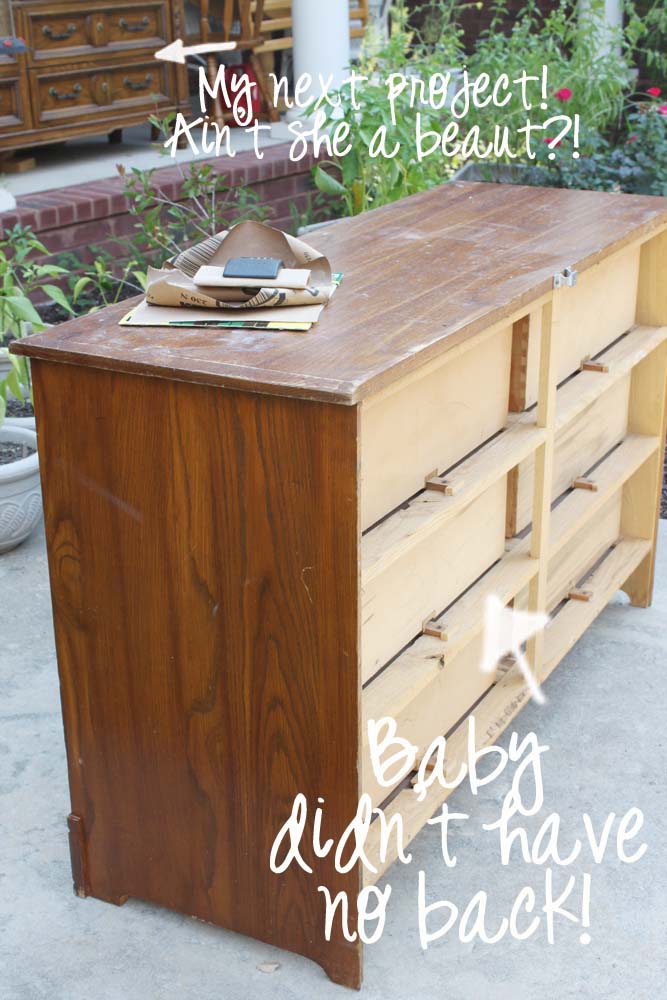
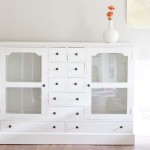
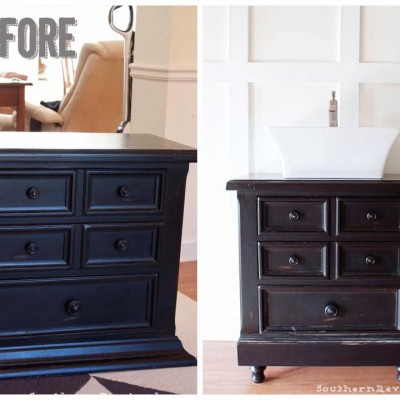
I found this beauty in the middle of nowhere. Literally. Like this store was on the corner of a cornfield and another cornfield. Kid you not. I paid $35, which was too much, especially since it didn’t even have a back. But she had perfect lines and I really liked her faux-four top drawers.

Pretend I am skinny and have a nice tan, Mkay?

I definitely think she was worth it, don’t you?

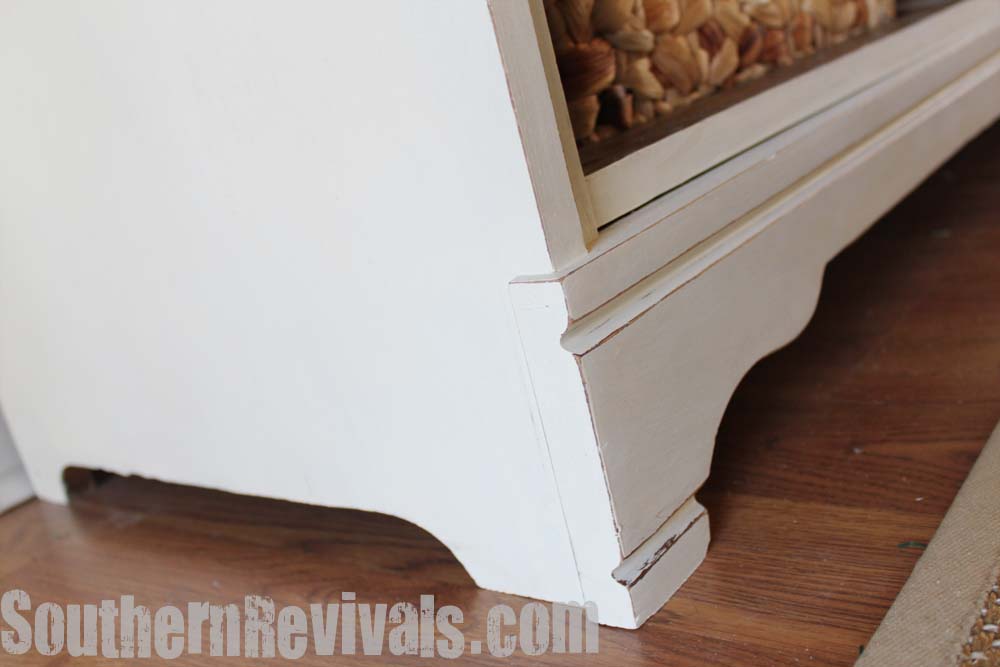
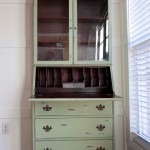
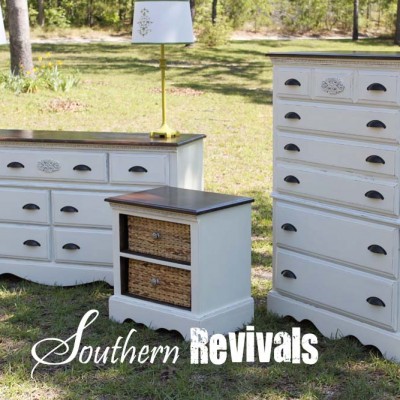
I took out the bottom four drawers and replaced them with water hyacinth baskets, you know, for legos. Because that just makes sense….right??
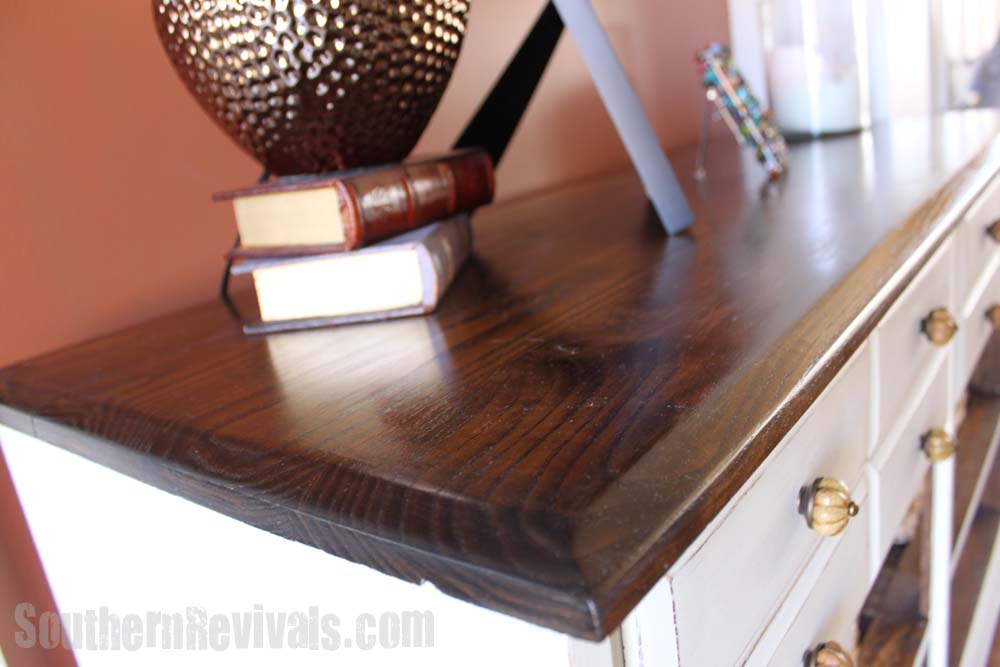
I do not understand furniture varnish. Why do they put that awful stuff on top of beautiful wood? Look what was hiding under there!

Finding baskets for the perfect fit was tricky but I persevered. And my efforts paid off, no?
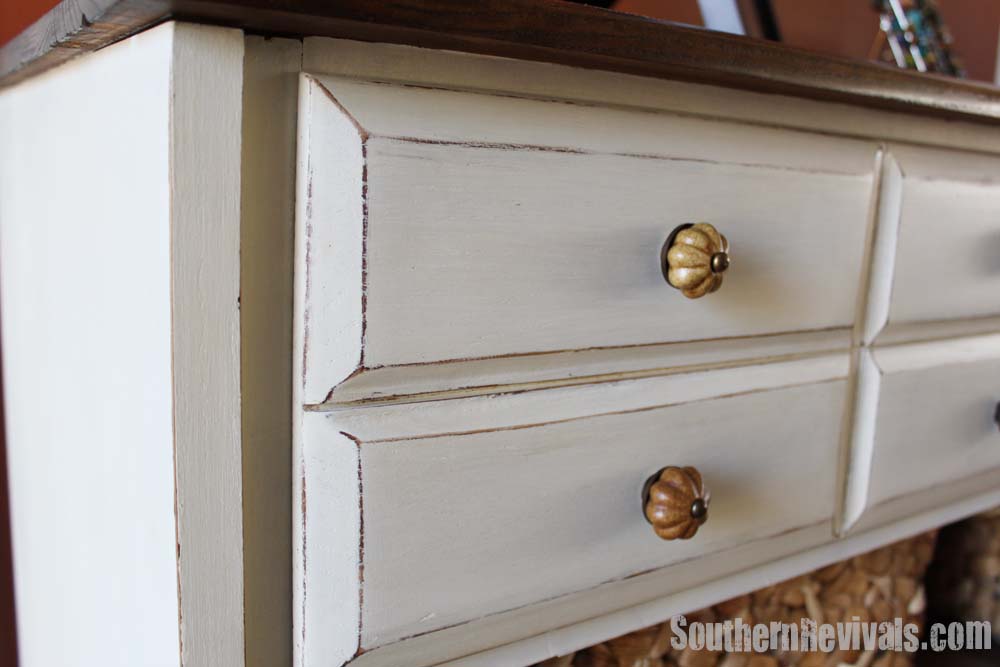
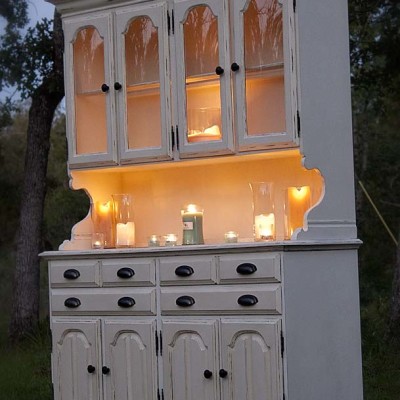
A little distressing to keep things interesting….
And she’s ready for work!
Would you ever guess there were a billion legos in this Pottery Barn style storage unit?


Super nice – and practical! Good job. Am enjoying your stuff immensely!
Greetings from Sweden,
Minna
Greetings Minna! Thank you for visiting all the way from Sweden!!
I love this and love the texture that you have paired it with. Great job.
Tami @ Curb Alert! http://tamicurbalert.blogspot.com/
Thank you Tami! I see that you and I share the same love of junk and curb alerts! 😉
Hey! Hiding those LEGOS is serious business. You did it in Style 🙂
Hi Shannon! Thank you!
Turned out beautiful. I have two brothers that were crazy about legos when we were growing up. One became an architect and the other works in an auto body repair shop. They traded out their legos for jobs they love.
Oh I love that! Thank you for sharing. That just made the endless lego foot pricks worth it!
Great transformation! I love the idea of removing drawers and replacing with baskets. I wonder what Pottery barn would charge for something like this…
Way too much Heather. Way too much! Thanks for stopping by!
Beautiful job! it looks terrific! 🙂
Thanks so much Kisha!
Love love love! I found you via pintrest, and girl, your stuff rocks! I recently just refinished my FIRST ever peice of furniture…a thrift store china hutch turned shabby chic 🙂 I don’t think I’ll ever be as awesome as you, but I am definately inspired. You can check out my china hutch at http://theharmonbabyfarm.blogspot.com/2012/11/making-home-my-thrift-store-to-shabby.html
I just want to say THANK YOU for keeping a blog and tutorials for people like me, I wouldn’t have been able to make my china hutch without it! Thanks for being an inspiration 🙂
Thank you so much! You did a beautiful job!! Wish it was mine!
This is just sick wicked awesome. I found the perfect nightstand, now that showed me I could add legs! How many times have I run across the exact same dresser above. It didn’t look like that! Your mind has a gift!
I am going to use that one, My mind has a gift! LOL Love it! And thank you!
This looks really fantastic — I’ve got an old dresser I’ve been planning to redo and you’ve inspired me! Thanks for sharing.
Great job – and I think you’re rocking those shorts! All that’s missing is that pina colada!!
Kelly
Gah! This is gorgeous. You seriously did an amazing job!
Good morning Jamie – I love what you have done! Only one more sleep and I am off to pick up my used dresser I found on kijiji.
I have very little experience repurposing furniture – can you tell me how you achieved this subtle distressing – did you paint it brown first and then sand off?
Thanks,
Jill, Oakville, Ontario
I love this!
Inthekitchwithkaaralo.blogspot.com
May I ask what you used for the bottoms where you replaced the drawers???
Thanks,
Lisa
I would love to know what you used for the bottoms as well.
Thanks for sharing your great ideas!
Julie
Did the insides have solid shelves already or how did you create the shelf parts that the baskets sit on.
No there wasn’t a solid surface to begin with. We built in braces above the bottom drawers and added plywood on top of the braces.
Thanks for the quick reply! I am excited to redo my dresser!
You are quite welcome! Good luck with your project!
LOVE it! How did you (or would you) fill in the gaps between the drawers?
Thanks! Which gaps do you mean?
What stain did you use? I think it is beautiful the one you did for a friend.
It is Dark Walnut by Minwax. Thank you!
I love it! Quick question : when you remove the drawers how do you get rid of the inside stuff that held the drawers? A beginner! Thanks!
I hate to be vague but it really just depends on the piece. The newer pieces will probably have screws that you can just take out and remove the drawer slides, etc. but older pieces, which were often very well crafted and meant to last a lifetime, may require cutting out the slides. Just take out the drawers and have a look at what you’ve got. Think of it like a puzzle! 😉
Such beautiful work above. I have persevered for days in search of the perfect drawer space alternatives much like above.
My redo calls for re-staining an old drawer just like in your phot and I have done a pretty good job thus far. The paint has been done but still in search of drawers, baskets or something fashionable to complete the look.
9H x 23W x 21D drawers are the dimensions and I need two. Any suggestions. I have tried most of the well known outlets but any ideas that help me shape my search is appreciated. Thank You So Much!!!! 🙂
Finding the baskets are always the hardest part. I scour places like Lowe’s, Home Depot, Walmart, TJ Maxx, Marshalls and Target. If all else fails I turn to the internet and search based on size. Good luck!