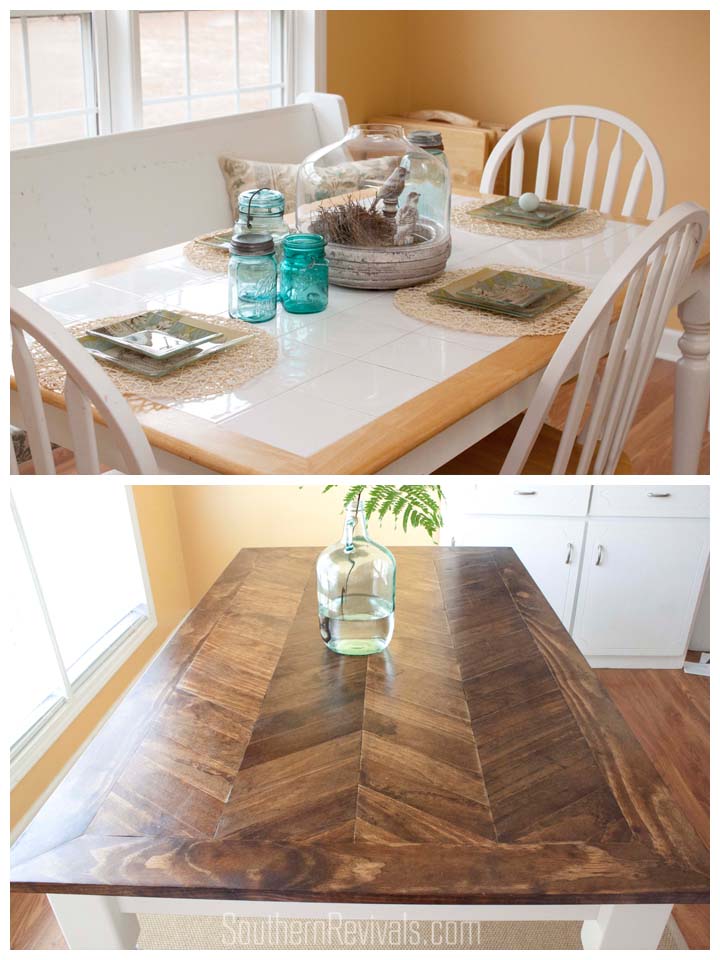
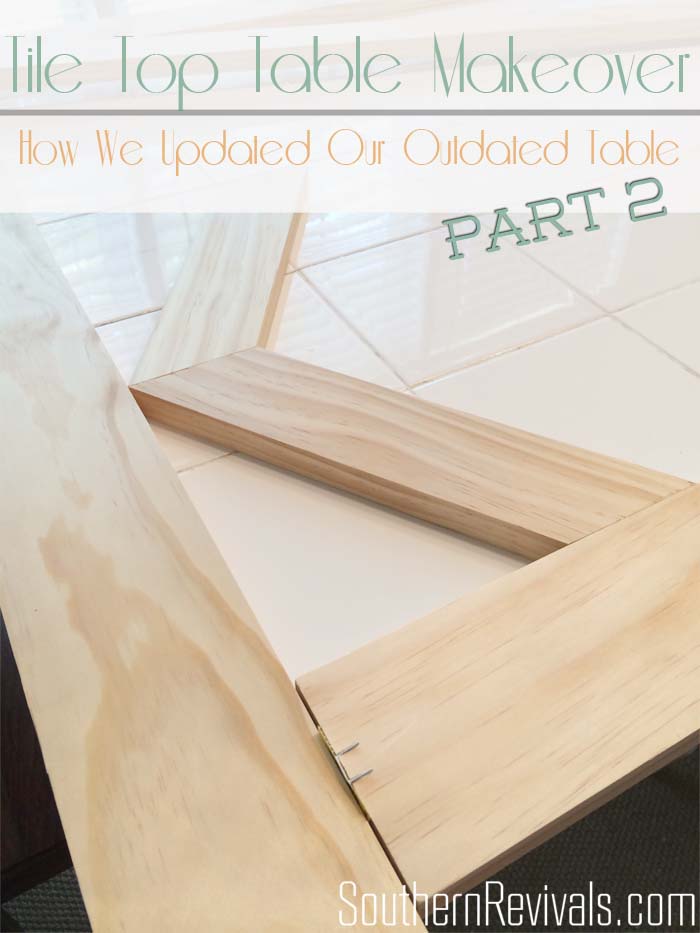
 Here’s part 2 of the outdated tile top table to herringbone table makeover. See Part 1 of our Tile Top Table Makeover for the story of why I went to such trouble to update this table and how we used glue {yes, glue!} to attach the herringbone pattern, making it easy peasy!
Way back in February of last year when I did this post for World Market I knew I wanted to give this table a makeover. In fact, I’ve had grand plans for my entire kitchen since it was maroon. Shortly after we moved here and in an act of desperation I picked up a cheap mistint at the paint store, one that I could live with, and painted the whole thing yellow. Well, I am way over yellow by now but the kitchen project will be a monster once we decide to tackle the whole thing so I am taking it one project at a time.
 And what better place to start than by transforming our dinette table into this gorgeous beauty?! I won’t get into how we did the table top since you can find that in part 1.
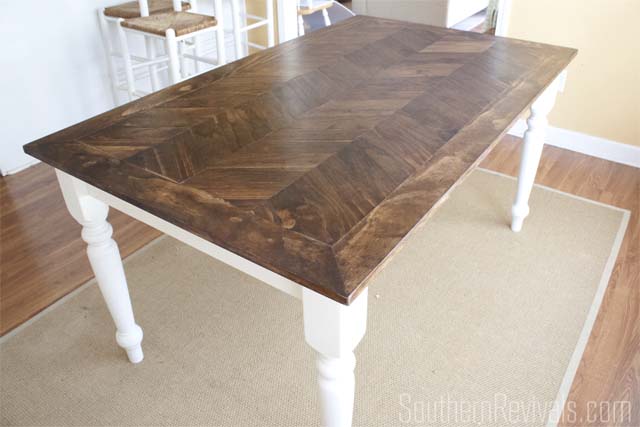
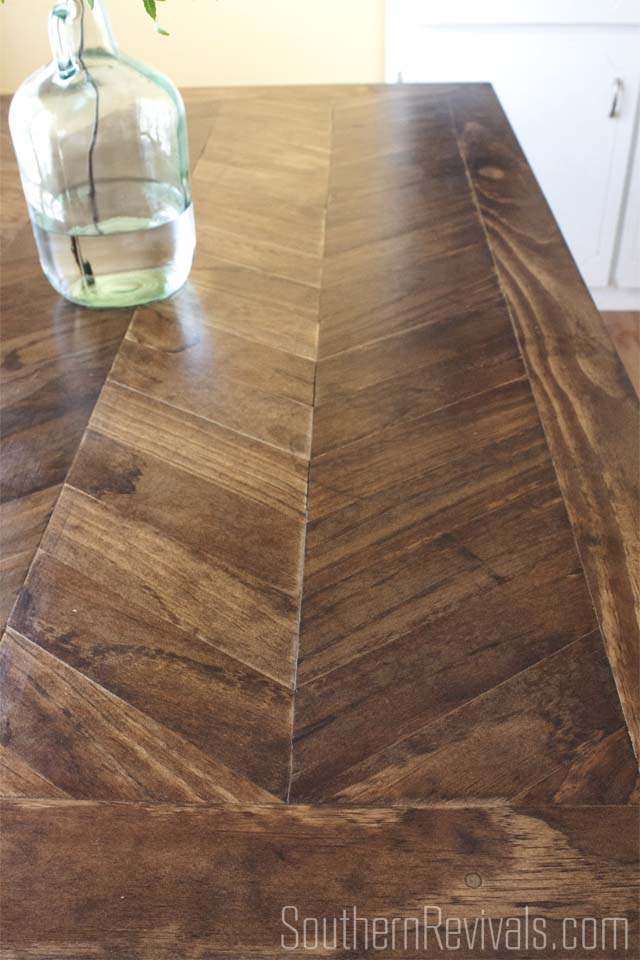 This post is all about color like this beautiful stain color. Provincial by Minwax. It’s just dark enough but not too dark.
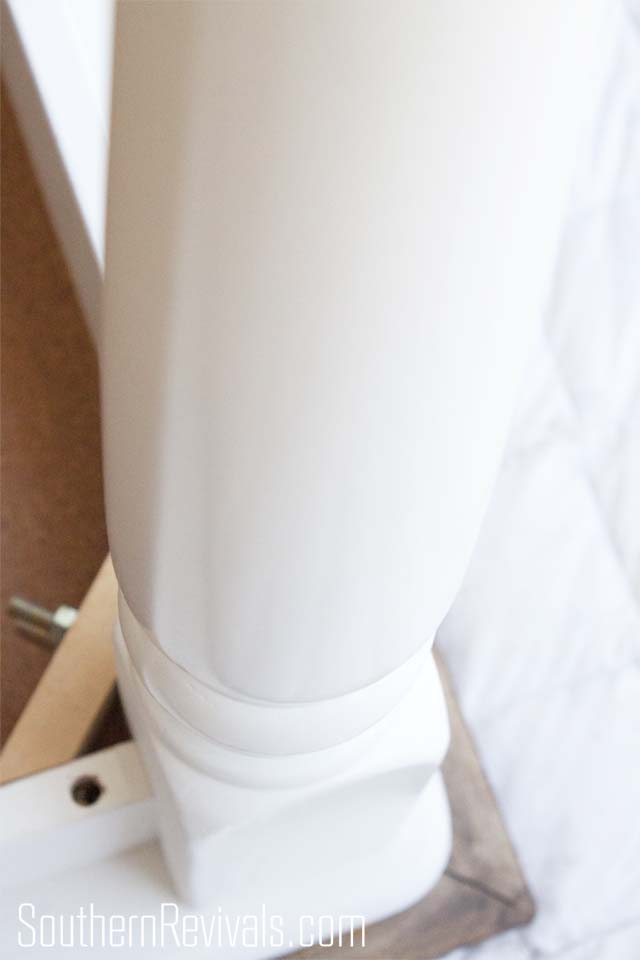
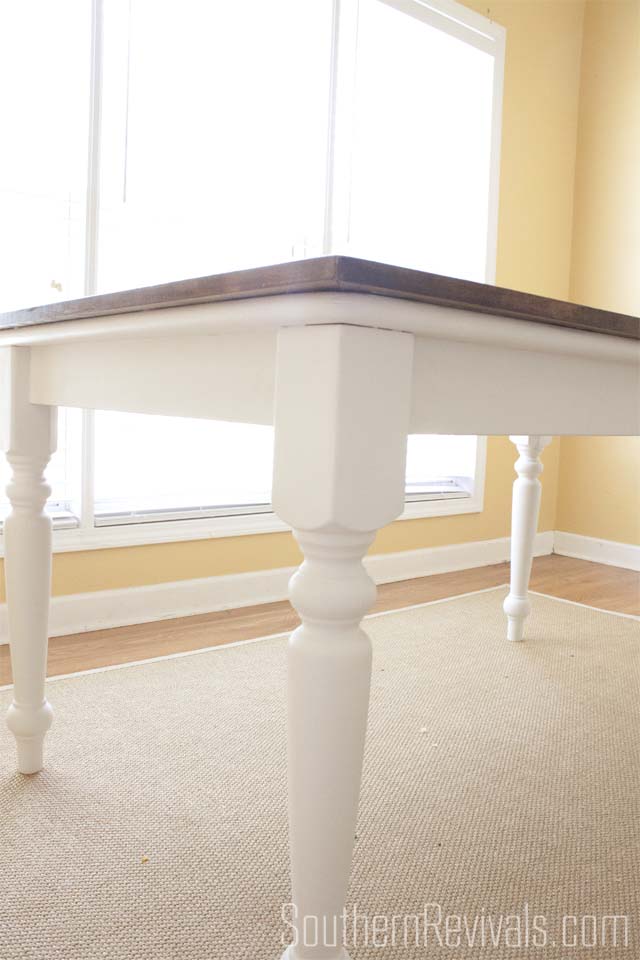 And while you likely aren’t able to tell in these pictures that I also painted the bottom. It’s done in China White by Benjamin Moore, one of my all time favorite whites.
 You are probably wondering why I painted an already white base…white. Again.
The answer is subtle, more in pictures than in real life, but definitely makes a difference. This factory, put together from a box furniture comes with quite a shiny finish. While it’s durable and easy to clean, it was also a bit too shiny paired with the newly stained top. Since I am using a great quality paint in matte I still get the durability, and it’s scrub-able, I get the best of both worlds.
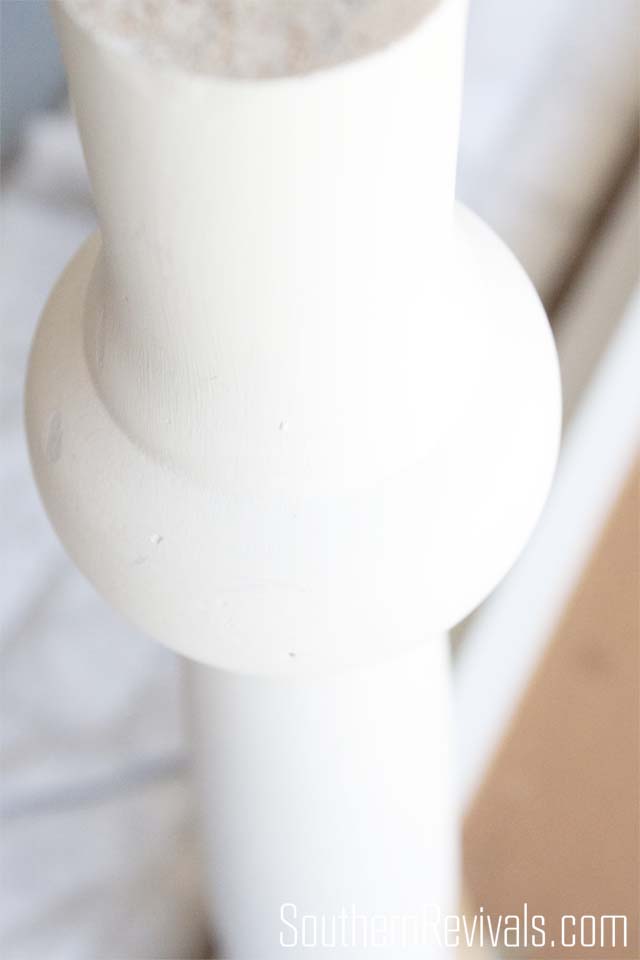 And like I said, it’s probably difficult for you to tell but the white is a bit creamier and I really dig a matte finish.
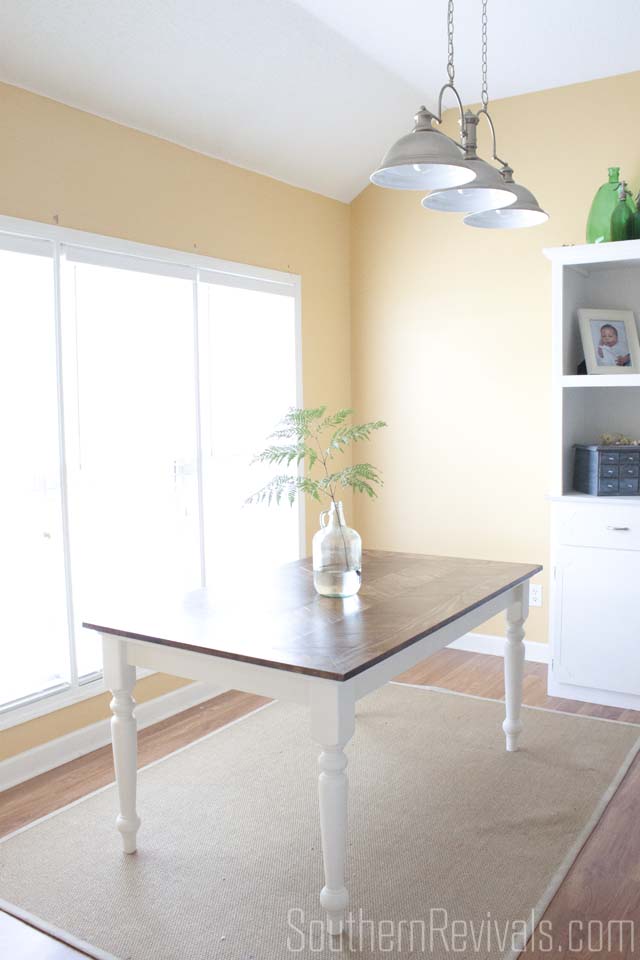
 It’s a delicious difference! I get to keep a table that means the world to me but it gets to have a whole new updated look and I didn’t have to spend a small fortune on a new table.
 The chairs are getting a makeover next. I’d love a new rug and I’ve lived with that yellow for about 7 years now so I’m so ready to see that go.
 But for now I’ll sit back, enjoy my coffee at my brand new, old table and be reminded all over again why I love being a DIYer!


LOVE IT! One thing I’m always interested in is your time. How long did it take to cut the pieces, how many pieces did you use, how long did it take for the glue to dry? The filler? That sort of stuff. Because, to me, it seems like you had that table ready to stain in about 2 hours 🙂
I am so grateful for this comment! Because it reminds me that I am a “doer” first and a “blogger” second and it definitely shows at a time like this. I will update the post with this info! Thank you!
Ok. I have updated the original post and I believe it answers most of your questions! Let me know if I missed something. Thanks again!
Oh my that turned out so great! I love it! Pin’ing now =)
Thank you Marcy!
I absolutely love what you did with your table! I’ve been eyeballing my kitchen table for a few years trying to figure out how to update it and this is it!!!! It too is a cheap out of the box table in that light honey oak color and looks so outdated. I’m definately going to copycat this project.
Go for it! And thank you!
Thank you! thank you! THANK YOUUUU!! I have this exact same table and I didn’t want to just throw it to the curb and buy a new one. (money I don’t have) I love what you did with it, my next project! 🙂
Great! I’m so glad it helped. We love ours. Have fun!
This looks like chevron to me or is it herringbone? I’m confused.
I saw your table on Pinterest and fell in love! We just bought the materials to start ours and I was wondering what angle you used for the herringbone cuts?
If I remember correctly, I believe it was 33 degrees. The only reason I didn’t include that in the post is because it is dependent on so many things. It was trial and error for us figuring that out. You could try a row at that angle and adjust according. A simple trick is to use cardboard or poster board. Cut the paper to the size of your boards and play around with the angles to keep from wasting your wood. Have fun!
Love what you did here. We have the same table my parents gave me that was in our family since I was a toddler. Do you have any pictures of what you did with the chairs?
Thank you! Not yet but I am working on the chairs as we speak. Hope to have them posted very soon!
IN LOVE!!! I have a very similar table but mine has a pop up leaf in the middle….. Trying to see if incoudk do something similar!! I would love to repurpose without having to get a whole new table!
Now that would be interesting! Let me know how it goes!
Love your work! How did you redo the chairs to match the dark wood?
The wooden chairs pictured here were already that color and I have actually painted the other chairs another color and will be sharing their debut hopefully soon!
Please let me know what you did with your chairs! I have the same table and am over the tile.
Honestly, I decided to use them for overflow during the holidays and built benches, which I’ll be sharing soon, to go in their place. I found they made my kitchen feel less cluttered than the chairs. Otherwise, I would have just painted them a solid color to make them look more cohesive.
I’d like to see pictures of your chairs! We have the exact same table and are wanting to redo it! Great ideas! 🙂
question, how are you liking living with the top? i have been wanting to do this for a while but nervous i would regret it due to trouble with crumbs
I used a stainable putty to fill in all the little spaces, else it would have been a nightmare to clean!
The Wallflower hiding in the corner has transformed into the Prom Queen hands down!!!! Absolutely stunning table. Bravo!
Ahh thanks! I love that analogy! LOL
What was the size of the table before you put the wood on?
Approximately 34 1/2 x 58 1/2
Hello.. great work this is freaking awesome. I actually have the same table and would love to do this project for my husband but I am amateur at wood work. You said you used 1-4s and 3s what does that mean actually and would the folks at Lowe’s/ Home Depot know what I am talking about lmbo. I don’t wanna look crazy?
Hi Jillene,
Thank you! Yes, 1x3s and 1x4s are common sizes and they’re basically just sticks of wood that are 1″ thick and 3 or 4″ wide. You can get them in various lengths. Anyone at HD or Lowe’s will know just what you’re looking for.
Love this table! Am also very interested in what you did with the chairs since I have similar ones. Share the link here? I can’t find it. :/
I will post soon with an update on the table, too!
I have the same white tile kitchen set with the light wood. I had my set since the kids were little. I just LOVE how you updated your table and can’t wait to have my table look like yours. I will need to redo the rounded back chairs too. I was thinking of either painting the whole chair white or just freshen up the white on the chairs and stain the seats darker to match the table top. I need to start my project very soon. I can’t wait to see your chairs.
You know, the reason I’ve taken so long to post the chairs is I think I want to build benches instead! LOL Thank you!
absolutely stunning. I was a little apprehensive at the beginning of the post that it would look bad but it looks amazing. I’ll never just walk by one of those tile dining tables again!!
Thank you 🙂
I love what you did with this! I have a similar table and would love to give something like this a try. What type of sander would you recommend using on tile? Or is doing it by hand the better option?
For this particular project, since it only requires a light sanding, I would say by hand with either a sanding block or just a section of sandpaper. Like I said, no need to really sand down the surface just enough to give it some “tooth”. If you already have an orbital sander on hand however and find that easier/quicker to use, you could absolutely use that.
This looks amazing! What type of wood did you use for the top of the table?
We used a hard pine that we found at Lowe’s. I hadn’t seen it before. Next time I’m there I’ll have a look see and try to get more info on it.
We have the exact same table! Planning to do this next weekend! Thanks so much!! Did you ever get to the chairs? Do you have a link for them?
I actually never did! I had planned on keeping the chairs but then thought about building benches instead. In the end, because I couldn’t decide, I just left them as they are. I’ve decided to wait to see what we do with our kitchen reno first and then decide.
I’m so glad to see this post. I have inherited an antique dining table and chairs that were my grandmothers. The only problem is that years ago, when they were moving, it fell off the truck onto the highway, the the tabletop has deep scratches in it. They are too deep to be sanded out. I had no idea what to do with it. This may work. It’s been suggested to me that I put Formica on the top, but that just doesn’t feel right to me.
I’m so glad to hear that this may help, Tammy! I’d love to see it if you decide to go this route. Thanks so much!
Can you tell me what the angle is on those chevron cuts?
Hi Angie,
You might the info in Part 1 helpful, if you haven’t already checked that out: https://www.southernrevivals.com/tile-top-table-makeover-updating-tile-top-table-wood-part-1/
If I remember correctly, I think the angle was 22 degrees but it really is relative to your project. Hope that’s helpful!
I have the same exact table I purchased at goodwill for $25 except the legs are painted black instead of white. I was wondering if I need to sand that paint off or can I just paint the white over it? Did u paint the wooden frame of the original top also. What is the exact paint color and type and do u have to seal it or anything. Also on top after you stained it what kind of seal did u use and why? I don’t have any chairs with it but I was thinking of building a bench like either your outdoor one or probably the entry way one. I thought of making one with storage under it. If I wanted to do a cushion on that bench how would u do it! Thanks also about how much do u think u spent on the wood?
Hi Brandy,
No need to sand the paint off. You will just want to make sure the legs are thoroughly cleaned. Even if they already look clean chances are there’s some oil or grease that could affect your finish. I recommend TSP or vinegar to clean, a light sanding just to knock down any shiny finish. Prime if you’re going from black to white, that’ll save you some paint and then use a good paint over that. I used China White by Benjamin Moore. Seal if desired with a poly or wax. I love the idea of benches. In fact, that’s what I’m going to do with mine. The wood I used on the outdoor bench was expensive hardwood. You could use pine for inside and probably build a bench for under $50. I’ll have a tutorial for my table benches as well as an update on how the table is holding up coming in August.
I recently purchased the same table for $25 at goodwill. The legs are painted black and I was wanting to know exactly what shade of white you used and what brand and if u you used a primer. Also would u suggest that I should just paint over the black with several coats or should I sand them down first. Thanks
Sorry I posted my comment twice! New at this lol! Thanks so much for the help. One last question have u ever used the paint with primer in it and why or why not would this be good! Thank you so much
Hi Brandy! No problem. Paint with primer is fine to use but it’s pretty thick. Just takes some practice to get it smooth.
We just did an amazing version of this with oak. What grit sand paper did you use in between polyurethane coats?
I would love to see! I want to say a 220, that’s what I usually do, but don’t hold me to that!
My husband and I have the SAME table as you did!! Our table has sentimental value to it as well being it’s the table that my husband grew up eating at every night. We were given it by his parents after we got married and now our daughter gets to eat at the same table. 🙂 I’ve been going back and forth trying to figure out if I should remove the tile (another post I saw) or do something completely different. I’m so glad I came across your posts here because this… THIS IS WHAT I WANT! Thank you for including all of the little details. I’m excited to get my old table transformed into a farmhouse beauty 🙂
I’m so glad to hear it, Ally! Thank you!