

Ever since I “finished” the pallet garden wall all I can think about is hanging a very large chandelier on the limb of that oak tree and having a big girl tea party…at night! And the reason I say, “finished” is because if you know anything about me at all, you know nothing is ever, truly finished around here. What can I say? I get bored easily.

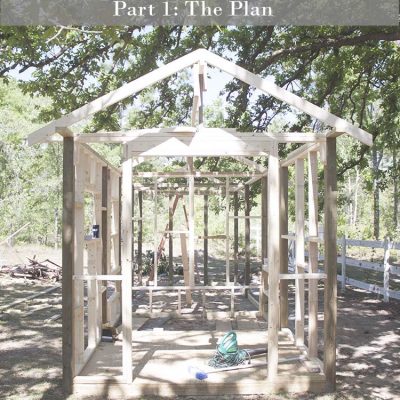
If you need a reminder of the during phase, here it is before decorating and after. You can find instructions on how I built my pallet garden wall, here. Before I started decorating, I power washed and sanded the pallet to prep it for paint and stain. It’s not completely necessary but I think it makes the job easier.
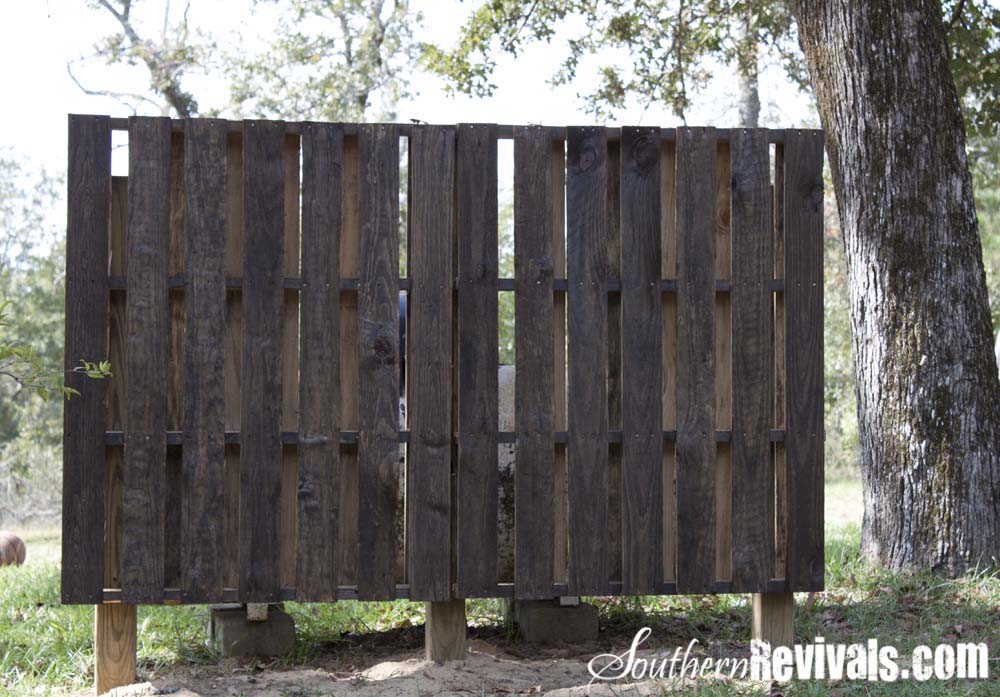
I thought of about a million ways of doing this. I finally decided I wanted the wall itself to blend in with the trees so I brushed on a Dark Walnut stain by minwax.

It was just too boring that way so I added some color with one of my very favorites, and yours!, Gypsy Teal by Valspar.

Better. Much better. But I didn’t want the wall to compete with the flowers that will be growing on it next spring so I quit while I was ahead.
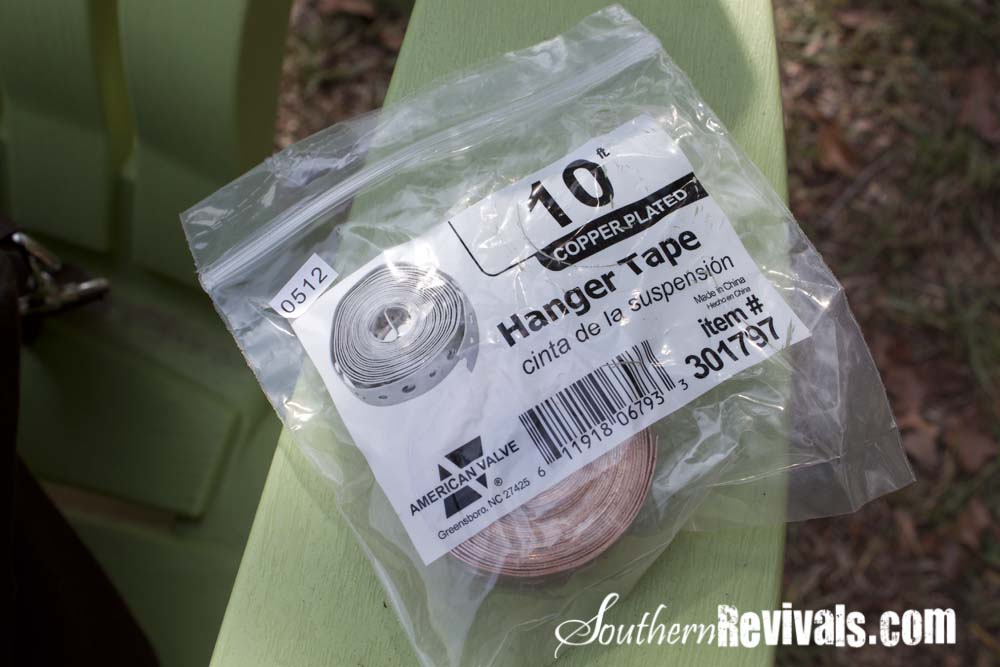
In addition to the flowers I wanted to plant at the base of the wall, I also wanted to hang a few pots from the wall. All along I planned on using this hanger tape to hang my pots but initially I had planned on going with the galvanized. Until I saw….

Mmmmm cooper! Don’t you just think copper looks delicious? I realize it will probably patina but that made it even more tempting.
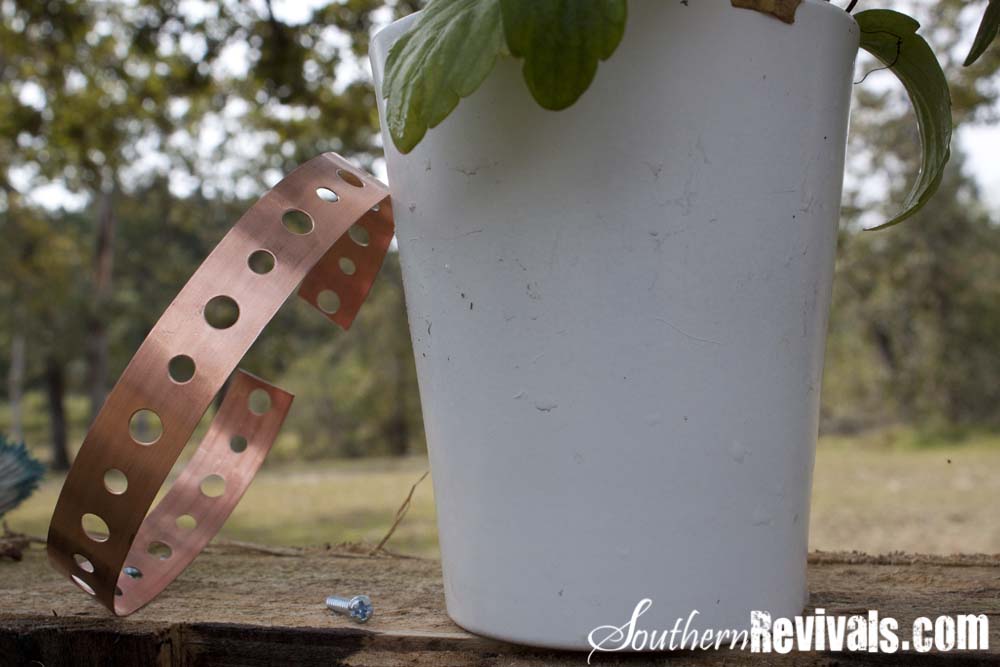
First, I trimmed off a section of the hanger tape. Enough that it wrapped completely around my pot from where I wanted it to hang, with enough left over to screw into the wall. I made sure my screw head was large enough not to slip through the holes and also not so long that it went too far through the wood.
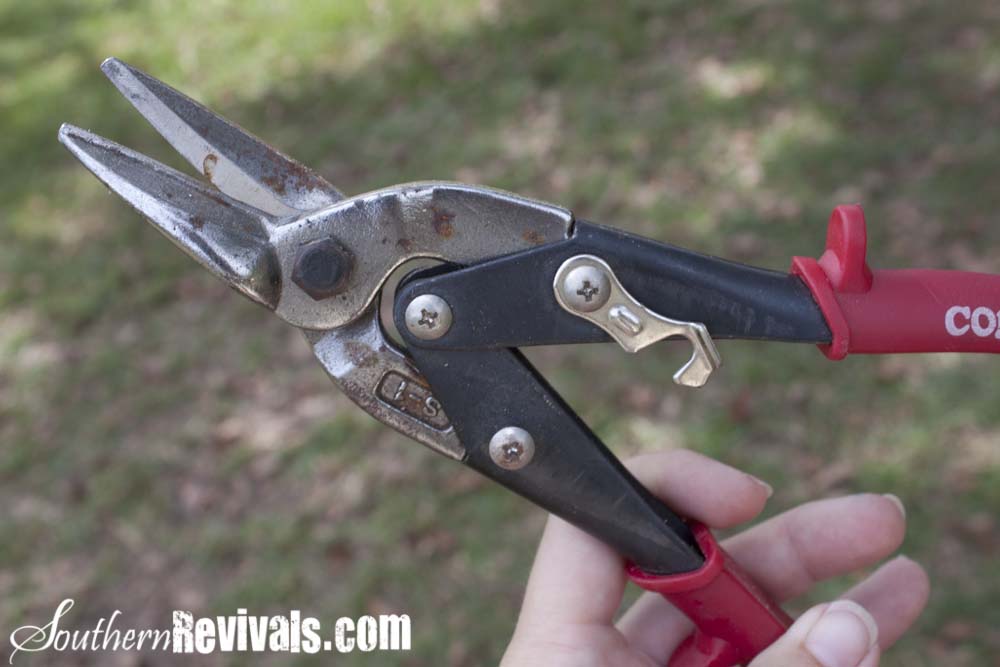
You’ll need these handy dandy tin snips to cut the hanger tape. For some reason, thankfully, we own these. Not that we’re snipping lots of tin around here but I imagine they were a purchase that resulted from some hair brained project we had going on that had nothing to do with snipping tin. Kind of like this one.

Once you’ve got your hanger sections all snipped, decide where on the wall you want to hang your pots and predrill the holes. Use a drill bit slightly smaller than your screw. This step will keep the wood from splitting when you screw on the hangers.

With your hole predrilled, wrap your hanger tape around itself to the screw hole you measured to hang you pot securely. Screw it on and…..

Voila’!! Pretty cute, huh?

I got these three pots as a gift my hubby. The were on clearance in the garden section at Lowes. I always shop from my gardening supplies out of season. Wait until you see the fountain I just for just $20! But I digress.

One of the biggest reasons I decided to make this pallet wall, besides that ugly tank behind it, is the Carolina Jasmine my son got me for Valentine’s day this year. Yes. The poor plant has been sitting in a pot for 7 months. But, I had to have the perfect place to put it and this was it! So that’s the first thing I planted. Next, I planted some Purslane, an annual I found on sale at Lowe’s for $1.50 each. This gives me flexibility each season so that I can plant whatever suits my fancy. {The plants in the pots are Pansies}
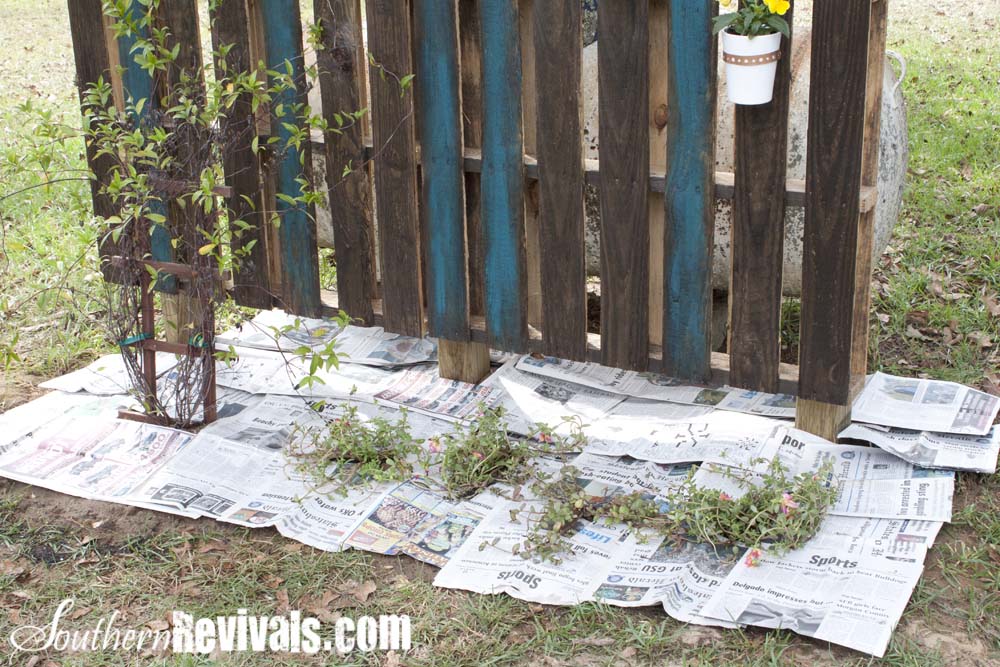
I put newspaper down around all of the plants to keep down weeds and grass. They say it works like a charm. And by we, I mean Pinterest. We’ll see how it goes.

I covered the dampened newspaper with some pinestraw mulch and, sigh of relief, I was all done!

Much better than what was there before, no?
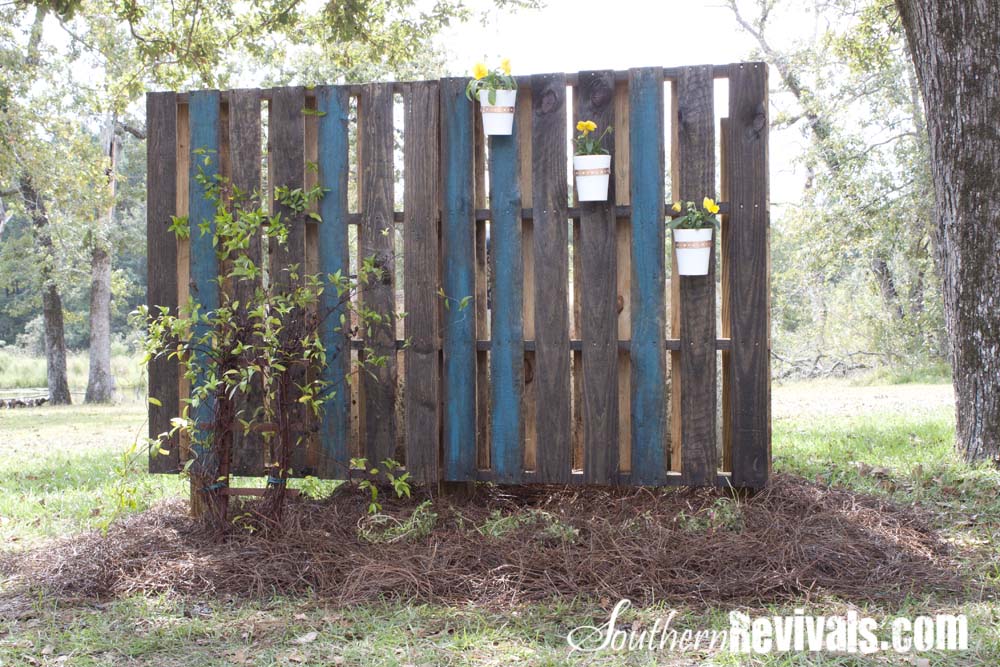
I know the idea will evolve and I’ll think of some more fun things to do with/add to the wall. But it really is a super quick and simple solution to an unsightly eye sore such a rusty old gas tank in your backyard. There are so many possibilities though! You could fence your entire yard with these things for a fraction of the cost of the more expensive fencing options and I think the “I did it myself” aspect adds a whole layer of awesome. Not to mention a pretty nice twist to reuse, reduce, recycle and REPURPOSE!


Totally adorable! Thank you for linking up at the Clever Chicks Blog Hop, I hope we see you back again next week with another clever post!
Cheers,
Kathy Shea Mormino
The Chicken Chick
Oh what a wonderful idea, we have used pallets for many projects including building our barns. I like the addition of the flower pots on this fence and it would look great for a back drop for my new fire pit patio! Thanks for sharing!
This is fabulous! You did GREAT JOB.
Enjoyed visiting, and I am a new follower.
Laura
White Spray Paint
What a fantastic idea with a lovely tutorial and photos to enjoy! I found you through the Clever Chicks blog hop and would love to invite you to visit our hop too. I have many folks who love to garden and would enjoy reading your post.~Melissa
i love you!!1 thank you!!
Today is April 13, 2015 and I know this blog was done nearly 3 years ago, but wanted to ask you how the newspaper thing worked? We put newspaper in our flowerbeds two Spring seasons ago and it didn’t work here in the deep south of Louisiana so I’ve finally opted to put the expensive black fabric and will also use Preen Southern which is a weed preventer that you sprinkle. It’s supposed to work for 4 months per their advertisements.
It actually worked wonderfully! In fact, there still isn’t any grass in this spot after all these years and the paper is long gone. I am in S. GA so I would think our climate would be similar. Try using more newspaper and place it (thickly) around you plant and cover with mulch. We considered using the expensive black fabric too but gave this a shot instead. The other day we were told at our local nursery that the black fabric stuff can actually drown your plants because the moisture cannot escape at all.
That’s pretty cool. I am trying to think how I could tweek that to block that west sun on the house. I have 2 double windows. I did plant a bottle brush tree in front of one, then discovered it could get as big as a tree, not good. We can’t block Christmas decor can we? no. This would give me so many options for decorating too. hmmmm, thinking cap, thinking cap, where is my thinking cap?
No! No blocking of the Christmas decor! 😉 Have fun figuring out your new project. This year I’m hanging more plants on mine and planting more plants in front of it!