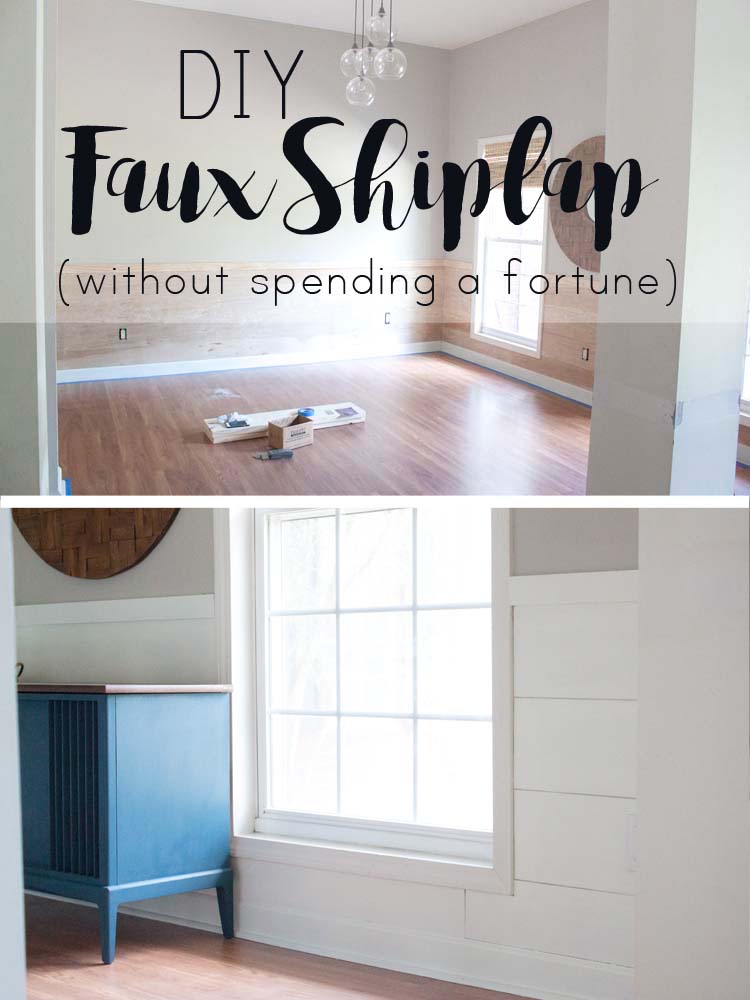
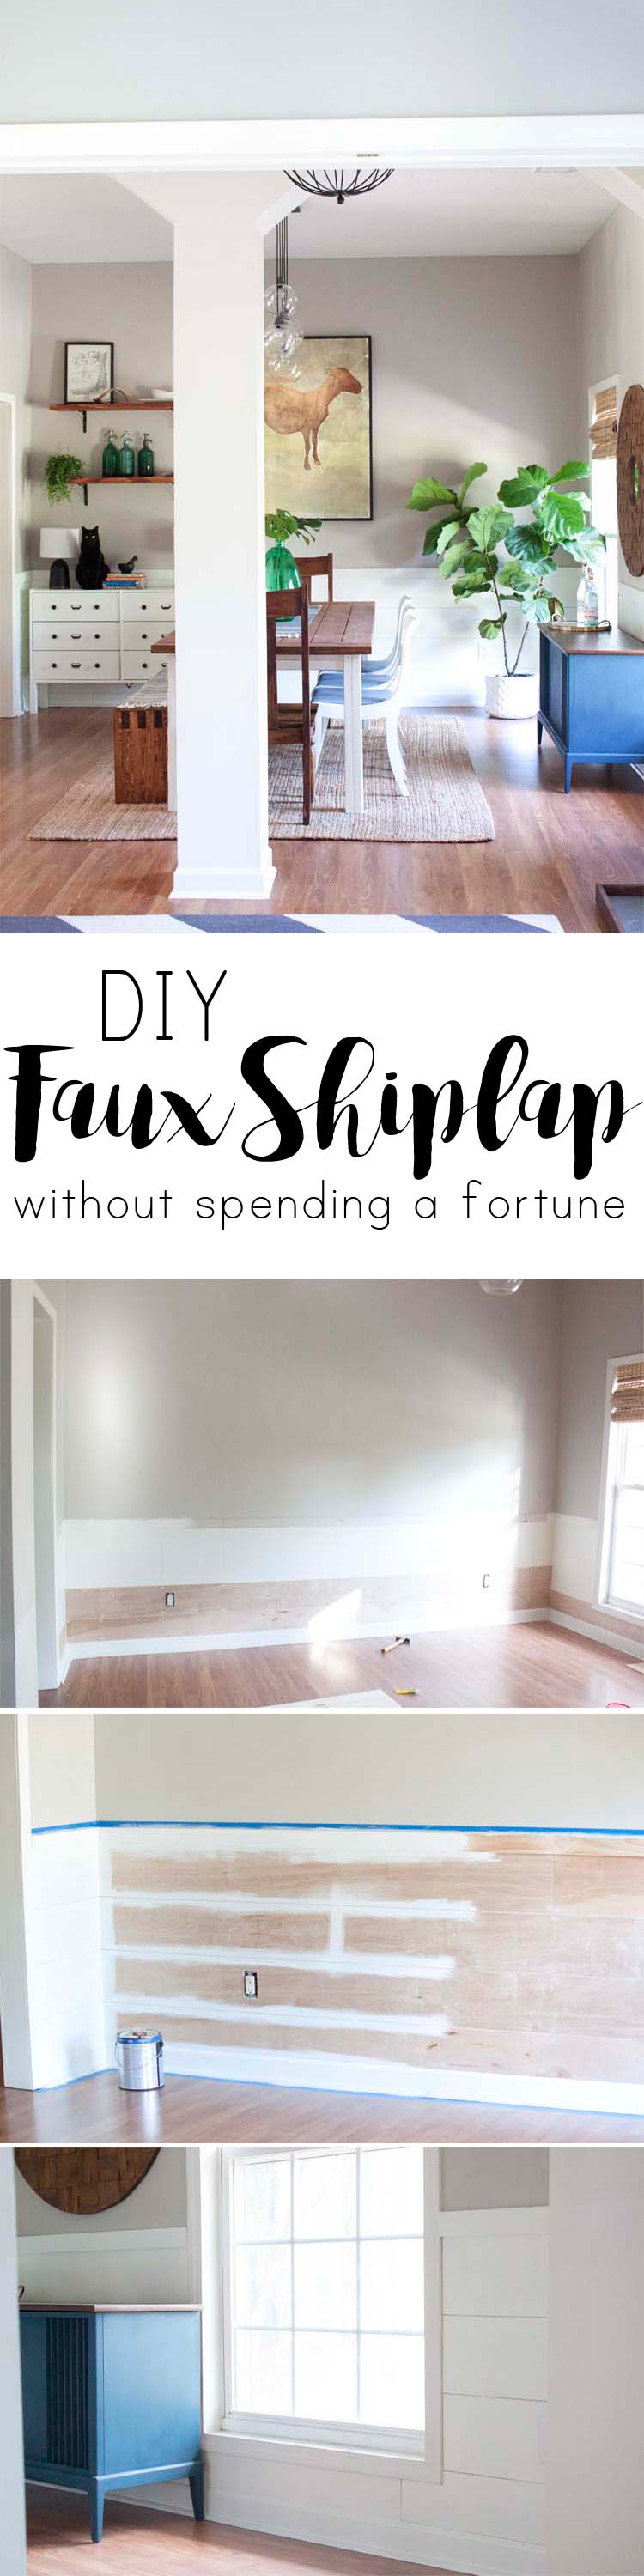
I have struggled with what to do in my dining room forever. It went through many stages before I finally settled on what to do with it and was actually totally and completely happy with the result. It didn’t hurt that I managed to DIY faux shiplap for a fraction of the cost to get the look I wanted.
*This post contains affiliate links. Please see my full Disclosure Policy for more information.
Last week I posted our full modern farmhouse dining room makeover reveal. I was fortunate enough to work with GLIDDEN® on that post which meant two things: 1) I already had a great paint to work with and 2) I only had three weeks to make up my mind and get the job done.
A lot of pressure? Sure. But I was finally forced to make a decision and get it done already and that is why I firmly believe I work best under pressure.
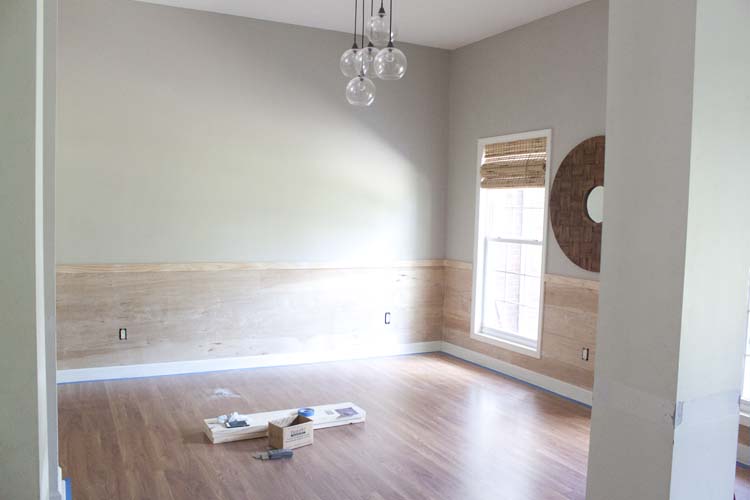
Something that had always bothered me about our dining room is that it had a chair rail. And it wasn’t so much that the chair rail bothered me, I thought, as it was that the bottom of the two-toned wall seemed so….blank.
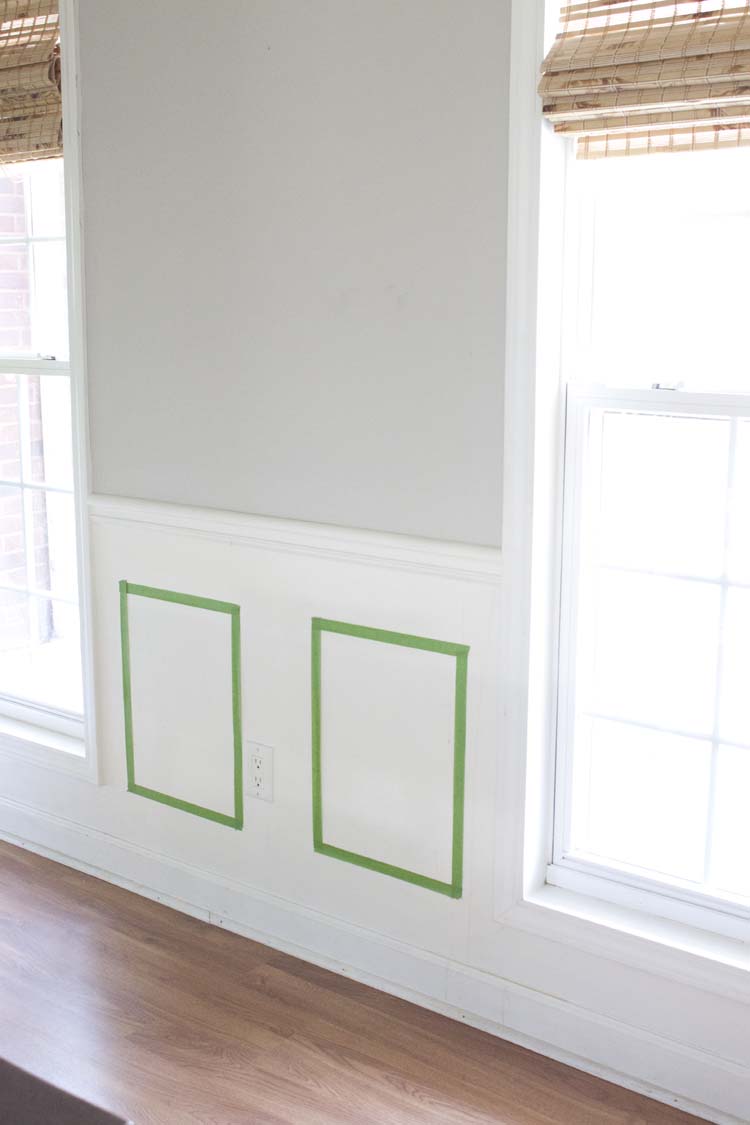
Years ago I toyed with the idea of adding more molding to the bottom of the wall to add interest and texture. But I never did. Why?
When I hesitate on making an idea come to life it sometimes means I’m not really at peace with the idea.

I realized with this makeover that I was more or less keeping the chair rail because it was already there and that adding more molding to make the chair rail make sense felt more like a band-aid instead of a solution. And that’s not a good enough reason to keep anything.
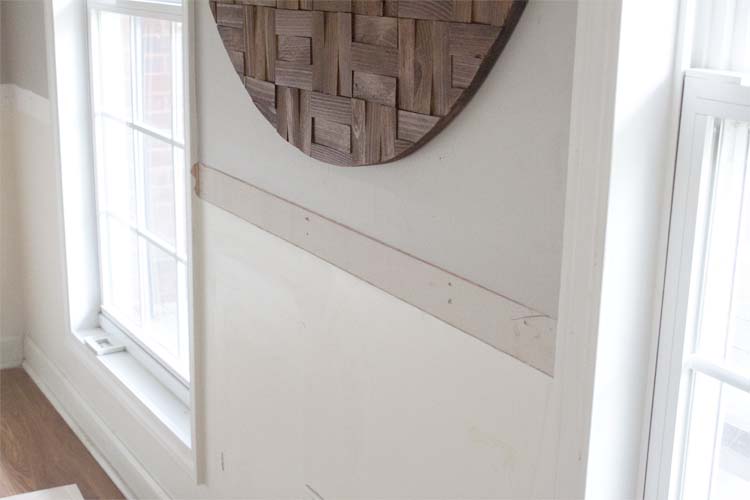
So I began the (not-so-painstakingly) process of removing the chair rail from our walls and also from the surrounding columns. I pried them all off with my 5-in-1 Paint Tool and then used the same tool to scrape away the rough edges this left behind on the wall.
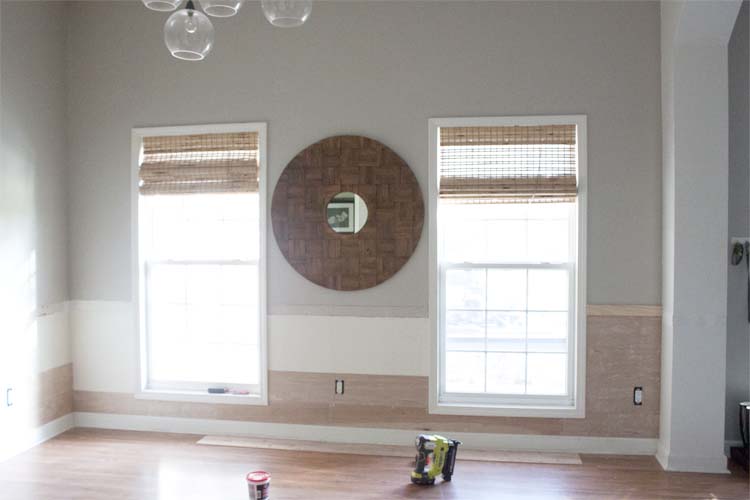
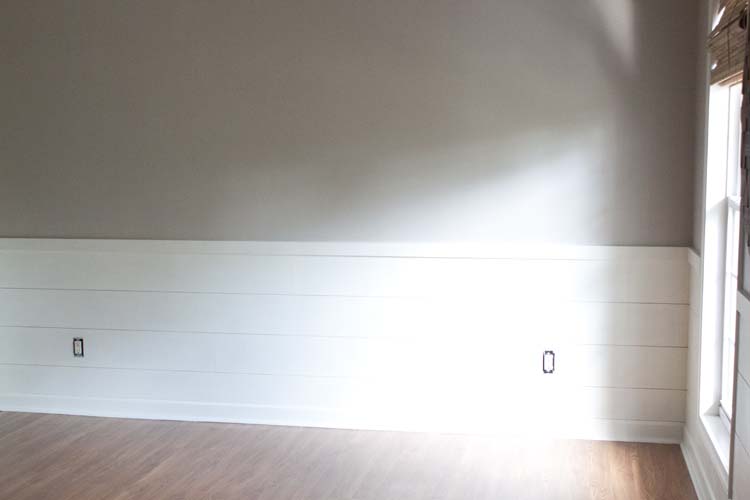
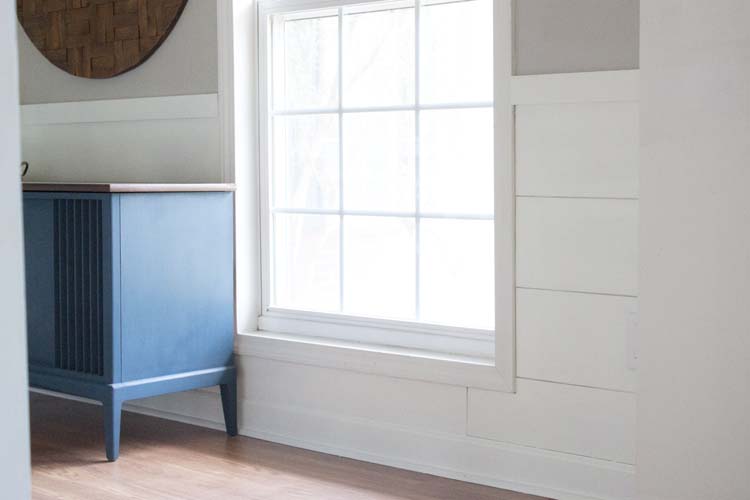
I knew I wanted to keep the two-toned wall. The rest of the main living area of my home has board and batten so keeping the two-tone just made sense but I didn’t want to do the same thing in here as I had done in the other areas. I wanted something different. Since our home has such an open floor plan it couldn’t be anything too drastically different from the other adjoining areas. But it had to have interest and it had to have texture.
That’s when an article I’d written for Better Homes and Garden.com, 8 Shiplap Walls That Gave Us Major Home Goals, came to mind and I realized that a DIY Faux Shiplap wall was the perfect solution and it cost me less than $100 to do it! Here’s how to DIY faux shiplap without spending a fortune.
You will need:
- 1/4″ 4 x 8 sheets underlayment
- 1x3s specialty pine (for chair rail)
- circular saw
- miter saw
- jigsaw (to create cut out for outlets)
- table saw**
- electric sander
- stud finder
- brad nailer
- Spackle
- paint and paint brush or roller
- 2 coins or tile spacer
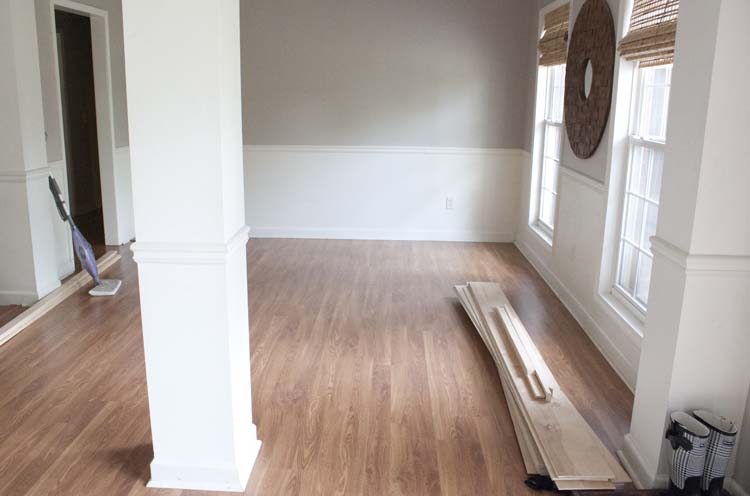
Here’s possibly the best tip you will ever receive: I don’t care how many tools you own (we practically have them all) get the guys at your home improvement store (we went with Home Depot) to pre-cut your 1/4″ panels into sections for you. Sometimes there is a nominal charge (they charged us nothing. what can I say, I’m a regular) but it is so, so worth it. Saves you a ton of time and also makes getting it all home easier.
You will want to have them cut your 1/4″ underlayment sheets into 6 to 8″ sections (lenghtwise).
**For best results measure they wall you’re placing these on and try to divide it into equal sections to determine how wide your planks should be. If you are unable to divide your wall into equal sections, get as close as you can and, start at the top of your wall and work your way down. This way way if you have to rip down your planks further the smaller width planks will be a the bottom of your wall and hardly noticeable. If you are able to divide your wall, and therefore your planks, evenly you will have no use for the table saw.
To Add Planks to the Wall:
NOTE: You’ll like want to sand the edges of your planks prior to installing and you might also want to the sand the surface slight prior to painting.
We chose to add our planks with a brad nailer directly into the studs instead of going with an adhesive. This way, if I ever change my mind, there’ll be less damage.
To do this we mapped out our studs with a stud finder and staggered the seams so that we could nail each beginning and each end into a stud. This keeps all the seams from lining up, which adds more interest, and nailing the ends into studs ensures that each plank will be secure.
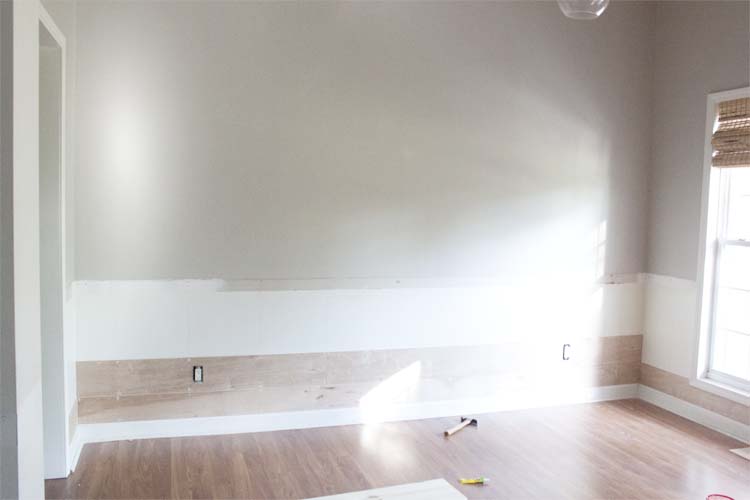
We started at the top of each wall, measured and cut our planks. To give it that shiplap look I used two coins, taped together, to create a gap. If you’ve ever done a tile job and have tile spacers leftover, those are perfect to use as well.
I also used the brad nailer to put the 1×3’s at the top of the planks (as a kind of chair rail) and nailed those directly into the studs as well.
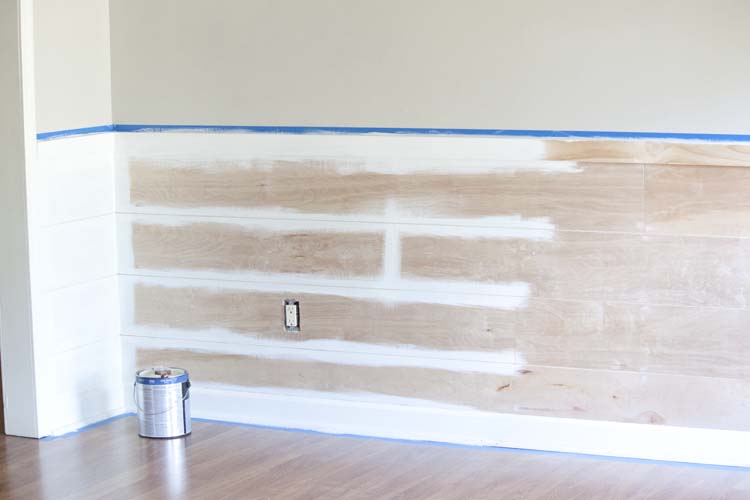
In order to paint it effectively you’ll need to use a brush to get into the gaps you created with your coin (or tile) spacers. After that you can continue to paint with a brush or use a roller to cover the area faster.
Something you’ll want to keep in mind is that you will need to readjust any outlets in your room to accommodate the 1/4″ planks you’ve added to your wall. Before starting your project you’ll need to cut your power, remove outlet covers, remove screws and loosen outlet boxes.

Use a jig saw to make the cutout in the plank over your outlet. Pull outlet out over the plank and then screw back in on top of the plank.
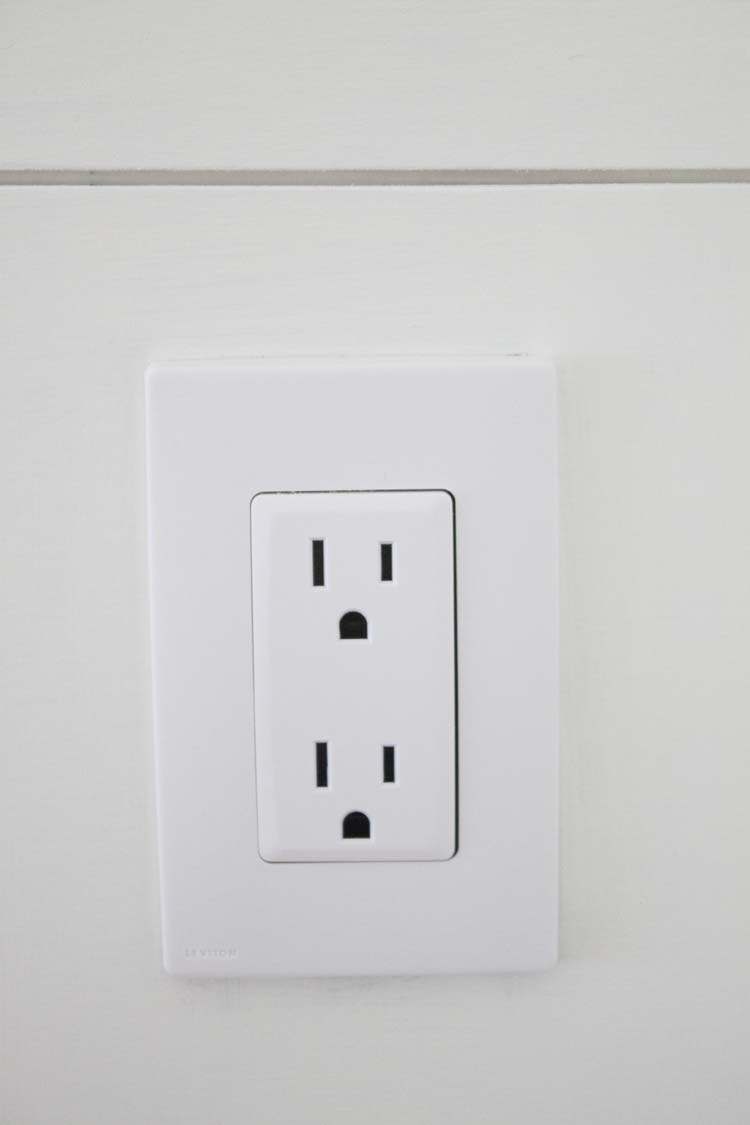
And like I did in our office makeover I went ahead and changed out all of our old and yellowing outlets with the Leviton Renu outlets and outlet covers
Listen, you might think that’s overkill and completely unnecessary. If it isn’t in the budget, it isn’t in the budget. But every time I redo a room I always do these things: change out the yellowing outlets, refresh the baseboards with a new coat of paint, change out our outdated brass door knobs (like in the guest bathroom makeover) and replace our old and rusty (how does that even happen?!) air vent covers.
Replacing and updating these things as I go means I don’t have to be concerned with the amount of time and cost of doing this all at once. But, by the time I finish all the rooms it’ll all be done. And I’m telling you, you will not believe how much of a difference these small changes make until you see them for yourself.
And that’s it! We were done in a weekend and that wasn’t even hard going. And more importantly I am finally really and completely satisfied with the new look. It didn’t require a lot of “stuff” to look and feel complete. It’s function and interesting without being overdone. Is shiplap a trend you’d try in your home?


Love it! So easy and it looks great. It’s a nice changeover from the standard farmhouse bead board look as well. And thank you for getting the tutorial out so quickly!
I love it! I didn’t even realize Shiplap was a thing! Thank you for sharing this with us!
Ha! Thanks Melanie!
Beyond fantastic! We will be making this a 2017 project! Thanks
You are so welcome! Happy new year!
Looks awesome! I want to do this for my wife in our laundry/mud room. Quick question: Any issues with not using glue? I’m concerned about warping/bowing between where the boards are nailed in. I don’t want to use glue either (for the same reason as you 🙂 so if you didn’t experience any warping/bowing, then I’ll do without.
This would be beautiful in a laundry or mud room! We have not had any problems with bowing or warping and we’ve done this in our dining room AND in another hallway. I will say this, if you find that you have any areas of your sheetrock that are already bowed or warped you might find that you have to glue in just those areas, along with nails. We went with a smaller width in our hall and as such (since the planks are lighter) bowing could be more likely. We mapped out our studs before starting and each plank is nailed into studs at as many points as was possible. Still, in some areas we glued the ends just to be safe. Something else to keep in mind is how much moisture you anticipate in the laundry room. We live in the South so it’s pretty much humid all the time and still it doesn’t seem to have had an affect but it’s still something to consider. Worst case scenario you have to remove a plank, glue and nail it back on. Hope this is helpful! Good luck with your project!
It was very helpful! Thanks Jamie!
What color paint is on the wall and what shade of white did you use?
Hi Tina! Thanks for stopping by! You can find more info here in this post: https://www.southernrevivals.com/2016/08/modern-farmhouse-dining-room-makeover-reveal.html
Hi !
I’m not sure how old this post is but in researching shiplap I came across your page. I have read about numerous ladies using the 1/4 in Underlayment. So I inquired at Lowes today and they had no idea what I was talking about. I looked on my own and found some plywood but nothing similair to what everyone is using I dont think. The other ladies are saying its about $14 a sheet? the ones I saw were about $25. I really want to do this in my 1/2 bath to start. Half way up the wall. No water in this bathroom. Can you give me the link to the underlayment you used? I would really appreciate it!! This looks amazing!!!!!
Hi Michelle,
I *think* the issue is, it isn’t actually 1/4″. What we used is a 4×8 underlayment that is 5mm or .019″. Here’s the link to it on the Lowe’s website. Their prices change periodically and from store to store, I’m sure I’ve gotten it for as little as $12 but it’s closer to $16 now. https://www.lowes.com/pd/RevolutionPly-5mm-Poplar-Plywood-Application-as-4-x-8/50121135
If you have a Home Depot nearby, they also have a 1/4 luan that’s a few dollars cheaper. It isn’t primed like the one above but you could just look and see which you preferred. https://www.homedepot.com/p/Underlayment-Common-7-32-in-x-4-ft-x-8-ft-Actual-0-196-in-x-48-in-x-96-in-431178/203183010
Good luch!
You said you used a brad nailer rather than adhesive but what adhesive would you use if you were going that way?
Hi Valerie,
I’d use construction adhesive if I need to attach wood to drywall. Hope that helps!