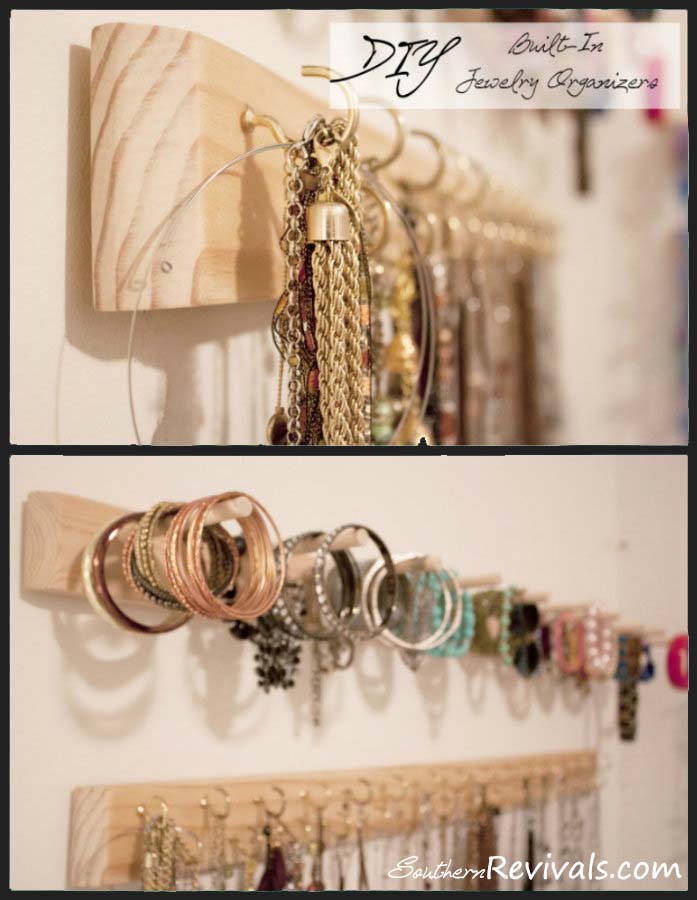
I’m not big on jewelry boxes for a lot of reasons but the biggest reason is they are just never big enough to hold everything and if they were, they’d take up too much space. So when we moved into our new house I decided to figure out a solution that worked my new closet. You know I am a fan of built-in…well, everything. This is how I made a built-in jewelry organizer guaranteed to hold all of your things without taking up valuable counter or floor space.
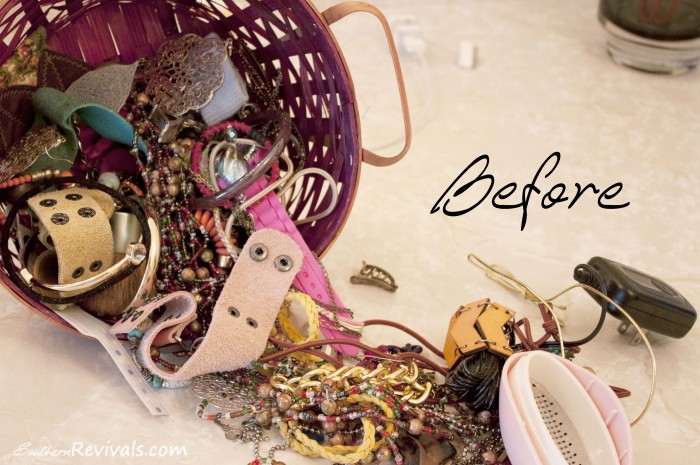 I first shared this tutorial over on a contributor site and recently realized I’d never shared it with you here. Since January is National Organization Month and we’re all trying to get better organized for the new year, I figured it was the perfect time to show you how I got my jumbled up jewelry under control. Here’s what you’ll need to build your own.
Supplies Needed
- 1×3’s {Footage depends on how much jewelry you have. I used a 1x3x6 for my project}
- Chop or Miter Saw for cutting wood
- Screw-in Hooks
- Ribbon
- 1/8″ dowel rods
- 1/4″ dowel rods
- Wood Glue
- Staples & Staple Gun
- Drill {with drill bit for pre-drilling holes for hooks and dowel rods}
- Sand paper or sander
- * Fray Check (optional – for ribbon)
- Screws for mounting to wall
Start by cutting wood sections for bracelets, rings, earrings and necklaces. How many and how long you need them depends on the amount of jewelry you need storage for. A good idea is to lay out your pieces in advance to get an idea how long your sections need to be.
Once you’ve determined the length of each section, cut accordingly. After all of mine were cut we sanded the edges down so there wouldn’t be any rough corners and to give more of a custom look. We also mitered the edges to give it a softer look without the sharp corners.
Next, pre drill the holes for your hooks and dowel rods. Be sure the drill bit you use isn’t larger than the diameter of your hook or dowel rod. After the holes for the dowel rods are pre-drilled you’ll need to check that they aren’t too big or too small. You won’t want the fit to be too tight but you won’t want it too big either. The holes for your hooks should be just big enough to get you started when screwing them in. These holes are pre-drilled mainly to keep your wood from splitting.
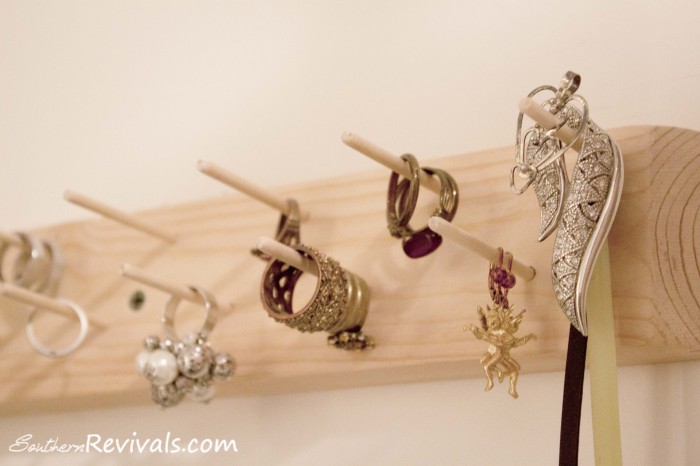
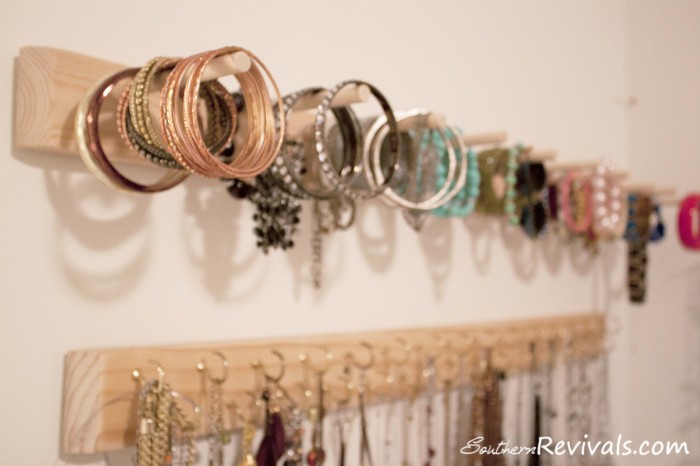
After you’re done pre-drilling the holes you’re ready to cut your dowel rods. The length again depends on your amount of jewelry but be sure not to make them too long or they may sag. Conversely, be sure to make them long enough that you still have plenty of room left over to hang your jewelry from after you’ve inserted part of it into the board. The dowel rod for my rings are 2″ to 2 1/2″ in length and my bracelet dowels are 4″ – 5″ in length.
Once you’re done cutting your dowels go ahead and insert them into your boards. It may require a light tap with a hammer, being careful not to break them. Be sure to use a little wood glue in each of the holes for good measure wiping away any excess before it dries. At this point you should have one board for bracelets – with dowels inserted, one board for rings – with dowels inserted, one board for necklaces – with holes pre-drilled for hooks and one plain board that you’ll add ribbon to later. Now you’re ready to paint or stain your boards. {Or leave them natural like I did mine!}

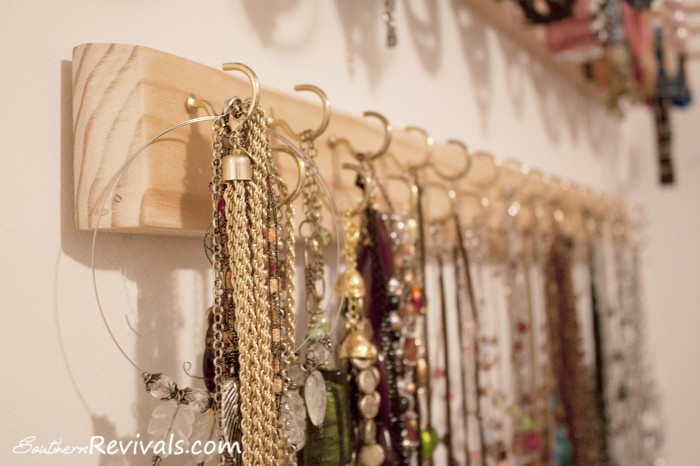
Now that your boards are painted (or stained) and fully dried you can screw in each of the hooks for the necklace board and attach ribbon to the earring board. Again, the length of your ribbon will depend on the amount of earrings you have. Affix the ribbon on the back the earring board with staples and have the ribbon drape over the top. This will hide your staples from view.
The spacing of your ribbon is a personal choice but is also dependent on the width of your ribbon. Go with what looks best to you keeping in mind that you’ll be hanging your earring onto the ribbon by poking the post through the ribbon itself so just be sure you’ll be able to do this easily.
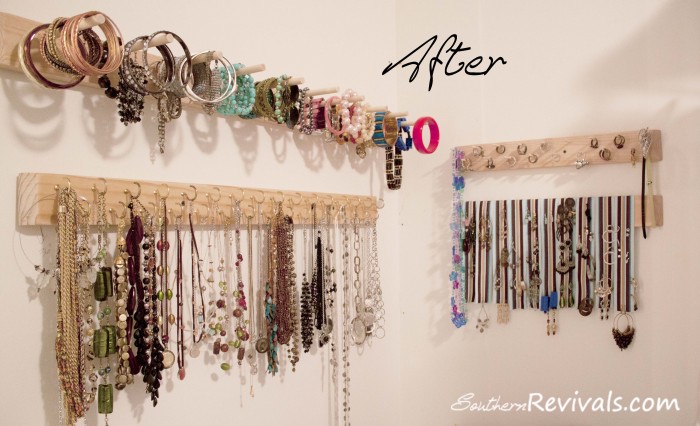
Finally, mount your boards to your wall with screws. We pre-drlled holes first and then screwed directly into studs where we could. Your jewelry won’t be to heavy but if you can’t mount them into a stud you’ll want to screw them into drywall anchors just to be safe. Add your jewelry and BAM – ORGANIZATION!
The great thing about this organizer is that you can expanded it as need to hold all of your stuff. Plus, it’s easy to see what you have at a glance so you can put together the perfect day’s look! That and all of your jewelry isn’t jumbled up in a basket on your bathroom counter. Or was that just me?


Leave a Reply